Repairing a leaky radiator inlet is one of the last jobs on my current project bike, and although it’s an easy fix, I’ve never seen a good writeup on this repair.
Liquid-cooling systems on motorcycles are fairly rugged. Consider the torture that modern dirt bikes endure! Still, coolant will always escape if it can find a way out of the system, and unless you're checking your coolant levels frequently, a leak can spiral into a big issue. Aging hoses and failed water pump gaskets are the usual suspects. Another mode of failure I’ve seen over the years, and the topic of today’s how-to article, is a bent radiator inlet. Trace your coolant leak, and if an inlet is the problem, you'll see leakage where a hose connects to the radiator.
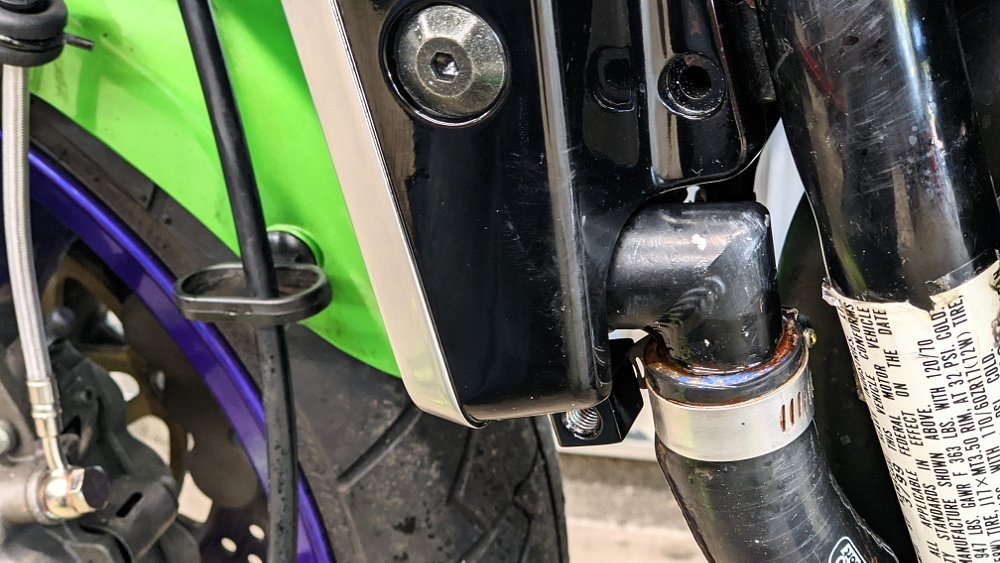
Radiator inlets can be damaged if you aren’t careful while removing old hoses. Overtightened hose clamps can also cause problems. (I suspect that’s how this Kawasaki ZRX1100 was damaged by the previous owner, who had a real overtightening problem.) Inlet walls are thin, so it doesn’t take much to deform one in a crash, shipping or even bumping around in storage. The good news? A propane torch and a handful of sockets should fix your problem for free. Give this method a try before shelling out for a new radiator.
Drain coolant and remove radiator
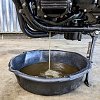
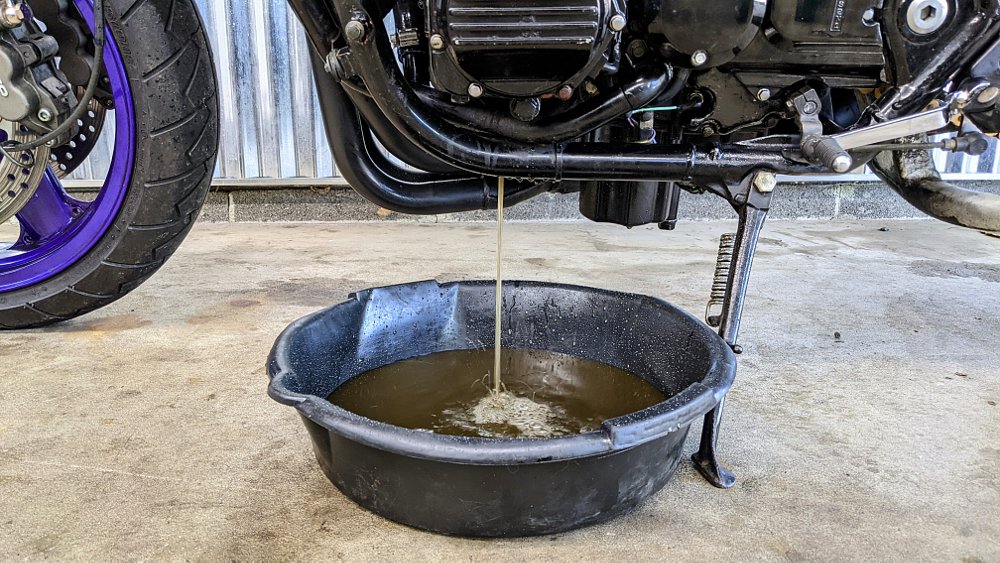
If your bent rad is already off the bike, skip to the next step. For everyone else, grab a clean container and drain your cooling system. Removal and cleanup will be much easier this way. Find and disconnect any associated wiring. You’ll probably have a fan and a temperature sensor to unplug. Unbolt the radiator from the motorcycle and move it to a clean workspace.
Identify the source, gather tools
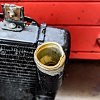
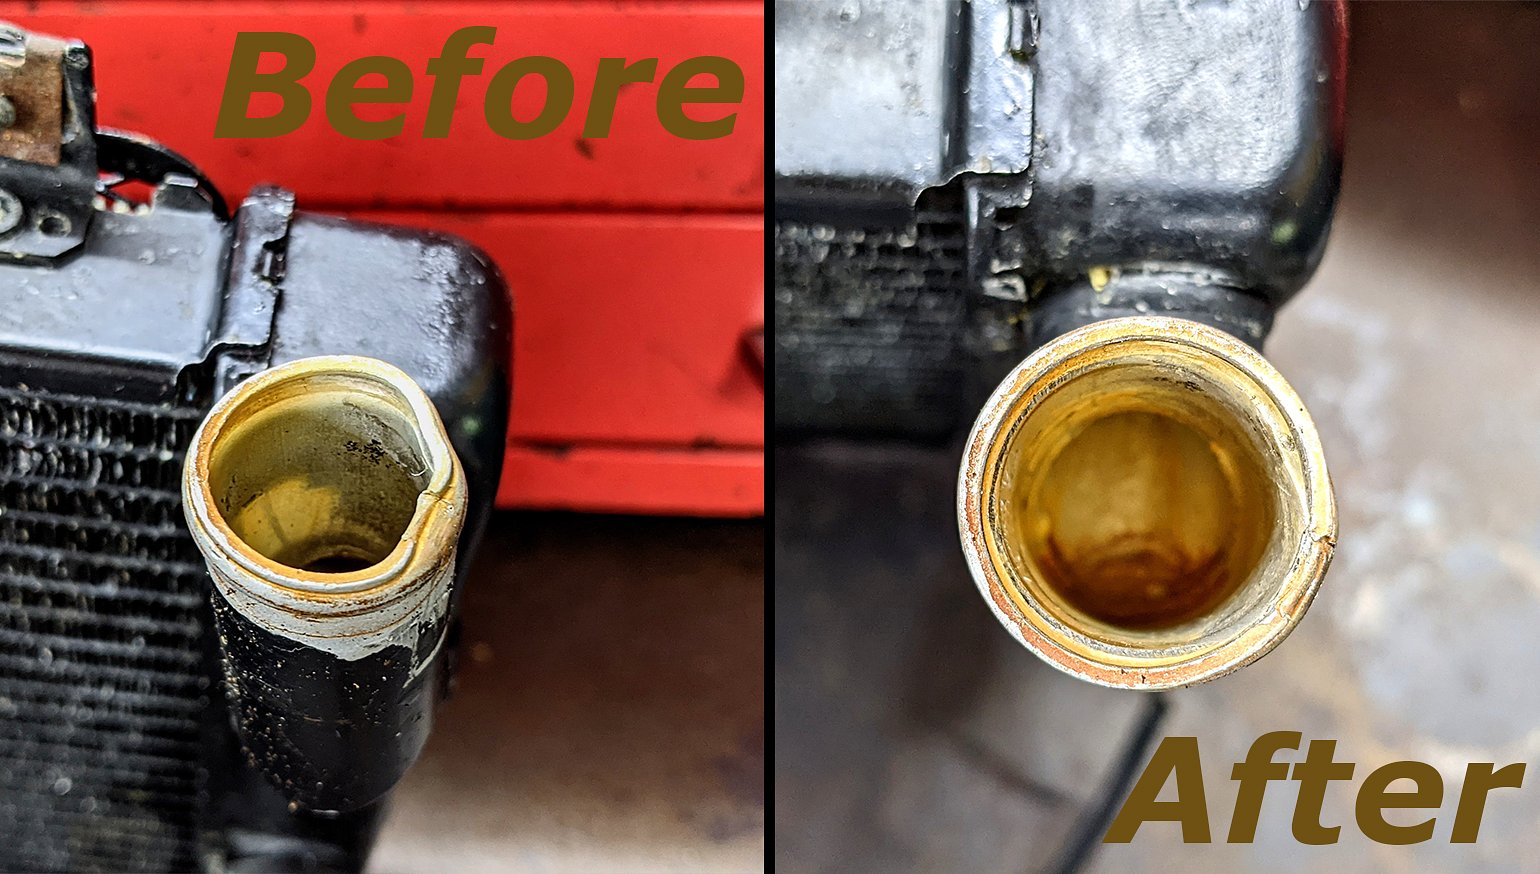
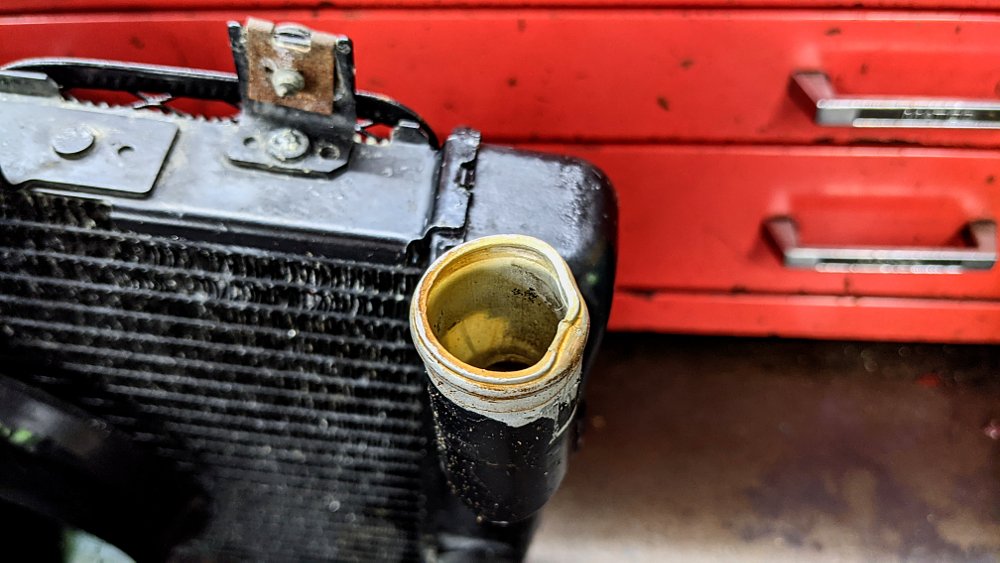
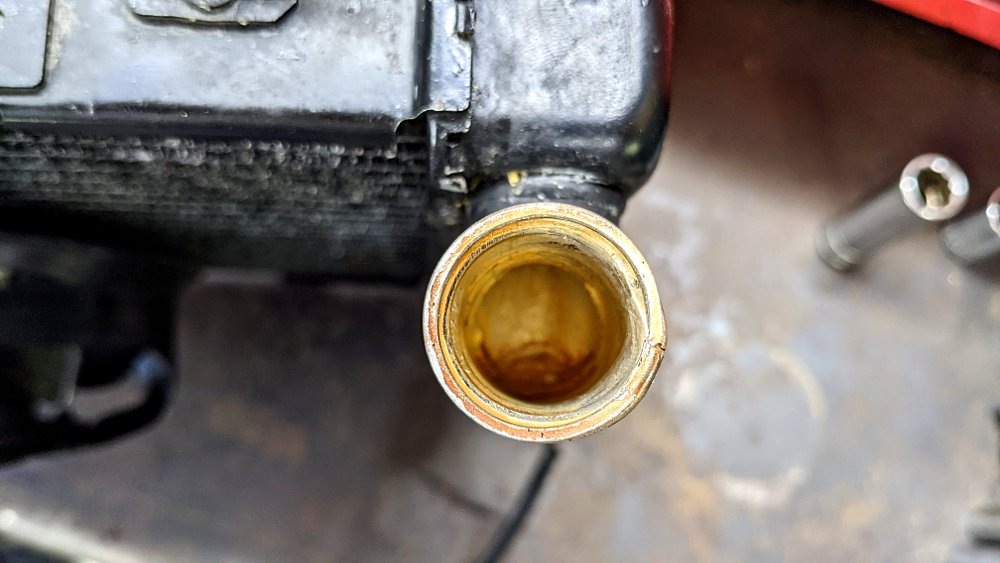
With the radiator on the bench, it should be easy to identify the leaking area. One of the inlets is obviously mangled. The other is passable, although it’s not perfect. Let’s fix that.
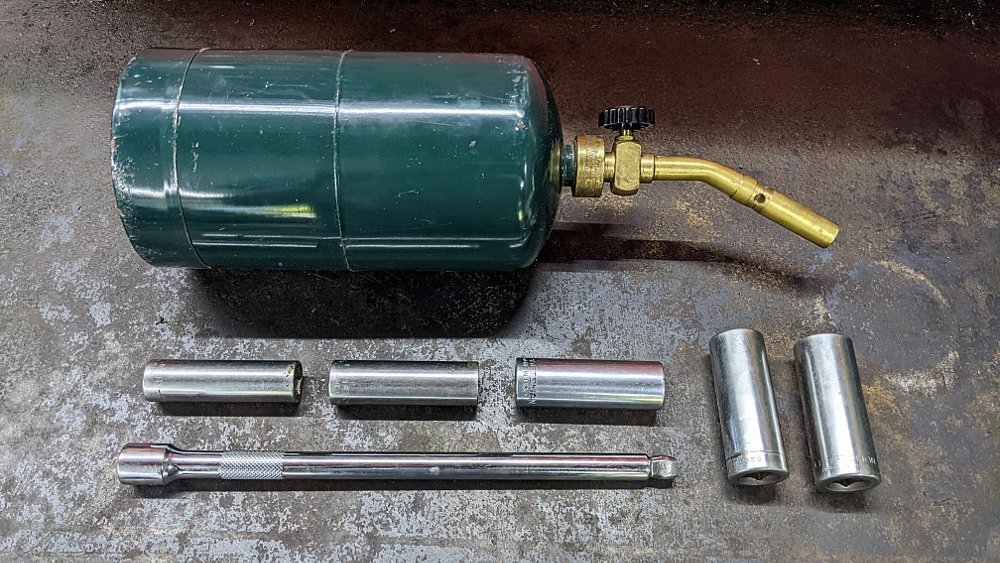
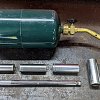
You’ll need a variety of sockets and a longish extension, about eight to 10 inches long. Try to avoid short sockets and wobbly extensions if possible. Pliers and channel locks might be helpful if the damage is severe.
Restore the shape
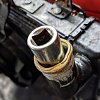
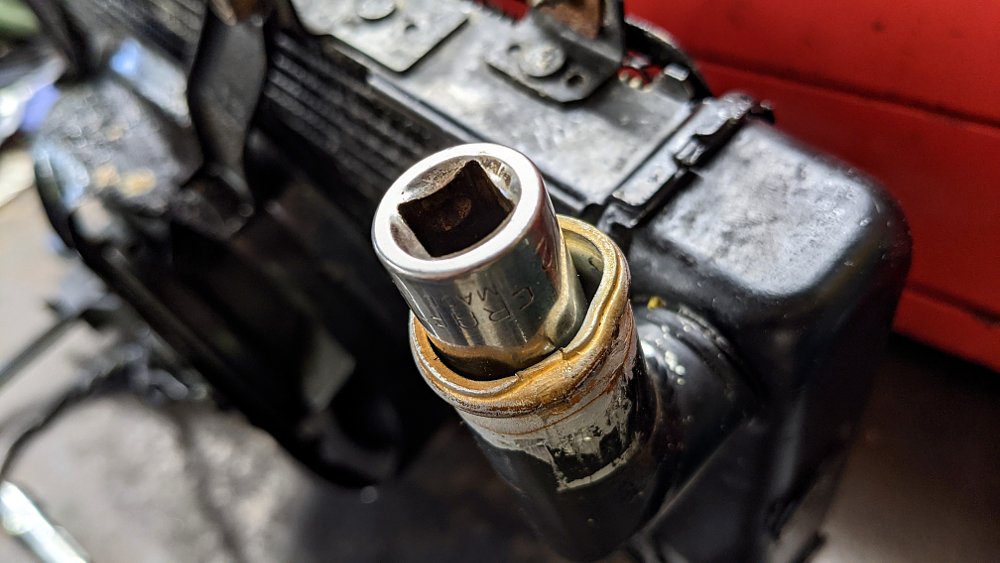
Find the largest socket that fits inside the dented inlet, and attach it to the extension. Fire up the torch and begin warming the aluminum with the tip of the flame. We’re shooting for persuasive heat, not destructive. (Not sure how hot is too hot? Mark some bare aluminum on the heated area with a Sharpie. If the mark disappears, you’re overheating.)
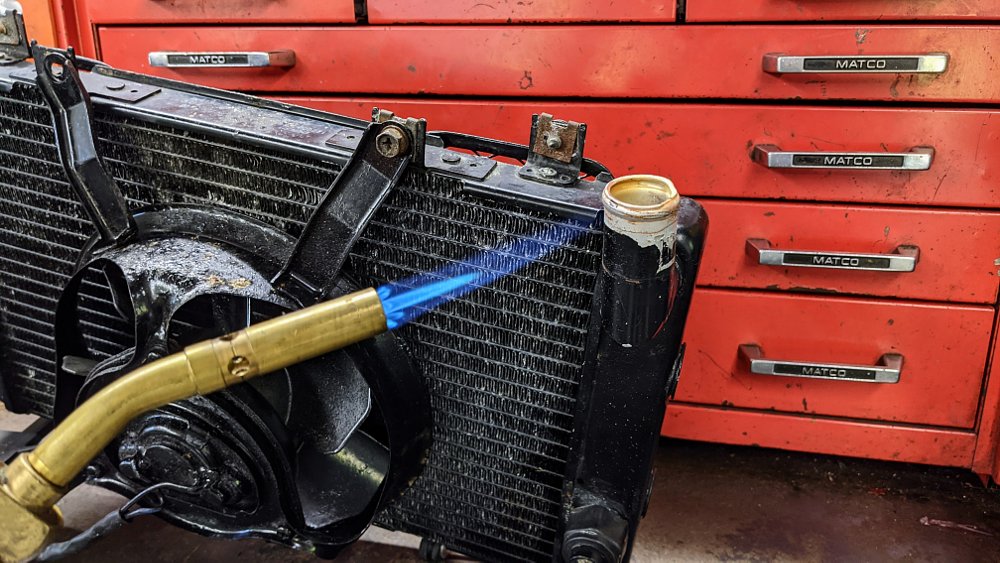
It’s helpful to have a friend move the torch around to evenly heat the area during the next step, but you can also do it solo if you work quickly.
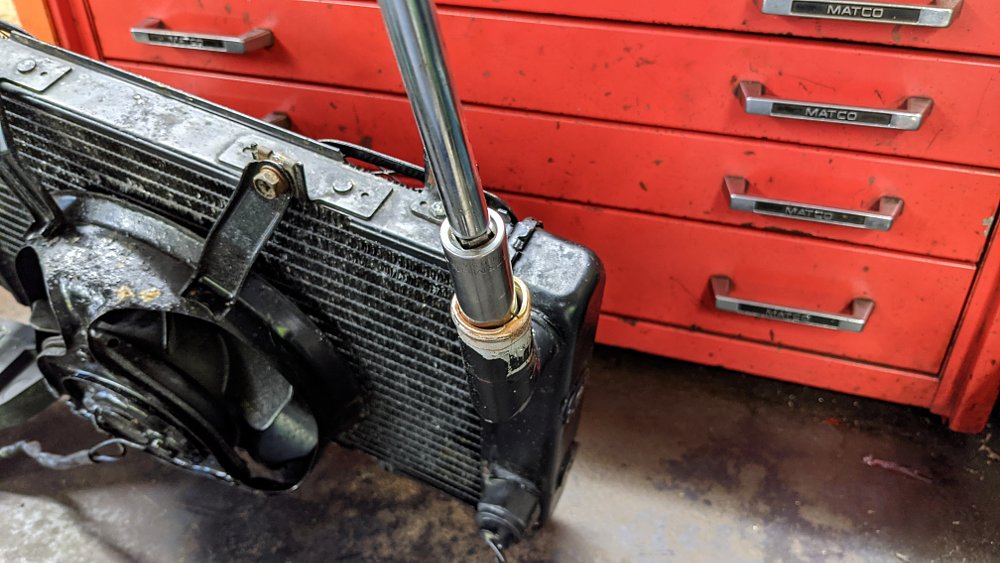
Attach the socket to the extension for a makeshift forming tool. Using the extension as a handle, roll and push the dent with the socket. Focus on making space to fit the next socket, avoiding the temptation to do the whole job with one size. Step up to larger sockets as soon as possible for the best results. Add a little heat, roll some more, and keep working it back and forth until the inlet is round again. I had to use a small pair of channel locks to finesse the barb edge before I could fit my final socket.
Reinstall and inspect
Check for burrs and sharp edges before reassembling. Reinstall the radiator, fill the system with coolant, and check for leakage after a few miles, just in case.
Coolant leaks are a pain, and radiators are expensive. Rather than spending $727.85 for a ZRX1100 radiator from Kawasaki, or rolling the dice with a $100 unit from eBay, the method above got me back on the road, drip-free, in under an hour. I’ve used this technique for dirt bikes, street bikes and even a few non-moto projects. When it comes to odd jobs like this, sometimes you already have the tools you need. You just have to see them in a new way.