It’s winter. Most of you shop rats in the colder climes are likely wrenching away!
In the spirit of seeing others succeed where I have failed many times previously, I thought I'd crank out another sheet of shop tips that are second nature to me, but might just make the dirty part of your life a little easier, with some help from fellow shop goon Joe Zito. (We like to share stuff like this because we're dorks.) Here goes!
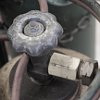
Notched nuts indicate reverse thread
Not all reverse-thread items are marked, but if you see notches cut into the corners of a hex, that’s a surefire sign that you gotta crank on it opposite from what your brain instinctively tells you to do.

Breathe some life into your air tools
If you are like I am, you keep your impact tools forever and a day, way past the point where they shoulda been replaced. So if your impact gun is getting tired and you find it unable to bust a nut loose, here’s a quick tip: Dribble a little heavy oil into the air line fitting. Almost the same way oil helps seal up a leaking set of piston rings in an engine, compression can be restored for long enough that your haggard ol’ impact might have enough punch to do whatever job you’re asking of it. The thick oil takes up the space between your tool’s worn out rotor vanes and the bore they ride in, giving your rattle gun some temporary pep for a quick job.

Speaking of which, they’re air tools
Not water tools. Drain your compressor tank, especially if you don’t use your compressor every day. (You’ll see conscientious pro wrenches drain daily. You can just drain the water out, and leave most of the air so you’re not wearing out your poor compressor’s motor every day.) And if you look in the mirror and know you’re just never gonna take the time to do this, go buy an automatic compressor drain and hook it up. Your tank will last for a long time and you’ll think of me every time you empty it manually. (Which will be never.)
And while we’re on that topic, shut the compressor down each night, too. If the motor winds up running unattended, that can be bad news bears.
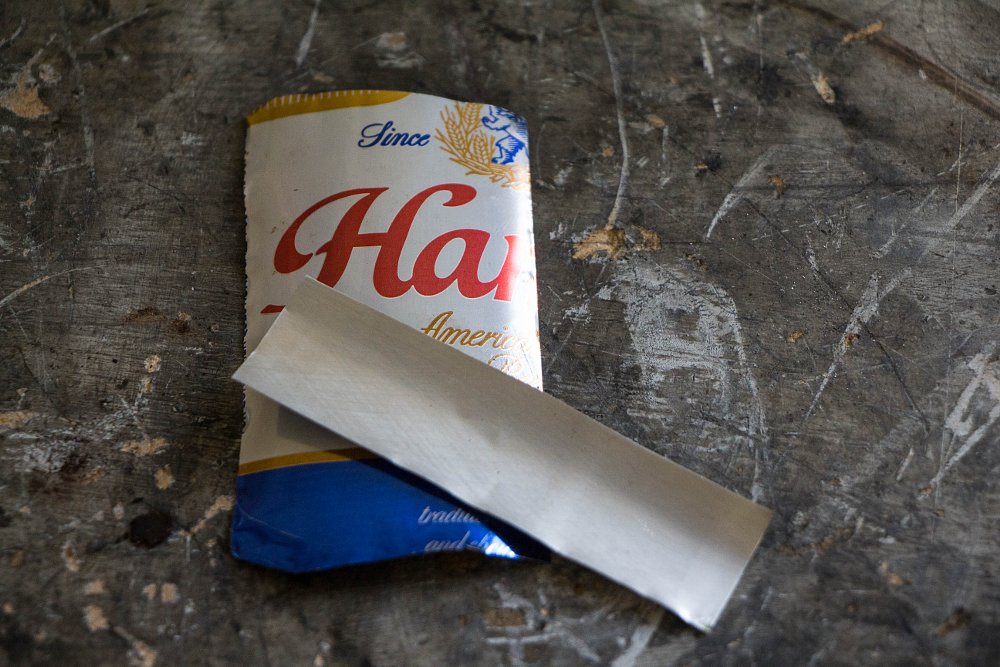
Use every part of the beer
I’ve written previously about using the cardboard from your case of shop beers as either gasket material or bolt maps, and obviously the beer is going to get used, but don’t just toss the cans. Beer cans make wonderful shims. I’ve used them to shim motors and transmissions in frames, and they’re awesome for helping handlebars and risers get a good mechanical lockup, especially if the knurling is tired or the bores are misshapen due to ambitious fastener tightening by a previous tech.
Take an aspirin
One of the things that can be a real pain when working on a liquid-cooled bike is bleeding the cooling system of air after working on it or after a fluid swap. An old-timey hot rod trick has served me well over the years: take an aspirin and hold the thermostat open with it. It will allow coolant to be pumped right from startup, and after a little time, it just dissolves into the coolant.
Don’t forget home ec
Joe Zito mentioned a great one. He says, “Whenever swapping out bearings, always try to heat the part you're taking the bearing out of so as to not remove material out from the bore. Don't end up with a sloppy loose fitting bearing after two or three swaps!” I agree wholeheartedly. I use my torches for this task usually, but on some items, an oven can be a more appropriate choice. (Brief protip: If you are married and want to stay married, go buy a junky old oven on craigslist, and power it outside with your generator. Do not for any reason, ever, under any circumstances, place a set of oil-baked crankcases into your eatin' oven. Ever.)
Further, you can also freeze the bearing race. (You can use the fancy freezer in the house for this if you make sure the parts aren’t smelly or oily or anything.) Sometimes with a hot bore and a cold bearin’, the race will just drop in and you don’t even need to touch a tool! This works opposite for removal, too. Sometimes I’ll lay a fat bead of weld on a trashed bearing’s race, and it will just fall out of its pocket.
Laundry appliances count, too. An old dryer set to no heat makes a hell of a good parts tumbler, and really classes up the front yard.
Think about your tools
Remember that heat trick from earlier? That saves tools, too. The heat that helps for pressing things also can help if you’re pulling something (like a clutch hub on a tapered shaft.) Why beat up your tools unnecessarily? Similarly, if you aren’t real clear on where the pusher pin should be when you break a chain, boning up on the correct way to do the job will save you many busted pusher pin tips. Most quality tools will last a long time if used properly and given a modicum of care.
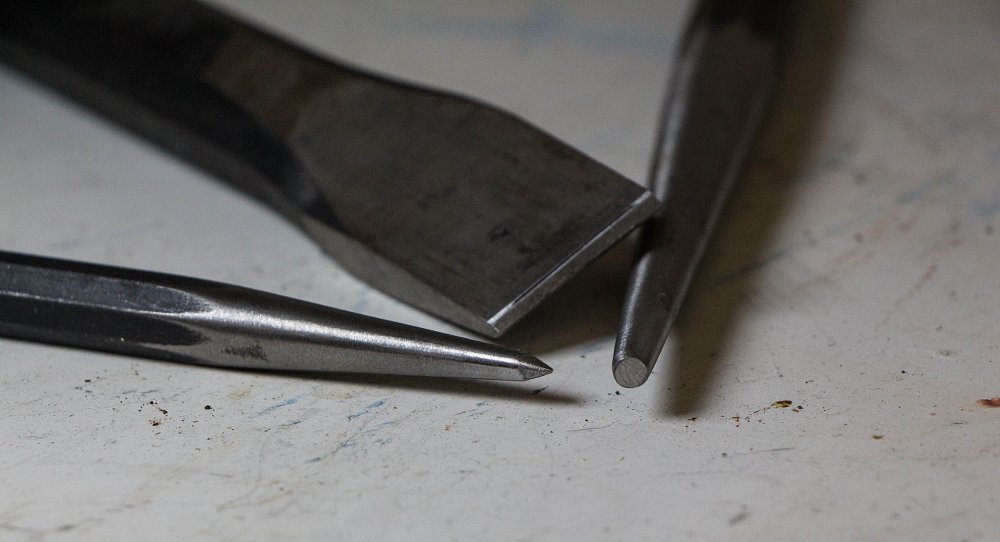
Dress your punches and chisels
Another excellent one from Zito: dress your punches and chisels. (Dressing is the process of restoring the tip of the tool to a useful shape.) If you think about steel’s ductility, it should come as no surprise that when it is impacted, it deforms, even if it’s hardened steel. In fact, it’s that hardening that makes a poorly dressed punch dangerous: if impacted, a punch or chisel can break and a chip of that hardened steel can separate and go flying, which is obviously potentially detrimental to eyeballs, paint, and probably some other stuff.
The solution to this is to dress your punches. You can put ‘em in a lathe (punches), use a grinder (punches and chisels alike; use the power tool sparingly, so the heat doesn’t affect temper), or just use good ol’ fashioned files. Your pin punches, tapered punches, and chisels each requires a differently shaped tip and different techniques, but by keeping tool tips in proper shape, you maximize your own safety and your tool life and efficacy. And, as a happy side effect, they actually work correctly. A prick punch becomes nothing more than a beating rod if it has a poorly-formed tip.
“This also goes for the mushroomed end you've been beating on with a hammer for years. The edges of the "mushroom cap" fly off at light speed if left untouched. I just use my bench grinder to take that mashed over edge back down to its original shape.”
Good advice, Zito.
Let there be light
One of the biggest impediments I see to people getting things done in a shop is improper lighting. It’s not something a lot of folks think about. Add more lighting where you can, whether temporary or permanent. Paint surfaces in light colors to bounce light around. One place I never thought about lighting well was my weld station. I’m wearing a hood and the arc is blinding, right? Wrong. With enough light, you can even see through your hood’s glass, which is nice for those who haven’t popped for an auto-darkening model. I also am guilty of grinding, shaping, and filing right in the welding fixture, and having light present for those tasks makes life easier. Evaluate your lighting situation — it pays off.

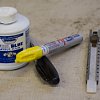
Get artsy
Ink has lots of benefit in a well equipped shop. A dab with a Sharpie in a low spot can help when you’re trying file an item square, like when attempting to get a gasket sealing surface perfectly flat. Just put a little dab in the low spot and stone your surface, and as you see the ink begin to disappear as you abrade the surface, you know you’re getting close to taking off just the necessary amount of material and no more. “Sneaking up” on a flat surface without removing more material than necessary prolongs the life of the part and the amount of damage you’ll inflict in order to repair it. (When you resurface, you're basically leveling all hills to the bottom of the valleys. The lowest valley becomes the new flatlands, if topographical terms work for you.)
Similarly, layout fluid is like a “heavy duty” version of a Sharpie. Prussian blue is helpful for determining surface contact as well. This can help when trying to figure out if gears are meshing correctly, and I’ve also used it to make sure I had good clearance between valves and heads. (Modeling clay works well for this, too.) Because it is “painted” on, it can help if you’re cutting a raw part from a block of metal: just paint the whole surface, and then arcs and lines can be scribed into the dye, helping you turn your rough-out into a closer version of the finished item without so much worry of ruining a block of raw metal.
Paint pen is wonderful for marking things somewhat permanently, but offering easy removal. (Think swap parts identification, or marking a service interval on a component like a differential housing.)
And soapstone works well to mark things in higher-heat areas. If you’re running a cutoff wheel and your Sharpie line disappears before your eyes, know that soapstone won’t.

Install spark plugs with fuel line
On many modern bikes, spark plug installation on a hemi-style head sometimes seems to be nearly impossible. Removing them is easy enough if you have a magnet, but how do you get ‘em back in? There are rubberized spark plug sockets for this, but they quickly turn into junk in my opinion. (And worse, they sometimes transfer the rubber boot the plug!) Not everyone has a set of the fancy magnetized ones, but I got a solution for ya. Instead of taking that new plug you just carefully gapped and plonking it blindly down a hole (risking ruining the gap), grab a piece of fuel line. Shove the plug ceramic into the fuel line, and then you can carefully lower the plug into place and get the threads started. (And if they’re clean enough, get it installed almost totally!)
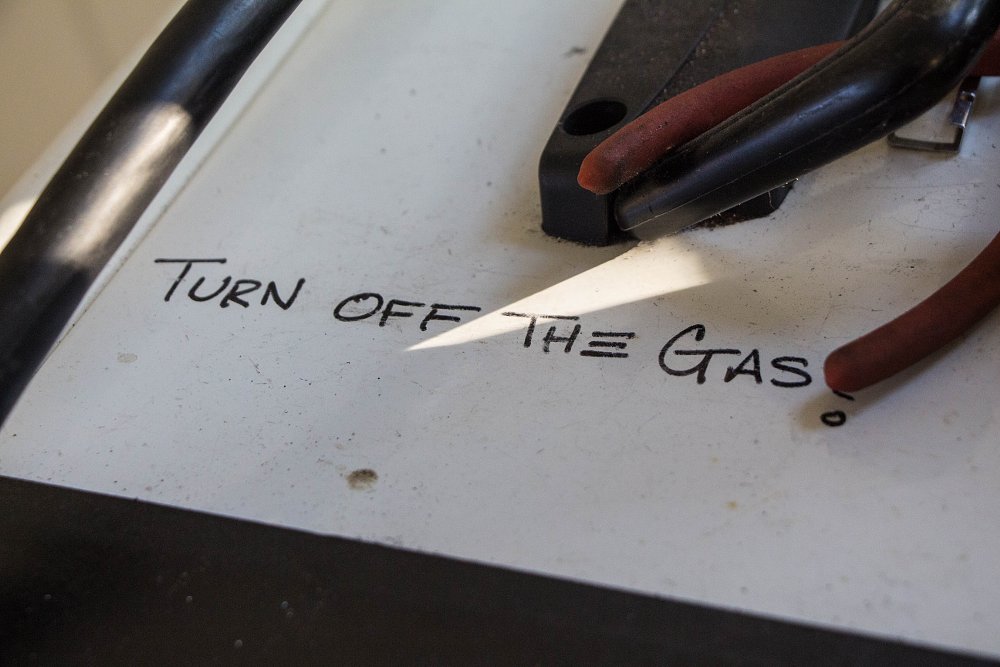
Write yourself a note
Flowing gas is dangerous, in the case of MAPP, oxygen, or acetylene gases, and more of an inconvenience in the case of argon or CO2 mix. (Ever run out of gas on a Sunday halfway through a project?) I’ve given up on caring if people in the shop think I’m stupid, which is why my welder has a dumb tattoo on it.
Got any others? Every little tip adds up to some serious time savings — which equals lower repair and build time!