Go look up a stock photo of your motorcycle when it was new, then look at the example you own. Have the years worn on your machine?
This article is for those of you who felt a pang of… something during that exercise. All those miles were worth it, but your bike's looking a little shabby, huh? Might be a pride of ownership thing, or a "good bones" project you picked up with intentions of light restoration. Maybe it’s time to sell, and you're thinking a clean bike will net you a little more cash. There are lots of reasons to care about the way your bike looks.
I believe I hold the distinction of being Common Tread's resident cheapskate, since master mechanic Zito will text me photos when he “Greasers” a problem with an inexpensive but functional fix. Combined with my fleet of junk-turned-kinda-nice bikes, that gives me as much qualification as anyone on the CT team to guide you through the process of sprucing up a bike without spending much money. Remember: We're focusing on aesthetics here, nothing mechanical, so seek help elsewhere on Common Tread if the bike isn't running right.
Let's get busy on some dilapidated motorcycles. Topics covered include washing the bike, cleaning chrome, vinyl wrapping, Plasti Dipping, repairing plastics, popping dents, basic paintwork, re-covering seats, and more!
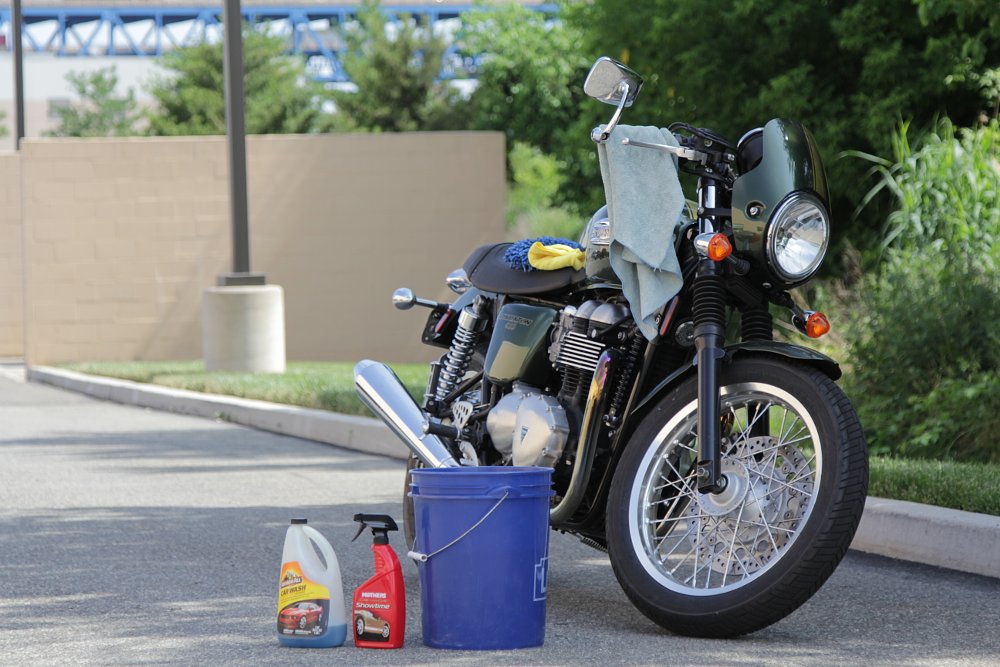
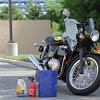
Wash your bike!
A little grime makes your bike look well traveled, and some people like that look. For everyone else, your bike is probably a little dirtier than you think. Get started with our complete guide to washing your bike. Here's the quick version.
- Prepare the motorcycle and work area
- Soak the motorcycle with plain water
- Lather and clean the motorcycle with an appropriate chemical
- Rinse
- Dry
- Lubricate the drive chain
- Seal the paint with wax or polish
There's also the option of getting your bike detailed, even though it rattles my cheapskate instincts. The sale price difference between a “clean” bike and a “super clean” bike might be well worth the effort. See what your local shop's asking for a deep clean and compare that number against what you think your time's worth if you’re considering a DIY detailing. A professional job might not cost you all that much from that perspective. For dirt bikes, I wipe my plastics down with lemon Pledge after every ride. Dirt and mud usually come right off during the post-ride wash, which keeps my bikes looking (and smelling) their best in the garage.
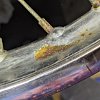
Cleaning up and polishing motorcycle chrome
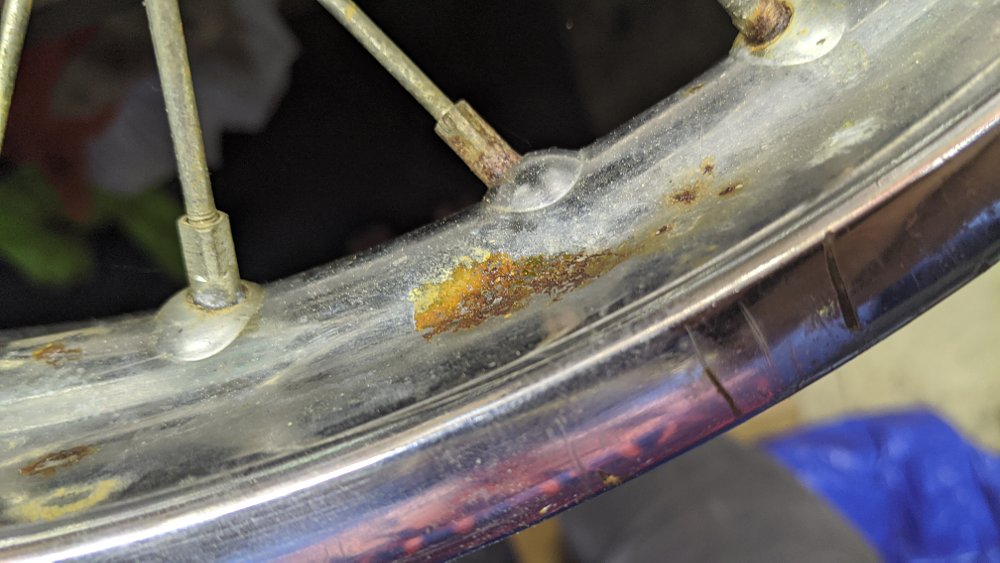
We already have a great article in our archives on chrome care, so start there. Common products can remove dirt, tar, and other gunk that have accumulated on your motorcycle’s shiny parts. Remember that chrome doesn’t rust; it’s the steel below causing the bubbling, splitting, or ratty appearance, and once the chrome has started coming apart, nothing’ll make it look right except new chrome, which means either replacement parts or a rechroming. Here are some tricks to get you by when your wallet's thin.
Start by eliminating any existing rust with your choice of anti-rust treatments. A good start is cleaning your part with a Chore Boy copper scrubbing pad and some solvent, like acetone or kerosene. Vinegar and Evaporust are my favorite affordable, non-toxic options for parts you can remove and submerge. Components that are too much trouble to remove can be treated in-situ with gels like Permatex Rust Dissolver or naval jelly. (Navel lint, however, is not effective on rust.) If the chrome damage is really bad (flaking, large rust holes and patches, big pitted sections) I’ll scrub the surface with crumpled-up aluminum foil and water. Some folks will tell you this is fine for all chrome, but I would never use this technique on anything decent.
Once the rust removers are neutralized, the bare steel surfaces where the rust once poked through will need some kind of treatment to stave off future rust. Here’s one low-buck way to make ruined chrome less shameful to see while also sealing up those bare steel surfaces: Spray some silver spray paint into a rag until it’s good and wet with paint. Use the rag to push the silver paint down into the steel, then wipe the chrome clean just like furniture scratch filler so that the silver paint remains down in the cracks and gaps. Yes, you still have horrible pitted chrome, but silver paint looks better than rust from six feet away. This is especially helpful around the thin chrome plating seen on Japanese bikes from the 1970s and 1980s.
One more tip: zinc plating is cheaper, easier, and less dangerous than chrome plating. You can build yourself a decent zinc plating setup for a couple hundred bucks, or less if you’re handy. Zinc looks right at home on brackets, pedals, linkages, hardware, and chain adjusters, just to name a few parts. Here’s an excellent video that shows the possibilities.
Vinyl wrapping a motorcycle
Two myths surrounding vinyl wrap should be dispelled. First, it’s not cheap to wrap a fully faired bike, or even a semi-faired one. Vinyl wrap is especially tricky around the sharp edges and aerodynamic features of modern motorcycles. It takes skill to apply the stuff perfectly to complex shapes; skilled labor isn't cheap. (A Sportster tank or a fender stripe will be much easier and cheaper to wrap than an entire S 1000 RR.)
Second, vinyl wrap isn’t a direct replacement for paint. Wrap is more like the graphics applied to motorcycles at the factory. It doesn’t like fuel spills, prolonged sun exposure, or scuffs. In fact, vehicle-grade vinyl has a lifespan of five years — less if the wrapped vehicle is parked out in the elements every day without cover. These characteristics become positives if you’re just looking to change up the appearance of your ride temporarily.
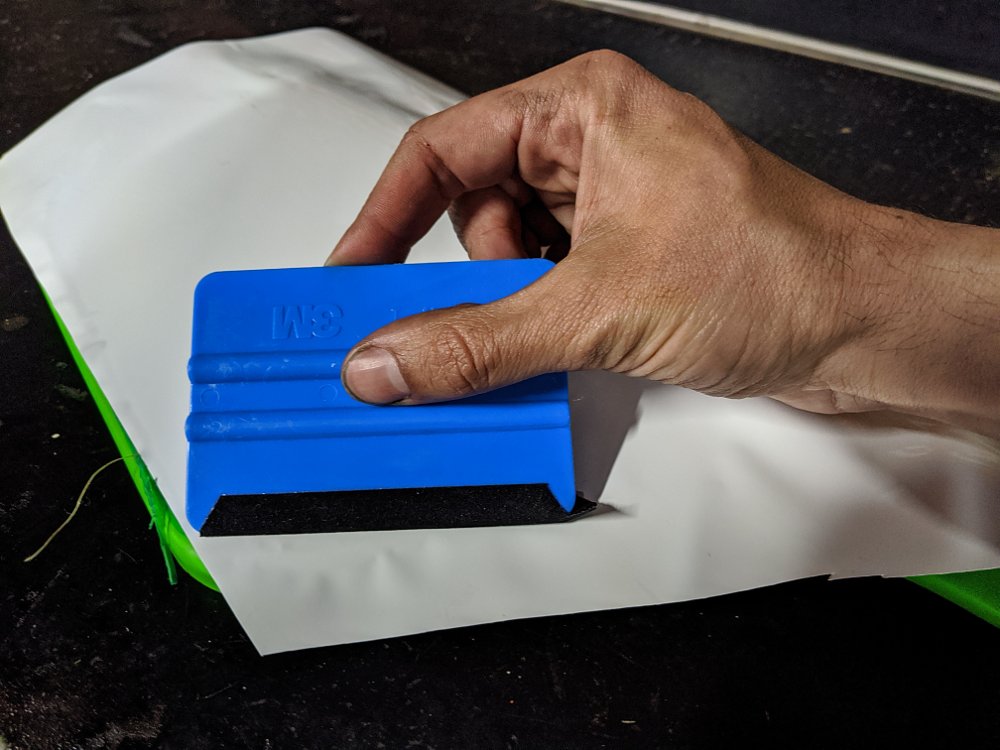
Don’t let vinyl wrap’s limitations discourage you. Just try something small like number plates or stripes first. You can also try wrapping parts like flyscreens, seat cowls, and heel guards to change up the look of your motorcycle without risking oodles of time and money. Vinyl wrap will not harm original paint in good condition. (If your paint is peeling or flaking, it may pull off when you remove the wrap!) Check out Common Tread’s guide to basic vinyl wrap to get started.
Plasti Dipping a motorcycle
Like vinyl wrap, Plasti Dip gets a reputation as a miracle product for cheap and easy aesthetic overhauls. While I'm not personally a fan of Plasti Dip for motorcycles, it does have its place, so let's talk about some applications and some caveats. But first, let's make sure we're on the same page here.
Old timers won't think of a removable, aerosolized, flexible coating when they hear Plasti Dip. The original Plasti Dip product was noxious goo in a can. The bare metal handles on your pliers, for example, could be dipped into the goo to rubberize them. You wouldn't want to use that product on your bike, except maybe on the ball ends of your levers as seen on some older bikes.
What we call Plasti Dip today is made by that same company, but it's sprayed from a rattlecan like paint. Plasti Dip spray leaves a thin, rubbery layer over a surface once dry. Build up enough of these layers, and the result is a protective, mostly matte finish that seals the original surface underneath. Correctly applied Plasti Dip can be peeled off if you decide to go back to what you had, the key word there being "correctly." A single pass of Plasti Dip spray is not strong enough once dry to withstand peeling, so you'll rub your fingers raw trying to work it off. It takes around five passes with the spray to make a coating that will peel nicely later on. The thickness and elasticity is similar to that of a popped balloon. Don't think you can do a whole motorcycle with one can! This video's information far exceeds its production value if you're interested in dipping.
Plasti Dip spray has a very strong odor and should only be sprayed in an open area with good ventilation. It's not great for the environment or your brain cells. It's especially important to know that fuel dissolves Plasti Dip, so if you're planning on dipping a tank, you'll have to get creative or be very careful whenever you fill up. I used this information to my advantage after I made the mistake of buying a motorcycle that had been Plasti Dipped with just one pass by its previous owner, which made the dip practically unpeelable. A rag soaked in gas helped me clean off the dip over the course of several days. Please do not skimp on the spray if you dip your bike!
My personal favorite Plasti Dip application was an idea my dad dreamed up. He wanted a particular tire on his late-'60s Honda, but it wasn't available in a whitewall version. White Plasti Dip and some very careful tape work got the job done. That was probably four years ago, and he hasn't had any issues besides the color changing to a creamy white. It's worth mentioning that this particular bike is more of a Sunday rider than a daily commuter.
Repairing fairings
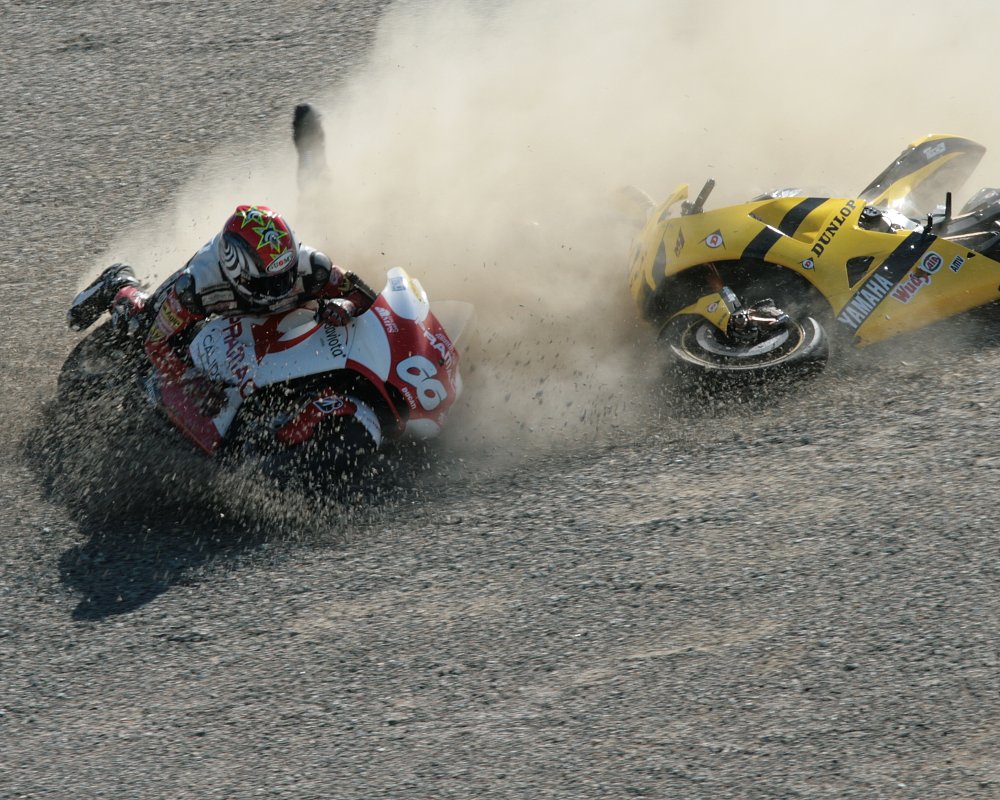
Hoo boy, this is a tricky one. Fairings rarely look as good as they did before the crash, and the cost of a decent repair usually sends folks like me straight to eBay for used examples, or the aftermarket for a fresh start. This article is about cheap, low-effort fixes, so we won't go there. (Seriously, though, companies like Auctmarts can ship you a whole set of plastics for a fraction of OEM cost for most of the common fully faired bikes out there.) It is nearly impossible to achieve a seamless fairing repair without paint and bodywork, so your first step is to manage your expectations. We’re looking for cheap and easy improvements here, not a concours restoration.
Start with research. Motorcycle fairings are made from a variety of materials, including plastics, fiberglass, and carbon fiber, so find out what you’ve got before ordering supplies. An adhesive that works for one material may cause problems for another, so use forums for your bike to see what other owners are using to patch their rides back together. Keep in mind that the insides of your fairings may be painted, and any adhesive designed for direct contact with plastic will not bond to paint the same way. Some sanding may be required.
Two-part epoxy has worked best for me in the past when dealing with plain ABS fairings. Another route is the “hot staple” gun and a steady hand. A small, bent piece of wire is heated in the gun until it’s hot enough to be pressed into the plastic. The fairing cools around the wire and presto, the crack is held together. Plastic “welding” with filler material is a dodgy proposition at best in my experience. Avoid superglue (cyanoacetate) and Gorilla Glue.
Fiberglass is relatively easy to patch from the back side of the fairing; any auto parts place should have all the fiberglass and resin you need to make basic repairs. Carbon fiber requires a similar process, but if you own a motorcycle with a carbon fairing, you probably have the cash to pay a pro to fix it.
Try to apply your repairs to the back of the fairing as much as possible to preserve the outer-facing side. A patch of vinyl wrap can be used to cover the damage if you’re lucky enough to find a match for your paint. After gluing up any cracking from the back side, fill any small cavities or cracks on the outward-facing side of the repair with toothpaste. Yes, toothpaste. All we're trying to do here is fill the surface so the vinyl wrap can contour nicely. Let the toothpaste dry, smooth the it with emery cloth, and lay the vinyl down. White toothpaste with baking soda in it seems to work best. Whatever you pick, the paste can be dissolved and washed away if you ever decide to have the crack professionally repaired. The vinyl and toothpaste trick also works for gouged or rashed fairings without cracks.
Popping out dents on a gas tank
Dents are another problem without much of a cheap, easy solution, but we’ve all had 'em, right?
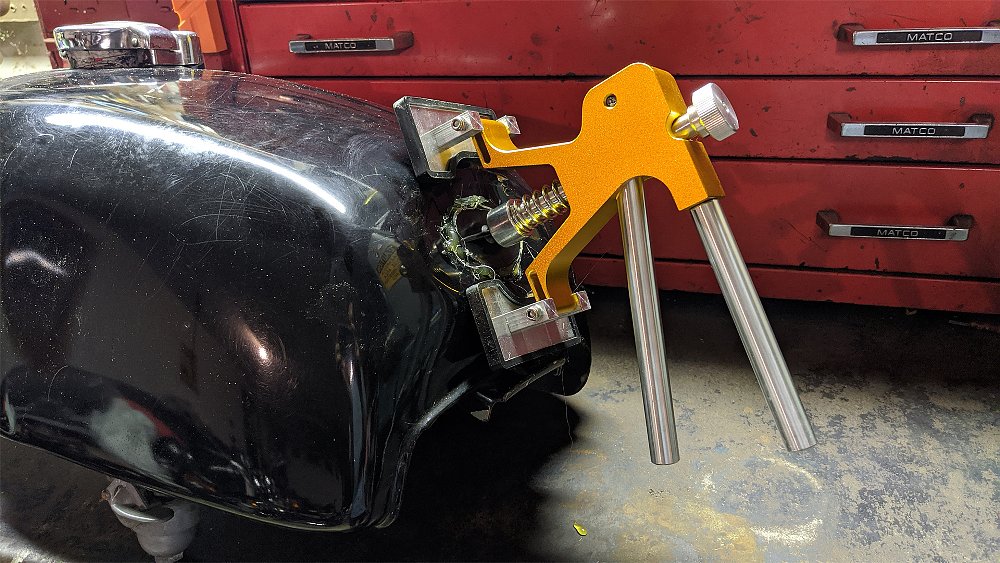
Let’s say you have an unsightly dent in your tank from a tip-over. If the paint hasn’t cracked and the dent is no larger than a grapefruit, I’d call a paintless dent repair service for a quote. They pull dents out of thin sheet metal all day, so paying for a little of their time and expertise may be cheaper than buying all the tools to do it yourself. Most DIY dent repair kits include a puller, some kind of adhesive/suction device, and a booklet of unhelpful directions. I find that GoPro suction mounts work better than any of them for big stuff, using a GoPro as a handle. Do this with the tank off the bike.
Little dents can be tough. A stud welder and a slide hammer are highly effective, except that process involves grinding paint away from the dented spot to expose steel for the welder, and at that point, you should at least try to have a dent-pulling pro take a crack at it since most folks don't have stud welders in their home garages.
Compressed air is a frequently overlooked option for popping dents. A manual-pump blood pressure cuff can be stuffed into the tank between the tunnel and the tank side, then inflated to pop the dent out from the inside. The same trick can be done with a crumpled up water bottle with a small hole in the cap to accept a blow gun hooked up to a compressor. Anything to minimize the Bondo!
If the paint has cracked, you can either hide the dent (Stompgrip sometimes works if the dent’s in the knee-gripping area), DIY pop’n’paint, or shop for a replacement tank. You’ll be surprised at how quickly labor adds up for a little ding once paint and bodywork get involved. The paint on your bike had likely faded over time, so a new can of factory-original paint probably won’t match. I’ve felt this disappointment many times.
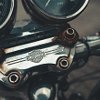
Tidy up the cockpit
Pay special attention to the cockpit of the bike. Is there anything here that bothers you when you ride? A busted mirror and deteriorating grips? Ruined paint from a leaking master cylinder and pesky rust spots on your hardware? The cockpit is all you see of your bike while riding it, so this is an excellent place to focus your effort.
Grips are easy enough to change. If they don’t want to slide on or off, shoot some compressed air between the rubber and the handlebar using the smallest blow gun tip you have, and the grip should move with almost no resistance. Harbor Freight’s DG-10 is $4 if you’re really short on cash.
There’s nothing uglier than a leaking front master cylinder with bubbling paint and nasty brake boogers around the lid seal. Remove that junk from the bike and hose it down with brake parts cleaner, then tape up the machined mating surfaces and spray the master cylinder with caliper paint. It won’t be invincible to brake fluid spills forever, unfortunately; that’s just a fact of life for DOT 3 and DOT 4 fluid. Let the paint cure fully before reinstalling and bleeding your system, and keep a wet rag handy to wipe up any brake fluid dribbles. You should be safe once it’s all sealed up. Finish off your reservoir restoration with new screws for the cap, if equipped.
Painting your motorcycle wheels
Motorcycle wheels get gross. Getting new wheels, or painting your old ones, can be expensive. What's a cheapskate to do?
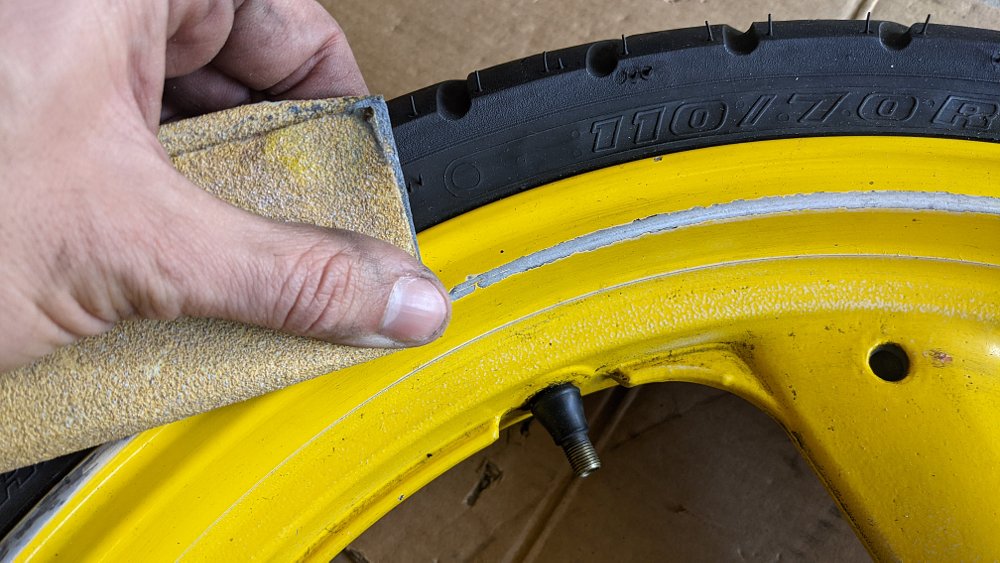
The unlucky among you will have small chips and dings to deal with, probably from tire levers and small stones. I've been repairing wheels for a while now using some basics I learned from a couple of Australian car YouTubers. First, strip all the brake components from the wheel, remove the wheel weights, and wash the wheel down. Then pull the valve stem core out to fully deflate the tire. Next, sand any nicks or paint damage smooth using sandpaper. You can wrap sandpaper around a wooden dowel or a Sharpie to reach different wheel features. Dings can be filled in with Bondo or JB Weld and sanded smooth. (Never fill cracks or holes in any wheel. Have a professional evaluate your wheel if you are unsure about some damage.)
The entire wheel should be perfectly smooth to the touch when you’re done with the prepwork. Clean all surfaces one last time with mineral spirits, run a tack cloth over it, and stuff playing cards between the tire and the rim to prevent unsightly overspray. Index cards will do in a pinch, but plastic-coated playing cards slide easily between the wheel and tire.
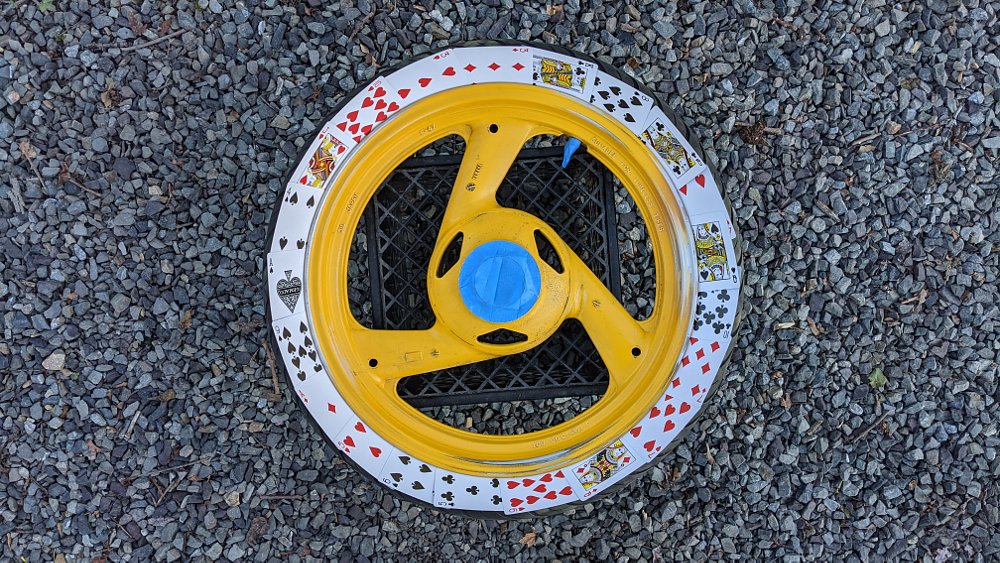
Spray the wheel with caliper paint or engine paint from the auto parts store. These paints tend to be hard-wearing and easy to work with. You can apply a clear coat over the paint, or leave it as-is for easy touch-up. Be sure to allow adequate time for the paint to dry and cure. Re-install your valve stem core, balance your wheel, and mount it back up. Make sure all components, especially braking and axle parts, have been reinstalled correctly.
Painting it black and putting it back
Most of the time, a component just needs a fresh coat of paint to look the way it should. Today’s high-performance aerosols can do a respectable job of restoring and protecting your parts, and I’d like to share my quick-and-dirty rattlecan approach with you.
Start by cleaning the part with the gentlest solvent that works, then let it fully dry and sand it smooth. Is most of the original paint still on the part? If so, avoid the temptation to strip the whole thing down to bare metal if possible. Factory paints are generally of a much higher quality than what you can get at your local hardware store or auto parts place. All you really need to do is put a good finish over the tired factory paint. Sand the part smooth using increasingly fine sandpaper until the part is fully smooth to the touch. As a rule of thumb, anything you can feel will show up in the final paintwork. Spray auto-grade primer over any exposed steel sections and smooth the whole works with 800 grit.
For paints, I avoid the basic paints and head straight for the specialty stuff. Chassis/rollbar paints are wonderful for frames and brackets. Grill paints and automotive engine paints are also great choices, especially for parts that will be near lots of heat. Sprayable enamel paint can be finicky but it’s best for matching factory paint on old bikes on the cheap. Finally, there’s caliper paint. I consider caliper paint my secret weapon in the backyard paint booth because it’s both durable and easy to apply as long as you follow the directions on the can and spray in a suitable ambient temperature.
Clear coats are a mixed bag. Anything that could be exposed to gasoline should get a two-part clear coat to prevent future gummification of your newly painted surface. 2K clear coats from Eastwood or Spraymax are the best I've found. Generic parts that won't see fuel or brake fluid get the same brand clear coat as whatever paint I used, although I’ve mixed brands many times with no issues. I rarely use clear coat over caliper paint, although I did a pair of fork lowers that way two years ago and they still look great.
Most DIYers will tell you preparation is everything with paint, and they’re right. What about follow-through, though? For example, spare your perfect paint job from annoying debris while it dries by putting a clean plastic container over it, especially if you have an outdoor spraying workspace or pets that shed lots of hair.
Re-cover your motorcycle seat
A torn seat looks terrible. I won’t attempt to improve upon Lemmy’s detailed guide to reupholstering a seat, found here for your education and entertainment.
I would like to add a few thoughts for those of you on motorcycles with plain, one-piece vinyl seat covers. These are especially common on sport bikes, dirt bikes, and nakeds. Buy a square yard of marine-grade vinyl in the color you want. Then follow Lemmy’s guide and pause once you’ve removed the old seat cover. Lay your original cover out flat over the marine vinyl and trace it, leaving about an inch extra all the way around. Bam! You just made a seat cover for almost no money. The only other tip I’d add to Lemmy’s article is a line of 3M Super 77 spray adhesive from the front of the seat to the back, straight down the middle and not on the sides. This will keep the vinyl planted as you move fore and aft without restricting the cover’s ability to move and stretch along the sides. Trim the excess vinyl away with a fresh utility blade and you’re all set. Go ahead, make mistakes! One square yard of marine vinyl ($10 to 15) is usually enough for two covers.
Put the reflectors back on?
Want to make a bike look cleaner and more original with hardly any money or effort, especially if you’re trying to sell it? Replace the reflectors. All of ‘em.
Reflectors and factory plate hangers are usually the first items to go on a new motorcycle. Replacing these components make the bike look a little dorkier, yes, but dorky is clean and clean is desirable. Maybe there's nothing to my theory here, who knows? I think it's a cheap way to put some shine back on the bike and attract a more mature buyer.
Is your motorcycle looking a little less tired?
This is the largest collection of my motorcycle restoration hacks I've ever published, and it feels good to get them out of my garage and into yours where they can hopefully help breathe some life into whatever you have. I simply couldn't afford a decent motorcycle in my salad days, and I didn't have the budget for proper repair supplies, either. No regrets here. I rescued some basketcases, learned a bunch of new skills, and even landed one of my low-buck restorations in a regional show.
Doing my own aesthetic work leaves more money on the table for much more important stuff, like insurance, brakes, tires, regular servicing... and gas! Hopefully these tips help you get the most out of your motorcycle with the time and budget you've got.