

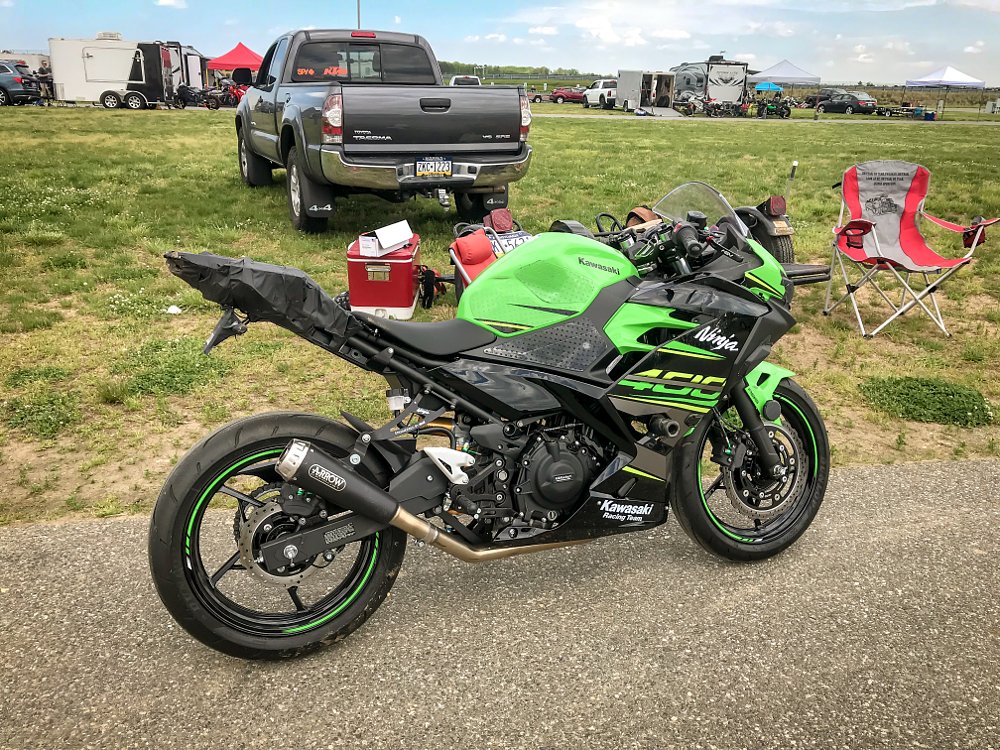
The Kawasaki Ninja 400 launch was one of my favorite events that I’ve attended since starting this job. Most of that had to do with the fact that Kawasaki rented Sonoma Raceway for the day and turned us loose to have some fun. Getting an entire racetrack practically to oneself is something that doesn’t happen very often.
After the launch I requested a long-term loaner of the Ninja 400. My goal was to have some fun with it on the street, but ultimately, see what it would take to turn it into an even better track machine. I’m an intermediate-level track-day guy. I attend three or four track days a year and try to end every season a little bit faster than the last. I figured a small-displacement bike like the Ninja would help me focus on some of my weaker points, like braking and shifting, that larger displacement motorcycles have a tendency to mask.
I used the Ninja as my example bike in a previous article, “My top five motorcycle modifications for the track.” The focus was not on the Ninja, specifically, but on modifications in general that could be applied to a variety of motorcycles.
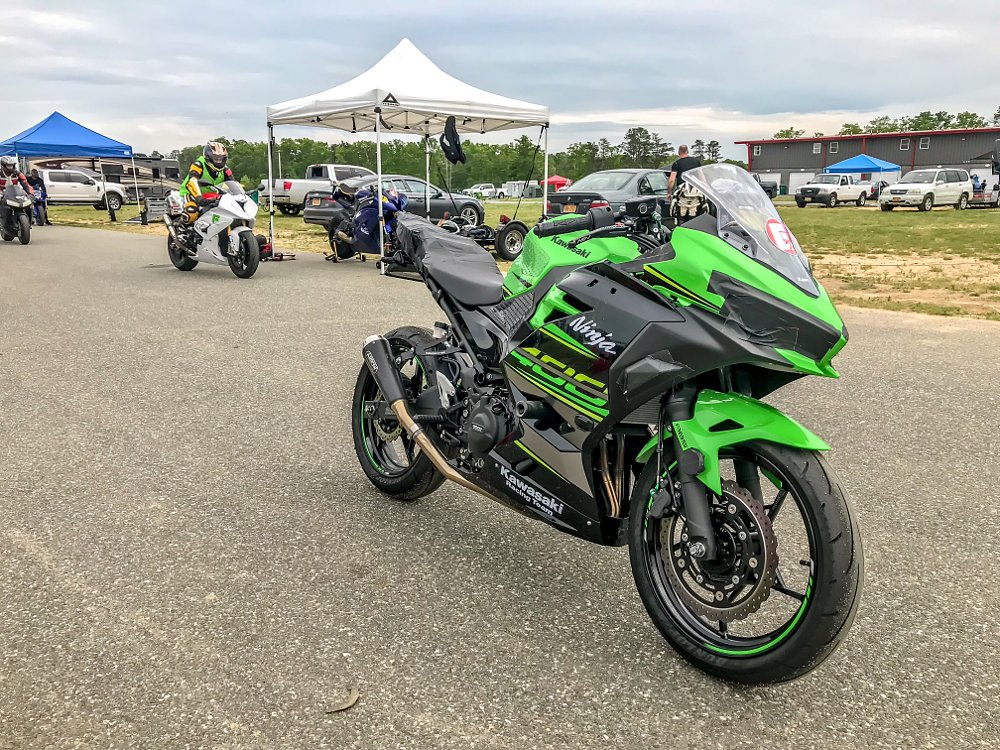
Now it's time to turn the focus squarely on the Ninja 400 and see how those modifications worked once I actually got it on track. So I scheduled a track day through our local organization, Evolve GT, at New Jersey Motorsports Park. Evolve GT is easily the best track day organization I've yet to experience here on the East Coast. Bill Sink and his team work extremely hard to make sure everyone is having a great experience and learning something in the process. Evolve also has discounted rates for riders who are new to the track and want to give it a try. I can't recommend these folks enough.
So let's see how the modifications on the Ninja worked.
The suspension
Considering the $5,299 MSRP of the Ninja 400, it comes with a pretty decent suspension. That being said, the upgraded Öhlins’s is better, much better. But, it was also one of the most expensive modifications of the entire build with the front NIX22 cartridge kit and the Öhlins STX36 Hypersport Rear Shock ringing in at around $800 each.
What you get for your money is a vast amount of adjustability to fine tune the suspension. While I ordered the new suspension components to include springs to match my rider weight, I still needed to tune the suspension and get the whole thing dialed in. For that, I turned to Mark Rozema of Markbilt Race Bikes.
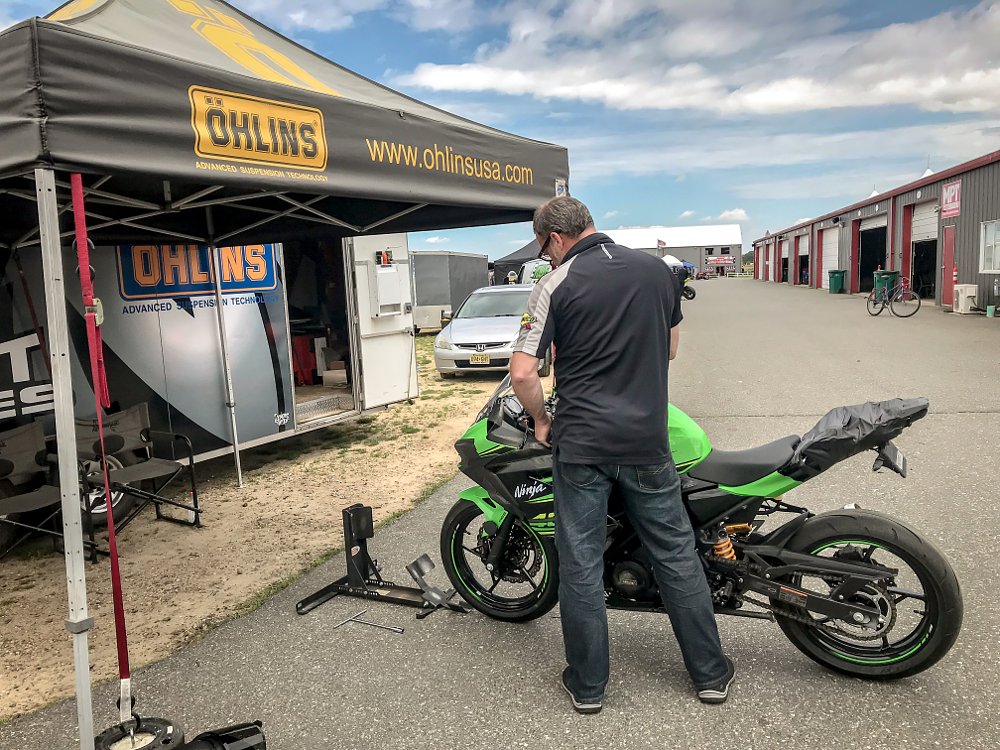
Mark runs a speed shop on the edge of the Millville Executive Airport, a stone's throw from NJMP. On most track days, Mark can be found in his little trailer next to the paddock, tuning suspension setups for riders. Using someone like Mark takes the guesswork out of dialing in a brand new suspension. He tackles the initial setup and then you check back with him in between sessions and he slowly works with you to make adjustments until you're satisfied. His services are completely worth the $40 he charges.
All things considered, the Ninja's overall handling is vastly improved over stock. Stiffer springs and better damping give the bike a much more planted feel at high speeds. This is especially true under hard braking. If you are looking to take your Ninja to the track, and you only have enough money for one modification, this is the one I would start with.
Stompgrip tank pads
I just lied to you. Don’t start with suspension, start with Stompgrip pads.
This mod has nothing to do with making sure you don't scratch your tank and everything to do with improving grip. Stompgrip pads are affordable and easy to install. Why OEMs don’t include them on their sport bikes as a standard accessory is beyond me. They provide such better grip, and subsequently control, during cornering, accelerating and braking, compared to a bare tank.
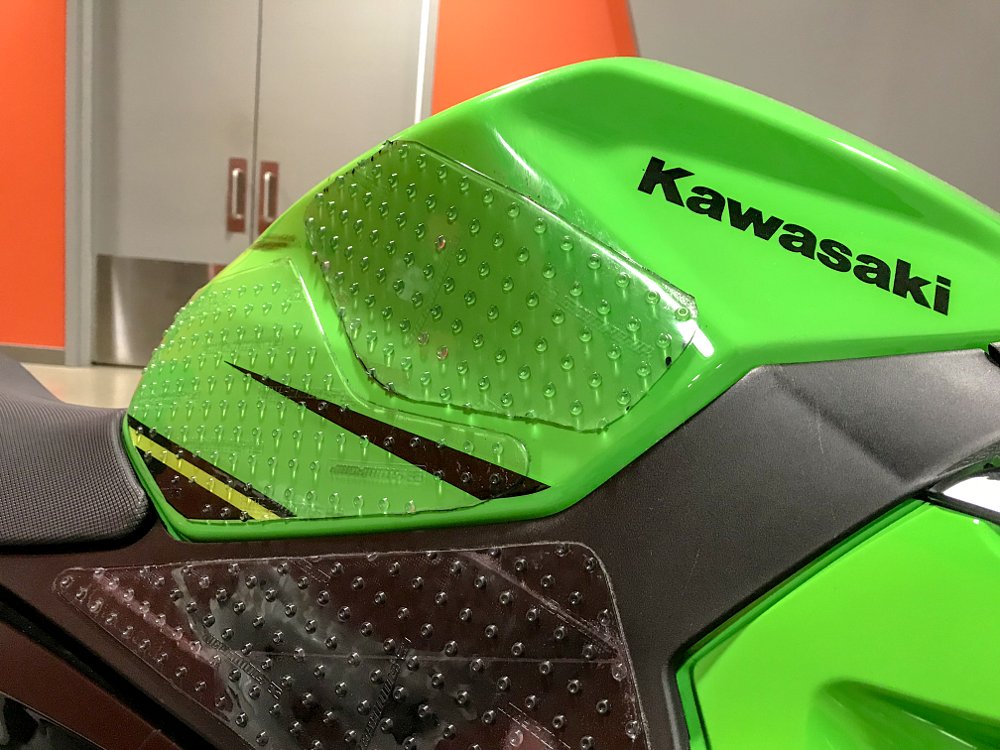
Our distributors don't carry Ninja 400-specific sizes, so I cut up some universal sheets I had lying around to fit the Ninja’s tank. I’d recommend adding these pads even if you aren’t planning on taking the Ninja to the track.
Braking
Speaking of braking, this is one of the areas I’ve yet to completely solve. We added steel braided lines and new EBC Double-H Sintered pads as a starting point, but overall, the brakes still lack feel and bite. That being said, I was very impressed with the ASV C5 adjustable levers. These are wildly better than the stock options.

Before going crazy and looking for replacement calipers, I’d like to try bumping to a set of full-on track pads. Something like the EBC EPFA Road Race pads. I’ve heard of folks getting good results with those and a new rotor. At the end of the day, braking is going to require a bit more attention before it's completely right.
Tires
A lot of non-track riders would rarely think of replacing their stock tires until they used them up. Even if street riders don’t love their motorcycle’s stock offerings, more often than not they’ll ride on them until they’re worn out enough to justify switching to something else.
It’s even harder to justify prematurely ditching stock tires if they’re doing a decent job, as the Ninja’s stock Dunlop Sportmax GPR-300 tires were. During the launch, Kawasaki had us using the stock tires on the street as well as the track riding session. That’s how confident they were in the Sportmax tires.
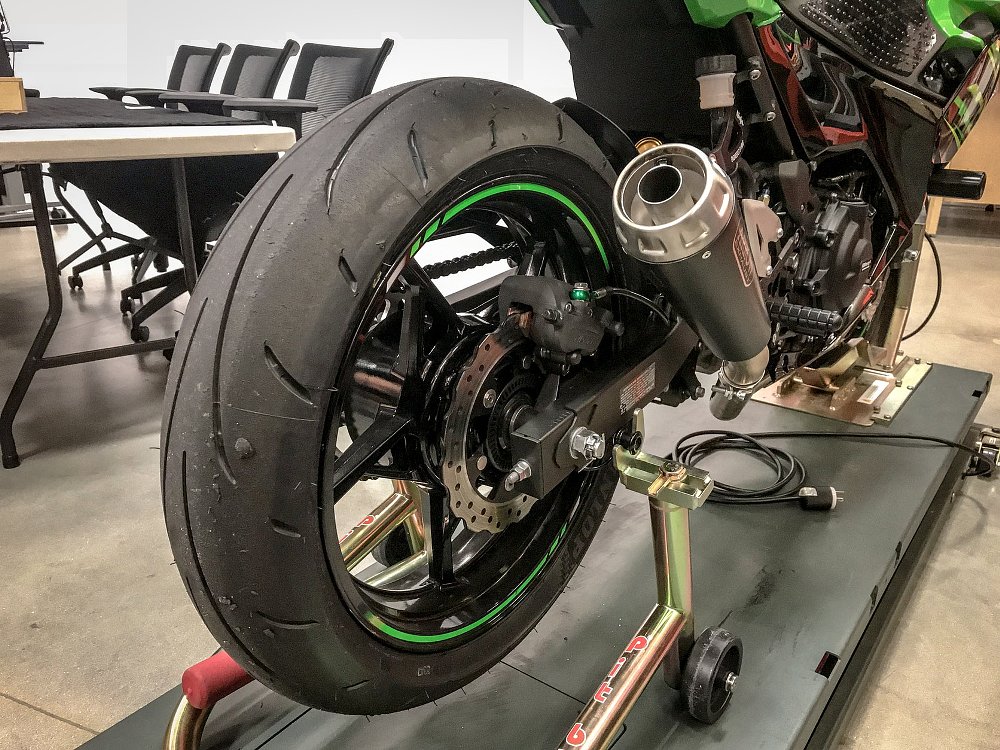
However, I found the Dunlop Q3+ tires to be a welcome improvement for track use. They warm up quickly and grip like glue. Their steep profile leads to quick turn in and fast handling. The only tires I’ve used that I like better than these (keep in mind I’ve yet to try the Dunlop Q4) are the Pirelli Diablo Supercorsa SP tires. But they’re more expensive than the Q3+ tires and they currently aren’t available in the Ninja 400’s sizes.
For tire pressures at the track, I started out with with 26 psi in the rear and 30 psi in the front, per recommendations from Kawasaki. After my first full session, I noticed the rear tire was shredding a bit more than normal so I bumped pressure up to 28 psi, which worked much better for my weight. I ended the day with 29 psi in the front tire and 28 psi in the rear tire.
Frame sliders and case covers
I actually put the Shogun frame sliders to the test when I low-sided through the chicane on the backside of Thunderbolt during the second lap of the first session of the day. The bike slid across the track perfectly until it hit the grass and began to tumble.
Some say that tumbling is due to the frame sliders catching the edge of the track, but from where I was sitting (on my ass sliding directly behind the bike), it looked like the tires caught the grass and caused the bike to tumble and flip end over end.
Either way, I was glad I had the frame sliders on there. Same with the GB case covers. I learned how quickly things can go awry and those accessories proved to be relatively cheap insurance. Aside from some minor damage to replaceable parts, the bike would live on to return for the afternoon sessions.
Clip-ons and rearsets
Part of the main reason I opted for Woodcraft products is that every single piece is replaceable and there is usually someone at the track to sell you what you need. After the crash, I was able to source a replacement foot peg and shift lever and rebuild my Woodcraft Rearsets for $40.
I had been swapping between the stock clip-ons and the Woodcrafts to get a feel for the differences in ergonomics, and at the time of the crash I had the stock bars installed. As they were both destroyed, I went back to the Woodcraft clip-ons. If I had crashed with the Woodcrafts, I would have been able to replace the bars for $30, for a total cost of $70 to get back on the track. That’s a cheap price to pay to avoid forfeiting the rest of my track day.
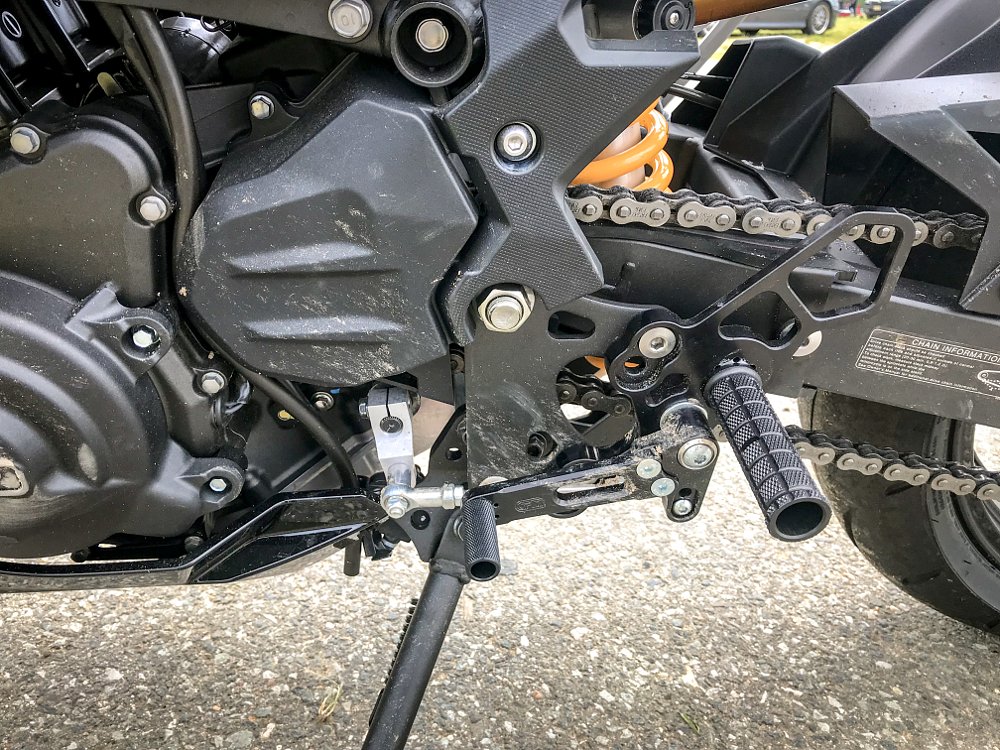
Replacement parts aside, the fit and finish, detailed instructions, and overall adjustability of the Woodcraft products added a level of sophistication to the little Ninja. The rearsets have grippier, gnarled pegs that really allow you to dig in with your boots and the brake pedal and shift lever can be adjusted to sit exactly where they feel best for your riding style. The clip-ons can be installed without removing the top triple clamp (so incredibly convenient) and can be finely tuned to sit exactly where they feel most comfortable to you.
Seat height
So this is the one area of the ergonomics I have yet to solve. Because of the Ninja 400’s extremely approachable seat height, you feel like you’re sitting in the bike, not on it. And while this is great for new riders on their first bike, the position is better suited to street riding than track riding. The low seat meant my legs were cramped, making it hard to move around on the bike, and my upper body was a little too upright. I'd still like to adjust the riding position in the future.
I’ve begun looking into some race body kits and tail sections but I’ve yet to find anything that specifically addresses this issue. Even an inch or two of additional height would be fantastic. Kawasaki sells the accessory tall seat, but it’s too soft and flexible. I need something firmer with a bit more of a track focus. If anyone out there has any suggestions, I’m all ears.
Exhaust
I really liked that the Arrow exhaust and the R&G hanger completely fixed my problem of a cramped right heel. That being said, I wasn’t sold on any significant power gains. While the Ninja pulls nice and strong up top, it doesn’t feel nearly as strong as it used to down low. I want to go back and play around with maps on the Power Commander and see if I can find a better option.
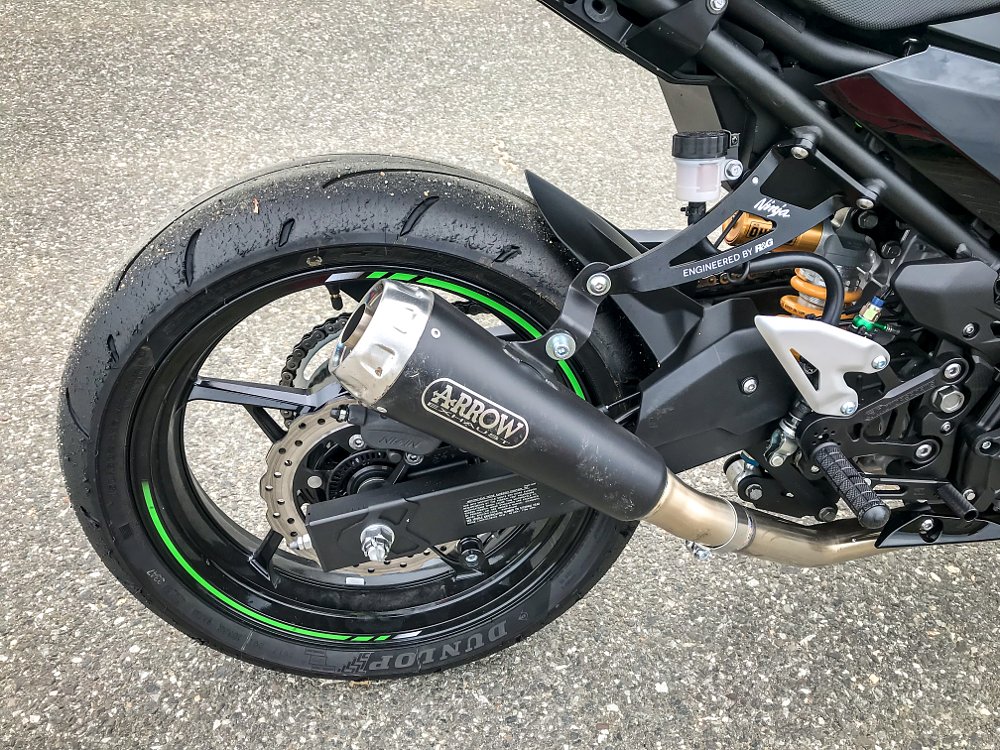
All things considered, adding the exhaust had a minimal effect on my ability to ride this bike on the track. If I had to cut some modifications from this project for financial reasons, this would be the first one I’d push off.
Clutch
For the Ninja 400, Kawasaki used a slipper/assist clutch with a very light pull. On the track, it became clear that the clutch pull was too light. We had installed a spring around the clutch cable where it meets the pivot arm to help with feel, but this is like throwing a Dixie Cup of water on a burning house and expecting it to extinguish the flames.
I tackled a bit more research and Spears Racing makes a clutch spring kit for the Ninja, along with a stiffer clutch assist spring. I am hoping these parts resolve this issue. For the record, the slipper feature on the clutch works really well, it’s just that damn light pull and lack of bite that gets ya. For the $30 investment, I wish I had just ordered these from the beginning.
Final thoughts
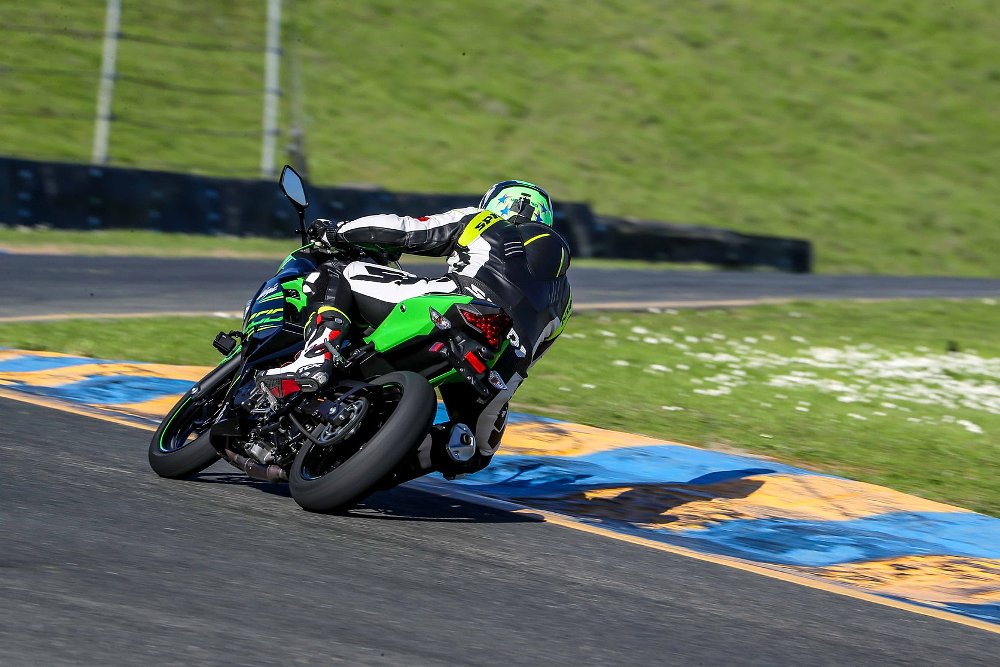
All things considered, I am really enjoying this bike on the track. It really helps me focus on improving technique. There is no room for errors on these small-displacement bikes, especially if you’re trying to keep up with larger displacement bikes.
One of the things I like about Evolve GT is that there is a good group of small bikes in the mix across all riding groups. During the later sessions of the day, I had a good time dicing it up with some riders on Ninja 300s, KTM RC390s, and a tiny vintage Honda twin.
The Ninja 400 is an affordable way to get to the track. With a few key modifications you can really transform this bike into an awesome little machine, but don’t think you have to make them all at once. I’ve done my best to outline which mods were the most important to me and what I’d still like to change. Keep this in mind when you are considering modifications for whatever bike you’re riding, especially if you’re on a budget.
Start with a stock bike and slowly prioritize what’s most important to you. If you try to tackle everything on the list at one time, it can become overwhelming. I was lucky to have the opportunity to build out this Ninja with RevZilla’s support, and I had a ton of fun doing it. But with my personal bikes, I usually tackle modifications one at a time depending on what I can afford. Think about what areas you most want to improve and what you hope to achieve, then prioritize your list and start crossing off items one at a time.
Image Gallery
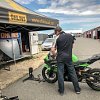
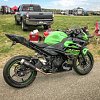
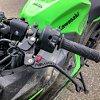
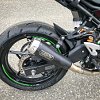
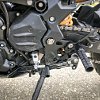

Image Gallery


Shop the gear
 Stompgrip Universal Sheet Kit$64.99
 Dunlop Q3 Plus Sportmax TiresFROM $232.42
 Pirelli Diablo Supercorsa SP V2 TiresFROM $160.94
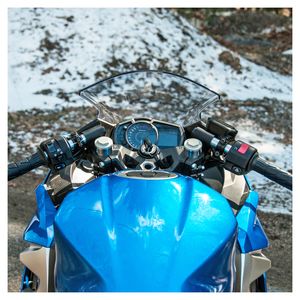 Woodcraft Riser Clip-Ons Kawasaki Ninja 400 2018-2023FROM $169.99
 Ohlins NIX22 Cartridge KitFROM $754.92
 Ohlins STX36 Hypersport Rear ShockFROM $429.00
 EBC Double-H Sintered Front Brake PadsFROM $29.95
 EBC EPFA Road Race Front Brake PadsFROM $84.40
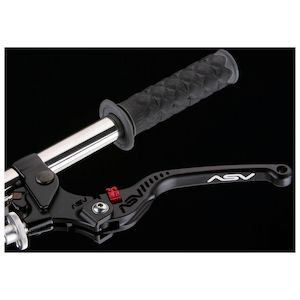 ASV C5 Sport Clutch LeverFROM $135.00
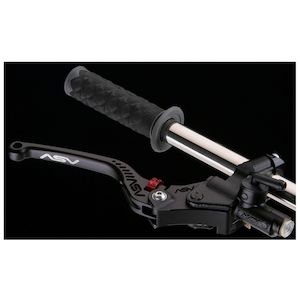 ASV C5 Sport Brake LeverFROM $125.00
 Shogun PA2 Frame Sliders FROM $53.99
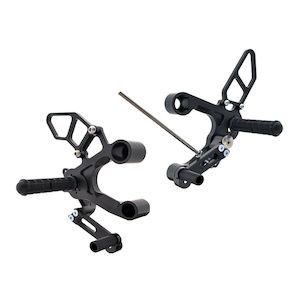 Woodcraft Rearset KitFROM $249.99
 GB Racing Engine Cover SetFROM $226.55
 R&G Racing Exhaust HangerFROM $81.99
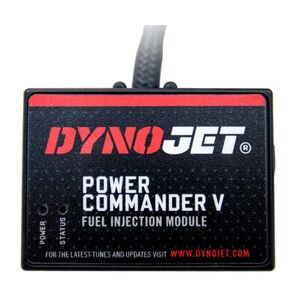 Dynojet Power Commander VFROM $354.66