Buying a new motorcycle can make you feel like you are on Cloud Nine. If it has the wrong suspension, however, it can feel more like an unruly petrol jackhammer relentlessly attacking your vertebral column.
People change their rear motorcycle shocks for a variety of reasons: to gain better performance and greater adjustability, to get suspension that is suited to the rider's weight and riding style, to change ride height, or just to replace worn-out parts with fresh new units. As long as you have the right tools (mainly the ability to handle Step 1), learning how to swap motorcycle shocks will take far less time than actually changing them, and changing them goes fast! That being said, there are a few tips and tricks that you can employ along the way to help increase efficiency, and decrease frustration as you go.
Keep in mind that this step-by-step how-to is strictly for twin-shock motorcycles. Changing the rear suspension on a single-shock motorcycle will obviously be a different job.
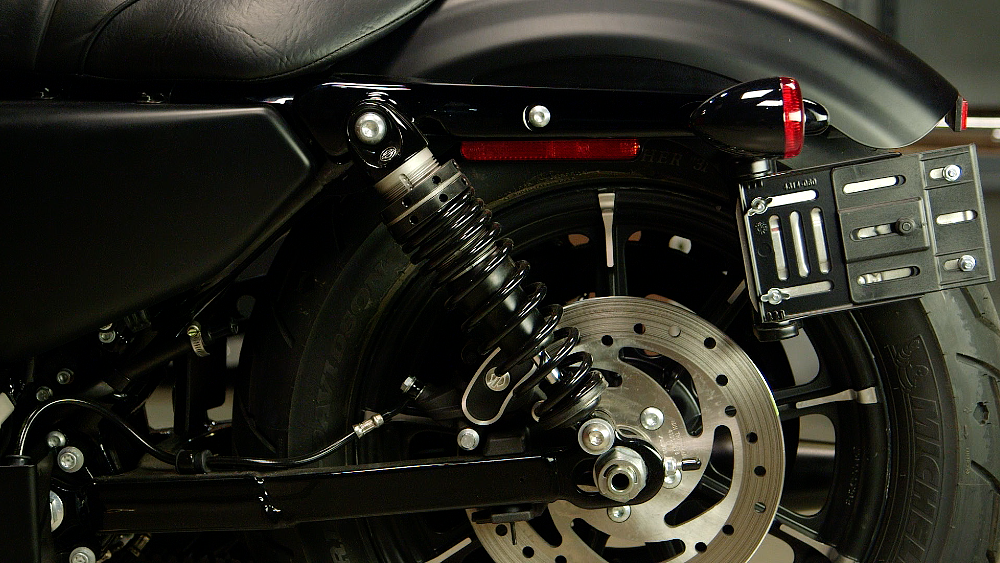
Shocks from the factory are notoriously "eh" on many models. RevZilla photo.
Step 1: Get the motorcycle elevated
Changing the dual rear shocks on your motorcycle is not a hard task. In the end, it is four total fasteners that need to be taken out, and put right back in. That being said, the ease and efficiency of your experience all comes down to having the right tools for the task (as is generally the case).
For this job, the integral “tool” is a reliable way to lift the rear wheel of the bike off of the ground. Unless Paul Bunyan and the Mountain from GoT are on hand to hold your bike up in the air, the first thing you are going to need is some form of a motorcycle lift, chock, blocks, or overhead suspension system for keeping the rear tire elevated while you work away.
The most important part of changing rear shocks on a motorcycle is having the ability to lift the rear end off of the ground (safely!). RevZilla photo.
Note: Consider the type of shocks you are adding to the motorcycle. Are you going taller or shorter than stock? If you are going taller, be sure that you have elevated the bike enough to allow the swingarm enough downward movement to accommodate the new shock length.
Step 2: Support the wheel and swingarm assembly
The ass end of your motorcycle is pretty heavy. Between the wheel, tire, brake caliper, rotor, and swingarm, there is far more weight back there than you are going to want to try to hold while also removing the bolts keeping your shocks in place. Supporting this portion of your motorcycle not only prevents the whole thing from crashing down upon removal of the fasteners, but it also makes that removal far easier in the first place by relieving the tension on each bolt.
A good method of supporting the rear wheel is to use a wooden block and wedge-shaped shims to slide under the tire. In addition to the wedge shape allowing for the shims to more easily snug up to the tire, the ability to further raise the wheel by pressing in on the wedges will come in handy for Step 4.
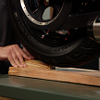
Wood blocks and shims are a great combination for supporting a rear tire while changing shocks. RevZilla photo.
Step 3: Loosen the bolts and remove the current shocks
Once you have the rear end of your bike elevated and the swingarm supported, you can get to breaking free the fasteners holding your current shocks in place. The best way to do this is to start at the bottom and remove the lower bolts first. Doing it in this order allows the weight of the shock to be supported from above and for the shock to swing free once the bottom bolt is taken out. If you do this in the reverse order and remove the top fasteners first, the shocks do not have as clear of a pathway to dangle freely.
Note: Most aftermarket shocks are going to have you reuse the stock hardware, so don’t go chucking stuff away at this point.
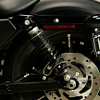
With the motorcycle elevated and the rear swingarm supported, removal of the shocks is a relatively simple process. RevZilla photo.
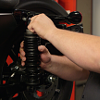
Step 4: Attach new shocks and adjust for new ride height
Once you have the old shocks removed, it is time to attach the new ones. A good rule of thumb here is to start at the top and work your way down. In attaching the top bolt of one of the shocks first, you are able to better gauge just how much you will need to move the swingarm to properly line up the shocks and their mounting points. If the shocks you are adding to your motorcycle are exactly the same size from eyelet to eyelet as your old shocks, this is less of an issue. However, in all likelihood, the two shocks will be at least somewhat different, thus requiring a bit of maneuvering of the rear wheel on your part.
Another advantage of using wedge-shaped support blocks is that they make it easier to raise or lower the rear wheel when aligning new shocks. RevZilla photo.
This is where the second advantage of the shims, or other wedged blocks, comes into play. Depending on how much you need to raise the tire (or lower it), the shims can efficiently accommodate the movement by either advancing the wedge further or pulling back.
Note: It is best to loosely assemble the fasteners on each side as you work your way through this step. Not only will this save you the headache of fully tightening, and then untightening if you are off the mark, but if you bolt down one side of your shocks too tightly, it may mask misalignment or swingarm bearing issues when you install the other side.
Step 5: Secure the bolts
With both sets of shocks exactly where you want them and loosely installed, go ahead and fully secure each. If you are not a pro, this is a time when you are going to want to pull out a trusty torque wrench and refer to the factory service manual. It should go without saying that your motorcycle shocks are a critical part of your motorcycle, so snugging them down appropriately is equally as imperative.
Step 6: Update any bike geometry that has been affected
Depending on how much you have altered your ride height, it is entirely possible that you will need to tweak some additional parts of your motorcycle at this point. The most notable instance of this is with regard to your kickstand.
If your motorcycle uses a side stand, and you drastically increase the size of your shocks, you may see your bike lean at an excessively acute angle. If you do the converse and shorten your shocks, it is possible to see your bike not lean enough. Either is an issue that will need to be addressed. Additionally, you will need check ground clearances for parts such as footpegs and low-slung exhausts, as altering the ride height could cause these to drag in corners.
With everything in place, fully tighten the new rear shocks to factory torque specs, check for any geometry issues with parts such as your kickstand, and have fun riding! RevZilla photo.
Conclusion:
So that’s that. A quick guide to changing your motorcycle suspension. In the end, if it sounds simple, that’s because it kind of is. For all of the high-tech features and intricacies of many motorcycles, the rear shock mounting setup is generally pretty basic. By far the hardest part will be getting your motorcycle into position, and then just paying attention to factory specs when fastening your new shocks in place. Once you become proficient in each of those aspects, changing your motorcycle shocks will be nothing more than a well-cushioned minor speed-bump on your way to a better ride.
For more information on the intricacies of motorcycle suspension, check out Lemmy’s Harley Suspension 201 article on Common Tread where he gets into the details of everything from the origins to the various styles and characteristics of a wide variety of motorcycle shocks. While the article is specifically geared for Harley’s, much of the info pertains to twin-shock motorcycles in general.
By purchasing and enrolling in Riders Preferred Membership, you agree to the
Program Terms and Conditions.
*Some exclusions apply: 10% RPM discount applies on full price and sale price Exclusive Brands.
10% RPM discount applies on additional select brands at full price.
Exclusions apply.
RPM free 2-day shipping applies on qualifying items, contiguous U.S. only.
Not available for AK, HI, or U.S. Territories.
View shipping policies.
RPM free returns apply on qualifying items and are processed on standard return timeline, contiguous U.S. only.
View return policy.