

Along with changing your motorcycle oil, learning how to clean and lube a motorcycle chain is one of the first forays into proper motorcycle maintenance for a lot of new riders. In all, it’s a pretty simple process that should only take about 15 minutes or so, but will go a long way in extending the life and performance of both your motorcycle chain and sprockets.
This article will provide a quick step-by-step guide for the best way to clean and lube a motorcycle chain. If you are looking for more detail, be sure to check out our How to Clean and Lube Your Motorcycle Chain video. where Lemmy goes a little more in-depth on some of the nuances of motorcycle chain maintenance.
First things first, let's get started with how to clean a motorcycle chain. If you're just looking for how to lube your motorcycle chain, you can jump down to step eight.
Step 1: Figure out your chain type
The type of motorcycle chain you are using will affect the way you go about getting the grime off.

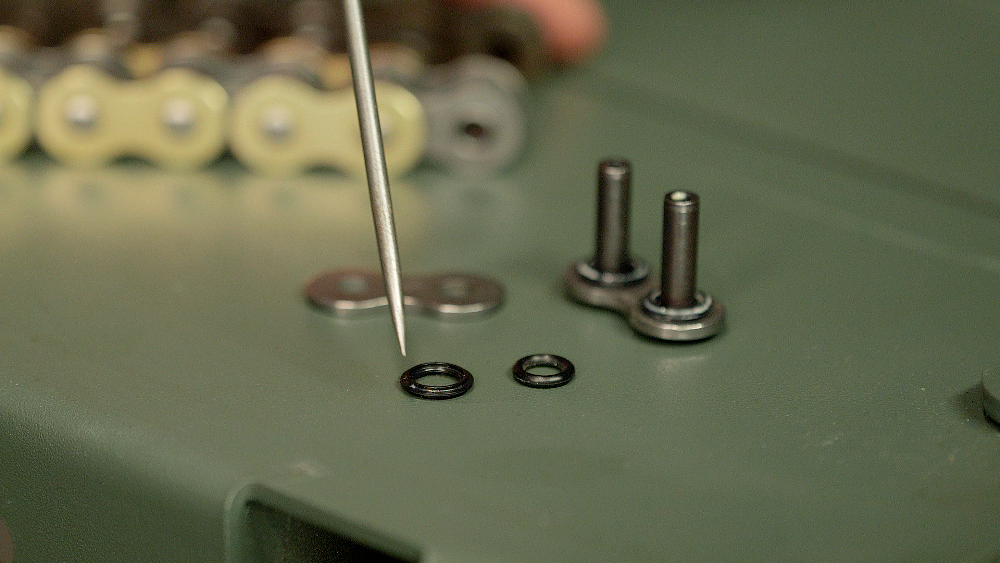
A plain motorcycle chain consists of metal-on-metal links with no seal in between. As such, plain chains can be cleaned more aggressively than sealed motorcycle chains. Sealed motorcycle chains (aka: O-ring, X-ring, or Z-ring chains) use a rubber seal between the inner link and outer links to keep grease inside the pin and bushing cavity (and to keep road grime out). This design helps extend the longevity of the chain and also necessitates a more gentle approach to cleaning.
Step 2: Get your bike into position
Cleaning and lubing a motorcycle chain is a relatively easy process. It is a lot easier if your bike has a center stand or if you have a paddock stand. Either option allows the rear wheel (and your motorcycle chain) to spin freely, thus allowing for more efficient application of your chain cleaner and chain lube.
If you have neither of the above stands, don’t worry. You can use your kickstand and a bit of maneuvering around the driveway. Clean one section and then move the motorcycle to get access to the next section. Another alternative is to remove the chain entirely and work on it that way.
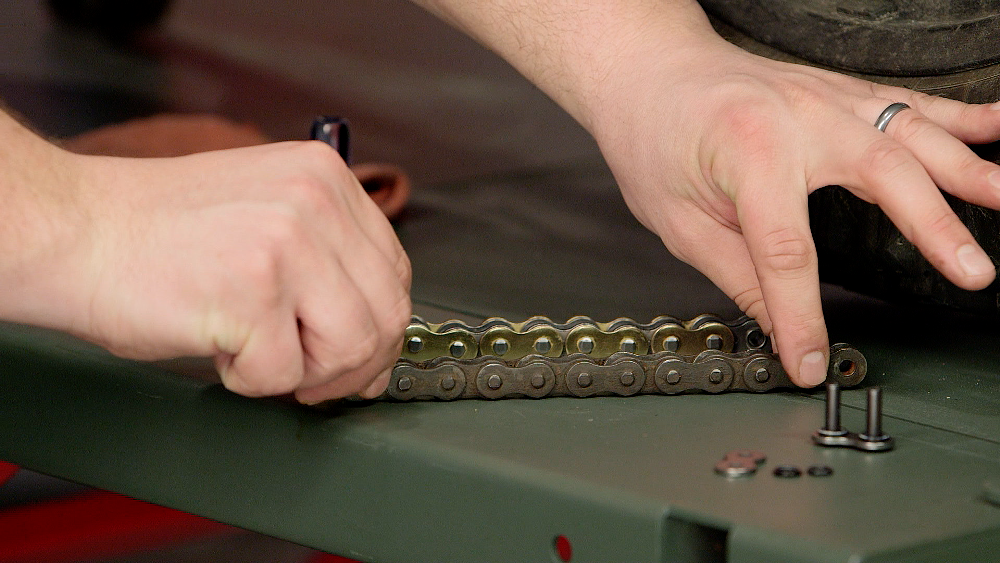
Step 3: Examine the motorcycle chain and sprockets
Getting up close and personal with your chain while cleaning it provides a great opportunity to check the current state of its overall well-being.
While you're down there, check for chain wear. How much side-to-side “wiggle room” does your chain allow? How much do the links slide back and forth under compression and tension? A motorcycle chain in good working order should allow for minimal variances in each.
Then there's the by-the-book way to determine if your chain is due for replacement. Your shop manual will give you a certain maximum length of a given number of links of your chain. If that number of links is longer than that, it's too worn. Here's another quick way to do an unofficial check. Tug on a link of the chain at the rearmost portion of the sprocket on the rear wheel. If the chain is very worn, it will pull away from the sprocket instead of hugging it like it should.
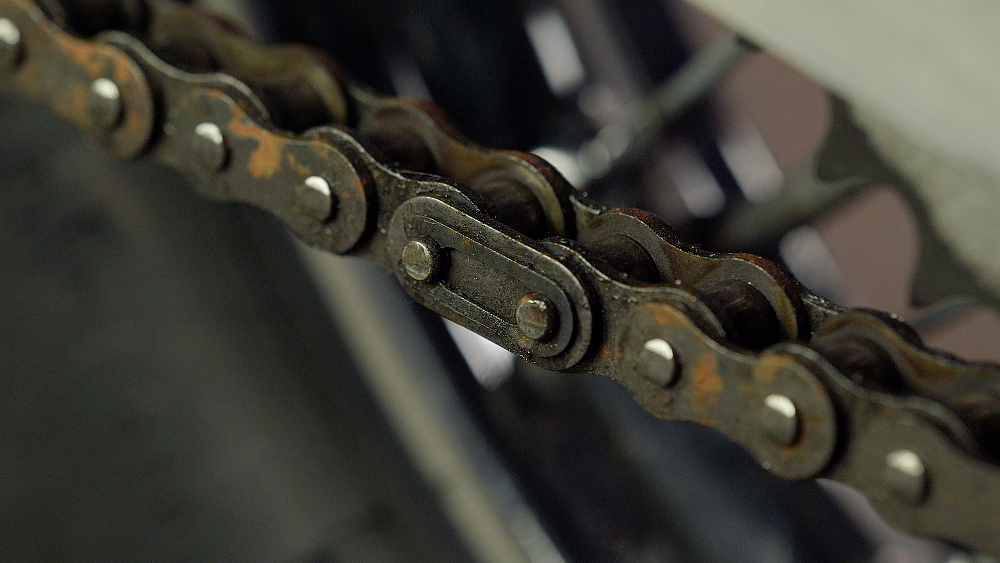
Check the master link. The master link on a motorcycle chain is the link that has been used to join the two ends together and will look slightly different than the surrounding links. Whether the master link is fastened via a clip or rivets that have been peened over, this is a great opportunity to check to make sure the master link is secure.
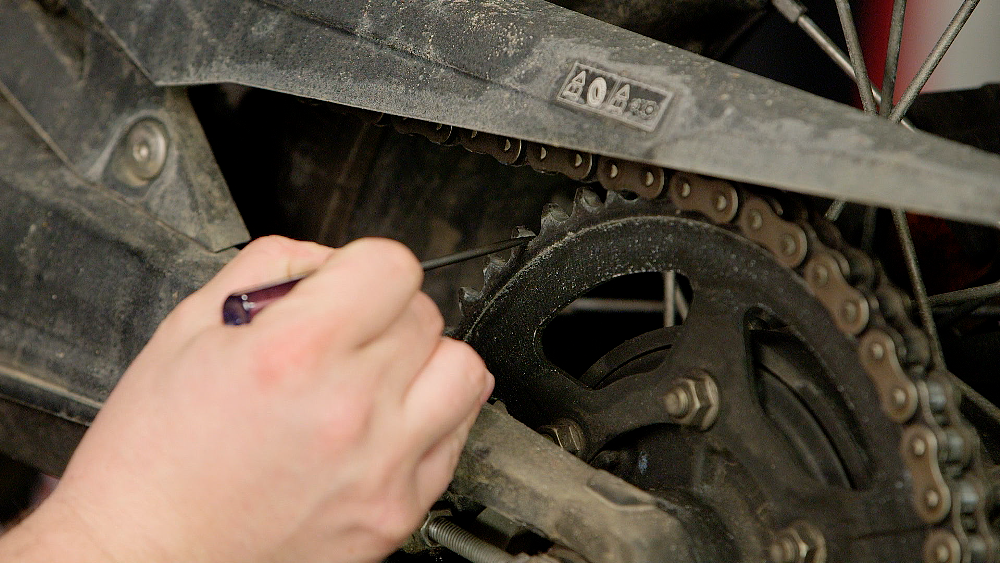
You should also examine your sprockets. Based on the condition of your chain and the style of your riding, your sprockets will tend to show wear in a couple ways. When checking for worn sprockets, keep an eye out for "shark fins" and sharp teeth. "Shark fins" occur when the leading edge of the sprocket tooth wears more heavily than the back side. This happens on bikes that tend to be accelerated hard, and decelerated more gently (or on bikes with very old chains).
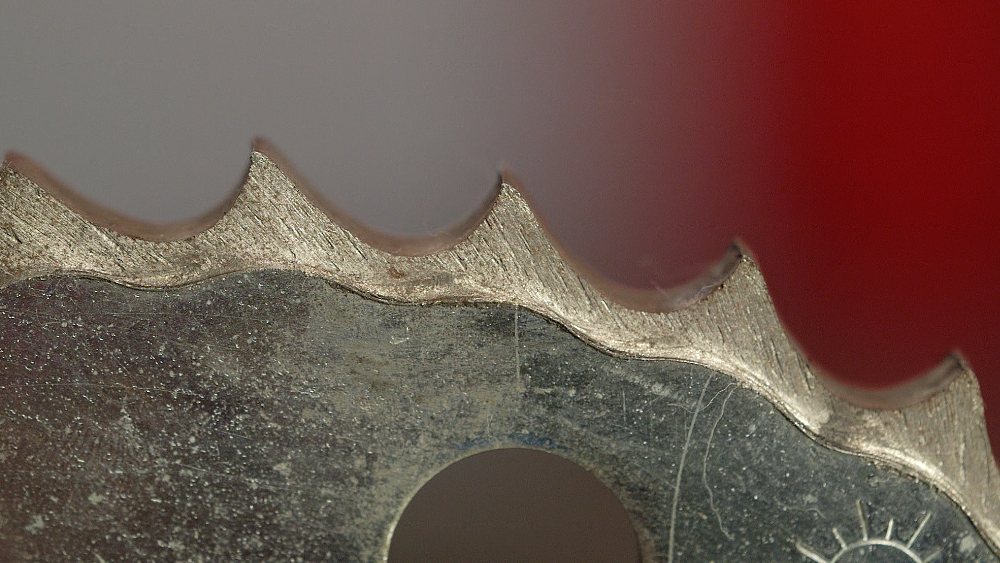
Generally speaking, the tips of your motorcycle sprocket's teeth should be flat. When they become sharp, it is due to both shark fins coupled with an abundance of hard braking and downshifting that wear away at the trailing edge of the sprocket tooth, as well.

It does little good to put a new chain on a worn sprocket, so as a general rule of thumb, chains and sprockets should be replaced simultaneously.
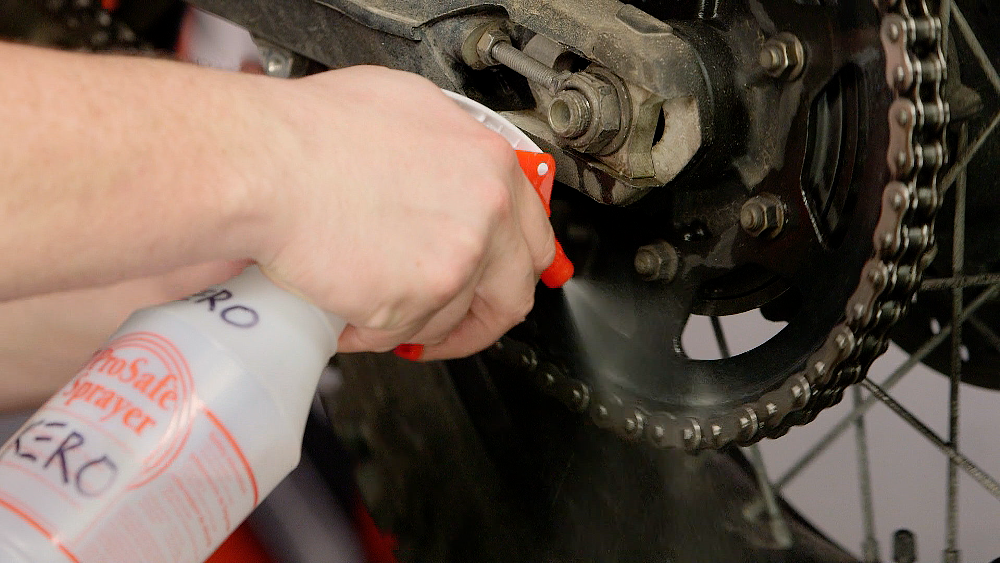
Step 4: Spray chain with chain cleaner
At this point, it’s time to start knockin’ the grime off. While you can opt for something like Maxima Clean Up Chain Cleaner, kerosene will also work equally as well to dissolve the existing lubricant and dirt particles on the chain. As you work your way around the chain, don’t be shy about really soaking things down. Kerosene is cheap, new motorcycle chains are not. So be liberal in your application.
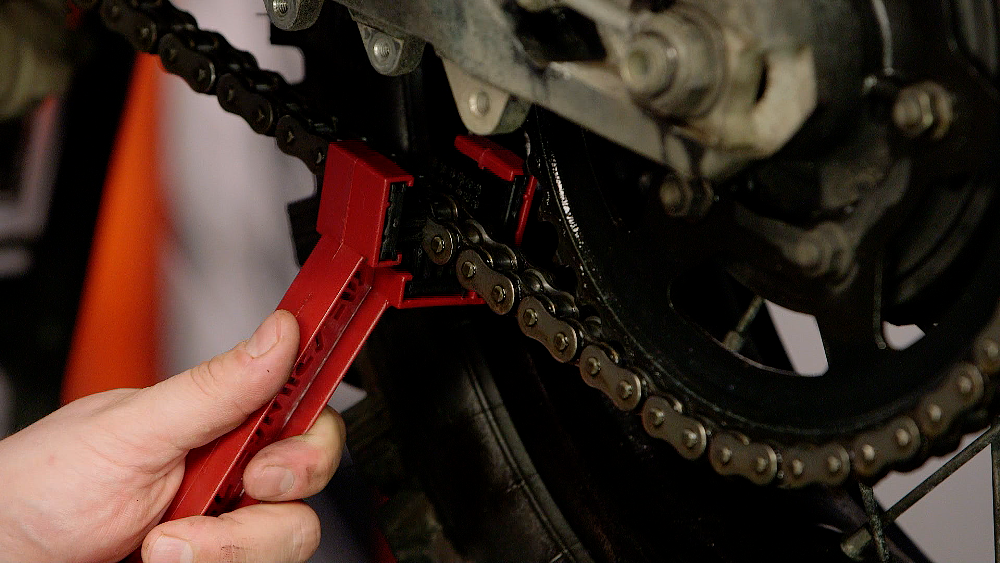
Step 5: Scrub the chain
With the chain soaked, use a motorcycle chain brush to really get at the caked-on gunk. Something like The Grunge Brush has been a time-tested and proven favorite for years, and for good reason, as it allows you to clean three of the four sides of your motorcycle chain at once. Be thorough. It will pay off later. A clean surface allows for better adhesion of the motorcycle chain lube.
Step 6: Re-spray the motorcycle chain
To finish off the cleaning portion of the process, re-soak the motorcycle chain with your cleaning agent of choice. Ensure that the last remnants of chain grime have been blasted into oblivion. Gunk kills motorcycle chains. Get rid of as much of it as possible.

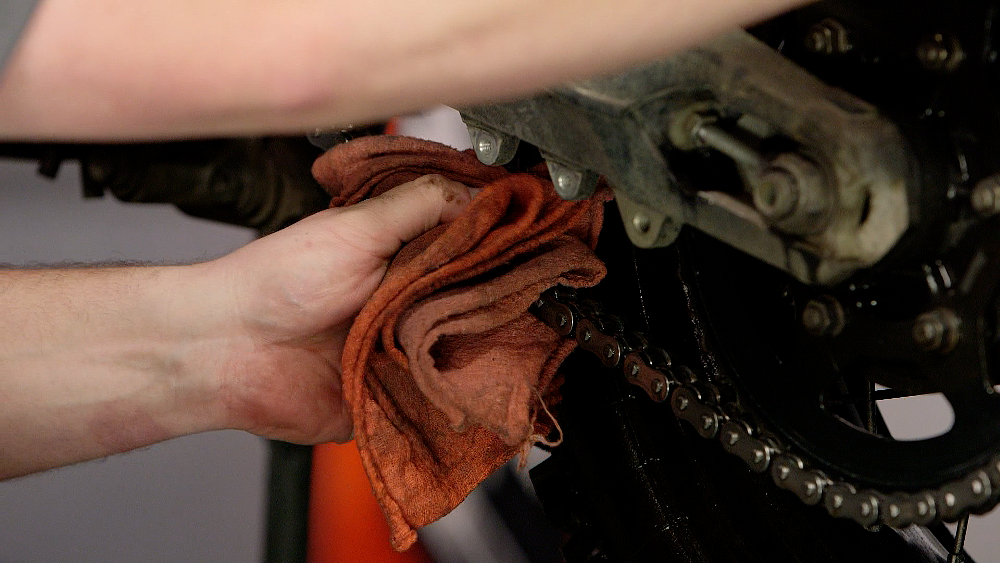
Step 7: Dry the motorcycle chain
For the motorcycle chain lube to adhere to the chain, it needs to be applied to a dry surface. Take your time to fully dry the chain and remove all of the chain cleaner prior to lubricating. You can also use this as an opportunity to clean up your workstation, as by this point things are probably a bit gross.
Step 8: Lubricate the motorcycle chain
With the chain clean and dry, apply the lubricant evenly to all sides. Preferences for the best type of chain lube are vast and include everything from specialty items such as Maxima Chain Wax to regular ol’ chainsaw bar oil. The advantage of something like the Maxima wax is that it is much less likely to fling off of the motorcycle chain and make a mess on other parts of the bike.

When it comes to the best way to lube a motorcycle chain, there are a few differences between plain and sealed chains that you want to keep in mind. With plain chains, slather on the lube and wipe off the excess. Keeping a plain chain continually coated in clean lubricant is the best way to ensure that it continues to function properly for many miles to come. With sealed chains, on the other hand, the grease inside the O-rings does the job of lubricating and the chain lubricant you apply is just for protecting the outside of the chain from rust, so you can use it more sparingly.
Clean up and go ride
So that’s it. Like we said, motorcycle chain maintenance is pretty simple. Check your manual to see how often you should clean and lubricate the chain on your motorcycle. Of course, it's not a bad idea to do it more often if you're riding in wet or dirty conditions. Some riders will make sure to clean the chain right after a ride in the rain, to get moisture off before rust can start forming.
If you have any additional questions or are looking for some feedback from one of our award-winning Gear Geeks, just give us a shout and we will be happy to help with this or any of your other motorcycle-related inquires.


