

Common Tread Supreme Ruler Lance made one of his regular sojourns to ZLA headquarters in Philly from his lair in Ohio in early fall. Although he was up for the trip, his tires were not. His rear Dunlop had seen better days, so he took a little detour up the hill to Lemmy Mountain for some tire attention before making the ride home.
Our first order of business was to eat the doughnuts Lance brought, washing them down with coffee. If you’re swapping tires before 9 a.m., we recommend you do the same. (If it is after 9, please swill beer instead.)

I should also specify that everything here is about changing tubeless tires. If Lemmy ever gets out and rides his neglected Honda XR650L enough to wear out the OEM tires, maybe I'll be able to get him to do a how-to on changing tube-type tires. Now I'll hand the mic back to Lemmy...

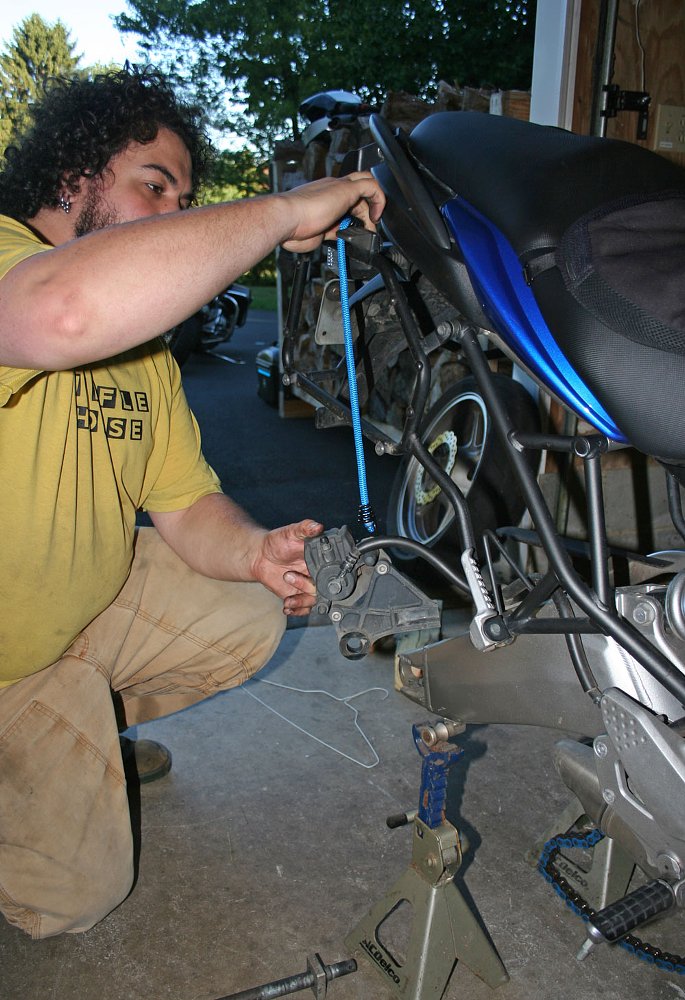
Lance's editorial comment #2: I have the swingarm spools because at home in my own garage, I'd quickly and easily raise my Versys on my rear stand. Since Lemmy only rides Shovelheads, choppers of muttly lineage and other odd junk, to which no one has ever fitted swingarm spools, he didn't have a rear stand. The jackstands worked just fine.
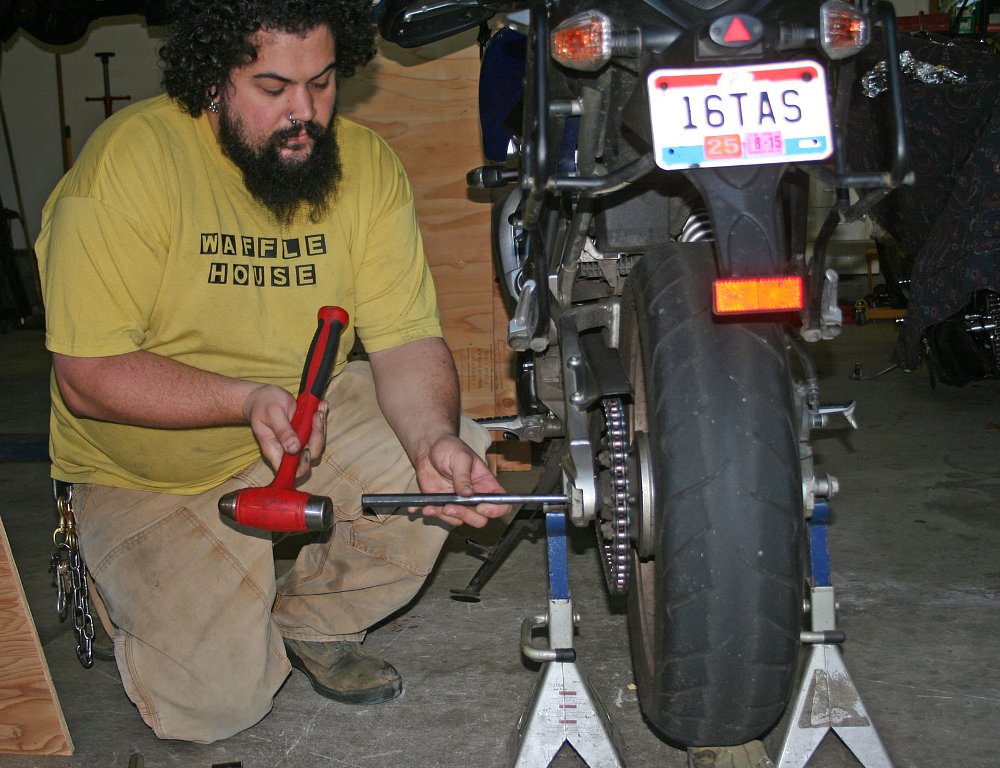
Next, we loosened the chain adjusters so we could slip the chain off the sprocket, and then slid out the axle. Keep track of the order of the axle hardware, especially wheel spacers. If you fail at this step, you have to put together a little jigsaw puzzle when you reassemble everything.
Lance's editorial comment #3: My tip: I like to put the spacers back on the axle in the proper order and put the nut on loosely. That keeps me from forgetting what goes where and misplacing any pieces. Plus, make a note of where the brake caliper mounting bracket fits into the scheme.
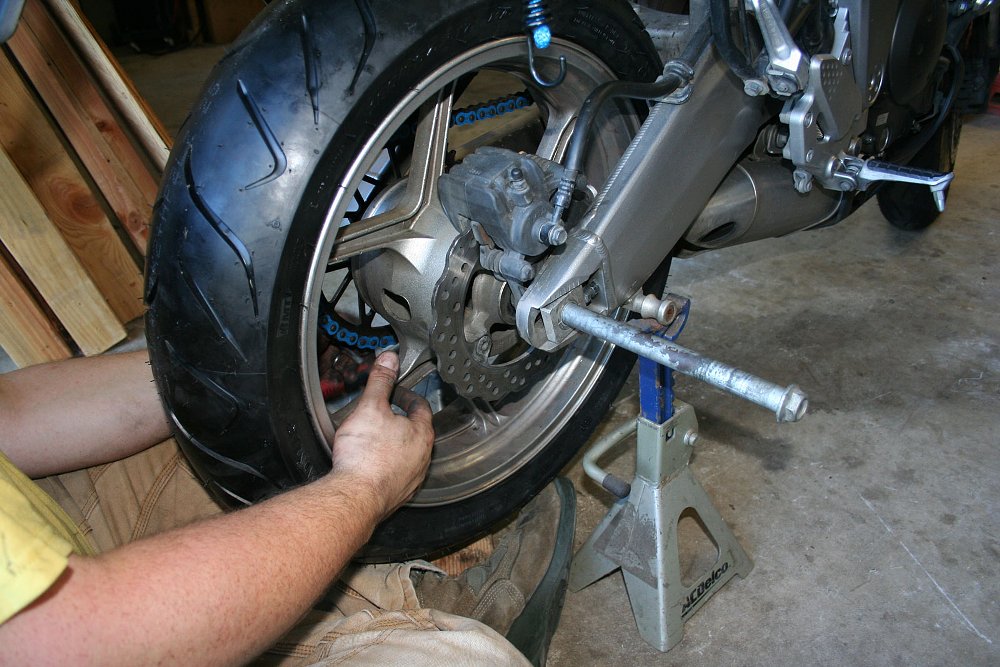
If you’re so inclined, now is the time to check those wheel bearings. If they feel gritty, repack or replace ‘em! Don’t forget to check the brakes while you’ve got them off, as well.
Deflate the tire by removing the valve core with a valve core tool. After the air has made its exit, it's time to break the beads. There are a multitude of ways to do this, but we elected to use a manual bead breaker. It makes quick work of an otherwise-difficult job.

Lance's editorial comment #4: Breaking the bead can be the hardest part of the job, in some cases. The tool Lemmy has worked like a charm. At home, I have a Harbor Freight changing stand I bought years ago. It has its drawbacks and doesn't get much respect from tool aficionados, but it has a bead breaker that works well, and that alone makes it worth its cost, to me. There are some other nifty tools that don't cost a fortune.
After the beads are broken on both sides, it's time to begin pulling the tire off the wheel. This part of the job is more of an art than a science. Everyone seems to find their own way of doing things. I like to work on old squares of carpet to keep from beating the tar out of the finish on the wheels.

Lance's editorial comment #5: Although it was mildly alarming to watch Lemmy battling my wheel and tire on his knees like an Everglades 'gator wrestler, I have to admit his methods got the job done. Personally, my knees have a lot more miles on them than Lemmy's and I prefer to work standing up. Plus, having the wheel clamped to a stand makes it easier to avoid the possibility of putting pressure on a brake rotor. If you do use the Lemmy method, keep the rotor side up to avoid leaning on it.
There are ways to make your own tire-changing stand, if you're lacking funds to buy one. I've seen some good homemade tire-changing setups created with a few dollars of materials: A discarded car wheel with a section of old garden hose sliced lengthwise and put on the wheel's rim for rubber protection, and a threaded rod in the center to clamp your motorcycle wheel to the car wheel. My store-bought tire-changing stand is another option. If you're ready to pay more, I've seen people change tires in a flash without breaking a sweat using one of those fancy (and pricey) No-Mar changers.
The job will go easier with the right tools. Use tire lube. They make this stuff for a reason — it works! It helps with de-mounts as well as mounting, and protects the bead from rips or tears from the tire irons.

Removing the tire is prolly the trickiest step. Use the spoons, take your time, and as Lance kept reminding me, “Take small bites!” He’s got a great point. I have a habit of getting greedy. I try to de-mount the whole dang tire at once, and it never works. It bends the spoons, makes my arms sore, and puts the delicate beads at risk. Work smart, not hard. Do little sections of bead at a time and don't forget the tire lube.

It can be difficult because the tire doesn't want to stay in the drop-center. I typically kneel on the tire to keep it where I want it. At this point, after a few bad words, you should have one bead free of the tire. Repeat the process on the other bead, but the same side of the wheel.
Lance's editorial comment #6: I find that having a couple of different shapes of tire irons makes the job much easier. I have one long iron with a nice bend in it that's almost indispensable for that first grip on the second bead, which is harder to access than the first.
With the tire off, I give the wheel a visual inspection, and then replace the valve stem. You can either pull the old one out with a tool or just cut it out. Lance didn't have a replacement valve stem ready, so we reused the same one. You can do that, but replacing it is cheap protection.

Once the tire is mounted onto the wheel, you need to seat the beads. Remove the valve core from the new stem so you can inflate it faster. A large air compressor will have enough oomph! to blow the beads of most tires onto the wheel, but there are always kludgy exceptions. If your compressor’s not doing the job, there are a number of redneck ways to make the tire assume its new home. I’m not going to claim that I’ve never used ether to blow a bead onto a wheel, but I sure am not recommending anyone else do it. Bead seating tools (also known as Cheetahs) are much less dangerous. Watch your fingers during this step! I have pinched the ever-livin’ bejesus out of myself by getting my finger too close to a bead that was about to seat.
Lance's editorial comment #7: Lube is again your friend when trying to seat the beads. It encourages the bead to slide into its home and, because it is liquid, it will create tell-tale bubbles to show you where air is escaping, instead of inflating your tire. Sometimes pressing on the tread next to the spot where air is escaping past the bead will be enough to get that satisfying and loud "pop!" you're seeking.
With the bead set, replace the valve core and adjust the inflation to the correct pressure. If you are the balancing kind of fellow, now is the time to do so. (Lance and I have similar views on balancing tires. We don’t.) Please don’t leave murderous comments about balancing. I encourage everyone to do what they feel is best with regard to tire balancing.
Lance's editorial comment #8: Uh, actually I've been known to balance tires, especially front ones and especially on a bike I'm going to take to the track and ride at higher speeds, where a vibration can show up that I never felt at street speeds.

Lemmy's editorial comment #1: This guy sure has a lot of advice to dole out for a guy with clean hands, doesn't he?
At this stage of the game, you ought to be ready to reinstall your wheel. I put that chock of wood back in place to hold the wheel up. Reinstall your caliper (or brake assembly, if your bike has a drum brake), get all your spacers lined up in the right spots and slide the axle back in. Leave the axle nut slightly loose while you adjust the tension on the chain. Snug everything up, check the chain tension again (the chain on Lance's Versys gets tighter when you torque that axle nut), check to make sure the rear wheel is straight by sighting down the chain, lubricate the chain, put a new cotter pin in the castellated axle nut, and go ride! (Carefully, of course, so you can scrub in that new tire and make sure you have everything snugged down right. And don't forget to pump up the brakes before you ride.)
As a parting thought, keep your head about you if this is the first time you’re changin' tars. Even thousands of tires later, these things still get me riled up. Beads don’t seat, tires won’t get onto their rims. It's always something. Patient and methodical work gets the job done, so don't get discouraged!


