

Whether you're hitting some trails, entering a hare scramble or attacking the local motocross track, like most riders who buy a new dirt bike, you're probably going to make a few modifications.
While the list of modifications riders make to their dirt bikes can feel endless, there are a select few mods that are often considered a “must do.” Those mostly have to do with protecting the bike and the rider with some accessories. Some of this comes down to personal preference and the details depend on what kind of riding you're going to do, but here are my top five modifications for a new dirt bike. Keep in mind we're talking about modifications you'd make to a new model off the showroom floor, not repairs to a "new-to-you" clapped-out used dirt bike.
With that said, the first modification I always recommend to any rider scooping up a new bike is the suspension!

Suspension setup
One of the most important steps in setting up a new bike, whether it’s for the dirt or the street, is making sure your suspension is dialed in. Suspension settings have a dramatic effect on how your bike will handle and perform. If you're new to this, check out our articles on suspension vocabulary and how to adjust your dirt bike suspension or watch Ari's video on the topic. Setting the sag is the first and most important step. It's not that hard, but you'll need a buddy to help.
Most dealers will also help you set up the sag on your dirt bike and discuss alternative springs if your weight requires it. The size and skill level of the rider, the kind of bike and how you plan to use it all effect how you want to set up the suspension. From my experience, it’s worth discussing with a trusted dealer or suspension shop what you plan on doing with your bike and your skill level.
For instance, a C-level rider may be on the cusp of needing stiffer springs but they only plan to attend the occasional hare scramble and aren’t really pushing the limits of the machine, so the change may not be worthwhile. A B-level rider who is focused on racing and wants every edge they can get to be faster as they work their way into the A class may opt for those stiffer springs or upgraded suspension. Again, every rider is going to be different and have different plans and goals.
I don’t think most riders necessarily need to “upgrade” their suspension right out of the gate. At minimum, however, riders should have their sag set up correctly and make sure to have the proper springs rates for their weight. After that, getting more seat time and developing skills is more important than making modifications.
Once you’ve got that suspension dialed in, a lot of the other pieces of the puzzle will be associated with protection for both the rider and the bike.
Handguards
Handguards come in many different shapes, sizes, and designs. If you're a trail rider, handguards are often seen as a “must have.” And as the name implies, they’re a great way to protect your hands from trees, branches, roost, and any other obstacles or debris you might encounter on the trail. In addition to keeping your hands protected, they can also help prevent your levers from being broken in the event of a crash.

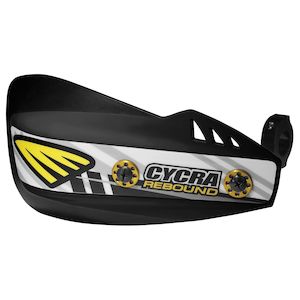
For trail riders, handguards that completely wrap around the side and connect to the end of the handlebar are very commonly used. They provide a bit more protection and coverage compared to what I’ll refer to as “open-ended” handguards. Open-ended handguards are often referred to as independent-mounted handguards and they are a bit different than the full wrap-around handguards.

Open-ended handguards are mostly used by motocross riders. They prefer this style because the guard still does a good job of blocking roost but it also helps reduce the chances of an injury in a crash. Open-ended handguards generally have a bit more flex to the guard and some even pivot forward. Since MX riders are jumping their bikes through the air, they run the risk of coming up short on a jump (often referred to as “casing” a jump) and having their hands blown off of the handlebar due to the intensity of the impact. When the hands come off the grips, you don’t want them getting tangled up in the handguards. The open-ended handguards can help prevent those kinds of injuries to the wrist and hands.
That type of injury can obviously still happen to trail riders, but the speeds are generally different and trail riders face other hazards, such as routinely navigating through trees. The tougher backbone of the full wrap-around handguards can save your hands on the trail. I’ve used open-ended handguards on the trail and I’ve pinched my fingers cornering around trees in tight single-track a lot. I also crash a lot, so the open-ended handguards just weren’t the best option for me, personally.
The important thing is to make sure the handguards you’ve chosen fit your handlebar and your controls have their full range of motion. After that, it comes down to personal preference for the kind of riding you do.
Skid plate
While handguards protect parts of the bike and the rider, skid plates focus on protecting the bike and… I’d say the rider's wallet too. Engine cases aren’t cheap, are they Stevan? (My colleague Stevan destroyed his engine case after the second ride on his brand-new bike in South Dakota a few days before our Get On! ADV Fest. He’ll probably never read this, but a select few will, so I’m gonna leave this little Easter egg in here for those folks.)
Dirt bike engine cases are strong but they’re certainly not indestructible. If you hit a rock just right, get one flung at you by the rider ahead, or perhaps you’re working your way over a sizable log, things can go wrong pretty quickly. Skid plates are simple to install and they’re economically priced for the insurance they provide.

You’ll find a few different styles and options available depending on the amount of protection desired. For instance, if you’re on a two-stroke, you can find skid plates that also cover the expansion pipe on the exhaust, an area prone to damage on a two-smoker.
Additionally, if you have a bike that has linkage suspension, you can find skid plates with extra coverage to help protect the linkage system from damage. That extra coverage has come in handy for me on my KTM XC-F many times. We do a lot of log-hopping around here.
Whether you're a trail rider or hucking it at the MX track, adding a skid plate to your bike is a no brainer.

Hour meter
Speaking of protecting the engine, making sure you’re servicing your engine at the proper intervals is another important part of the dirt bike game. Dirt bikes don’t generally come with an odometer that calculates the miles ridden. If you don’t see an odometer or an hour meter on your bike, I’d recommend scooping up an hour meter. This will help you keep on schedule with your oil changes and other routine services. An hour meter costs only about $30 and is super easy to install. In my opinion, this one is another must-have, no-brainer.
Handlebars and grips
The more comfortable a rider is, the more confident they will feel, which in turn generally makes them faster. When I trail ride with my buddies, we’ll swap bikes on a fairly routine basis. It’s fun to ride something different and often leads to one of two things. One, it will help you appreciate how your bike is set up and quickly understand what you do and don’t like. Or two, it will provide you with insight to components and parts on your buddy's bike that you could easily add and might enjoy on your own. Sometimes it’s a little bit of both. But one of the biggest differences I notice right away when riding a bike that’s not my own is the handlebar. I didn’t know I had such a strong preference on handlebars until I rode others. A different handlebar can really make a big difference in overall handling and comfort.

Much like a lot of moto gear and various parts, this is very much a personal preference update. If you’re just getting started in the dirt and you’re not really sure where to begin, I’d recommend just riding with the OEM bar until you have the chance to try alternative options. Additionally, you can actually mock up a handlebar using cardboard because you can generally find all the measurements detailed on the product page. Sure, it’s not going to be quite the same as having the handlebars in your possession, but it will get you closer to understanding what rises, sweeps, widths, etc. might work best for you.
If you’re swapping your handlebar, you’ll naturally throw some new grips on there, too. Even if you’re not changing the handlebar, grips are an affordable update that can add more comfort or provide better tactile feel. Personally, my favorite grips for the trail are the ODI Rogue MX Grips and the Pro Taper Pillow Tops. The Pillow Tops provide a bit more feedback but don’t quite feel as tacky and “grippy” as the ODI Rogues. Again, it’s all personal preference but I’ve used a few different options over the years and I always come back to these two.
There’s tons of modifications riders make and while these are the top five for most riders, including myself, there are a few other considerations worth discussing. Some riders may find their importance and value greater than others.
Other dirt bike modifications to consider
Tires: Tires play a critical role when it comes to grip and handling. Generally, I’ll ride with the tires the dirt bike comes with because I’m not one to get rid of a perfectly good set of tires unless I absolutely need to. OK, if I just bought a new bike and I was about to hit the dunes, I’d probably swap them for something suited to those special conditions, but you get the point I’m trying to make. The average rider will usually be content with the stock tires until they wear out.
I ride and race in a lot of sand and one of my favorite tire combos is the Michelin Starcross 5 Soft for the front and the rear. I also like the Bridgestone M59 front tire paired with the Shinko 525 Hybrid Cheater Soft / Intermediate at the rear when I’m going to be racing in more rocky terrain.

Tire choice, like everything else we discussed, really comes down to personal preference and conditions. From my experience, most aftermarket tires are pretty great. The only time I notice a drastic change or improvement is when I replace a worn-out tire with some fresh knobs.
Oftentimes the riders who have such strong opinions about tires and are quick to judge what you’re running are the same people who will never ride fast enough to understand or feel the difference from one tire to the next. My advice is to focus on technique, get in as much seat time as possible, and change your tires when the knobs wear out.
Brake Snake: If you’re not sure what a brake snake is, our Common Tread writer in residence, Andy, wrote a great article about it. “A brake snake tethers your rear brake pedal to your bike’s frame to prevent damage and jam-ups. A typical brake snake consists of a short length of braided steel cable, some crimp-on ferrules, and a cable sheath, often made of rubber tubing,” Andy explains.

The main purpose of a brake snake is to help prevent the brake pedal from getting bent in the event of a crash and it also helps prevent debris, such as sticks, from getting wedged between the brake pedal and the engine case. Speaking from experience, it’s impressive how easily sticks can get jammed up in that rear brake pedal. A brake snake is simple, easy to install, and very effective.
Frame guard: Squeezing the frame of your bike with your knees is a big part of riding, regardless of the discipline, but it’s especially important for dirt riders. Frame guards help prevent premature wear against the frame and provide an extra level of grip so you can stay better locked in through a variety of terrain.
Disc cover or rotor guard: If you ride rocky terrain on a regular basis, like I do in the mountains of Pennsylvania, a disc cover, also referred to as a rotor guard, can help prevent damage to your brake rotors. Disc covers also help prevent debris from getting into the brake calipers, which is why these are also commonly used for both MX and trail riding.
There’s a lot to consider when modifying your dirt bike but I suggest starting with the top five modifications above and then choosing more detailed and specific modifications as you get more seat time and better understand the disciplines or type of riding you enjoy most.
Image Gallery


Image Gallery


Shop the gear
 Cycra Rebound Racer Pack Handguards$79.95
 Motion Pro Sag Scale II$45.99
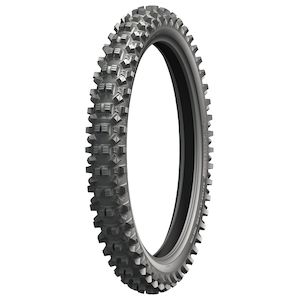 Michelin StarCross 5 Soft Terrain TiresFROM $64.99
 Acerbis X-Brake Disc CoverFROM $29.66
 Hardline Hour Meter$39.99
 Pro Taper SE Handlebars 7/8"FROM $69.95
 Pro Taper Pillow Top GripsFROM $13.99
 Moose Racing Contour DeflectorsFROM $24.95
 Moose Racing Aluminum HandguardsFROM $48.95
 Moose Racing Sag Scale$46.95
 CruzTools Shock Spanner Tool$17.05
 Motion Pro Deluxe Suspension Bearing Service Tool$214.99
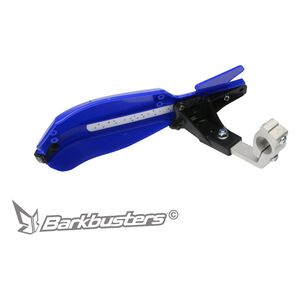 Barkbusters VPS MX Handguards$64.95
 Bridgestone M59 Front Tires$113.18
 Enduro Engineering Evolution 2 HandguardsFROM $56.95
 Trail Tech TTO Tach / Hour Meter KitFROM $39.95
 PC Racing iMotoMinder Wireless Hour Meter$39.95
 Shinko 525 Hybrid Cheater Soft / Intermediate Rear TiresFROM $84.96
 Factory Connection Shock SpringFROM $119.95
 Acerbis Off-Road Skid PlateFROM $71.96
 Acerbis X-Grip Frame GuardsFROM $47.66