
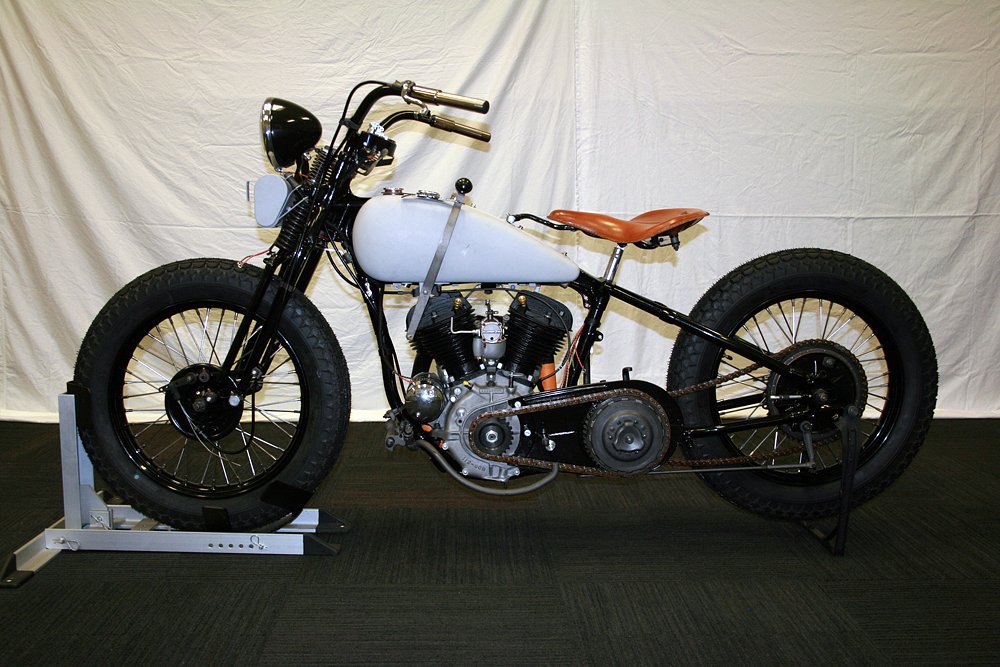
If you’ve followed along this far, you know that I’ve completed all the major hurdles of building a motorcycle from scratch. I’ve got a complete engine and transmission sitting on the bench and a rolling chassis waiting to receive them. All that’s left is a couple bolts here and there and the bike is ready to ride out the door. Sounds easy, right?
Before you answer, let me mention that Harley-Davidson made all their own hardware in the 1930s and often chose unusual sizes and threading. That meant there was no running down to the local hardware store to pick up whatever hardware I was missing. Instead, I wound up with about $2,000 in specialty fasteners.


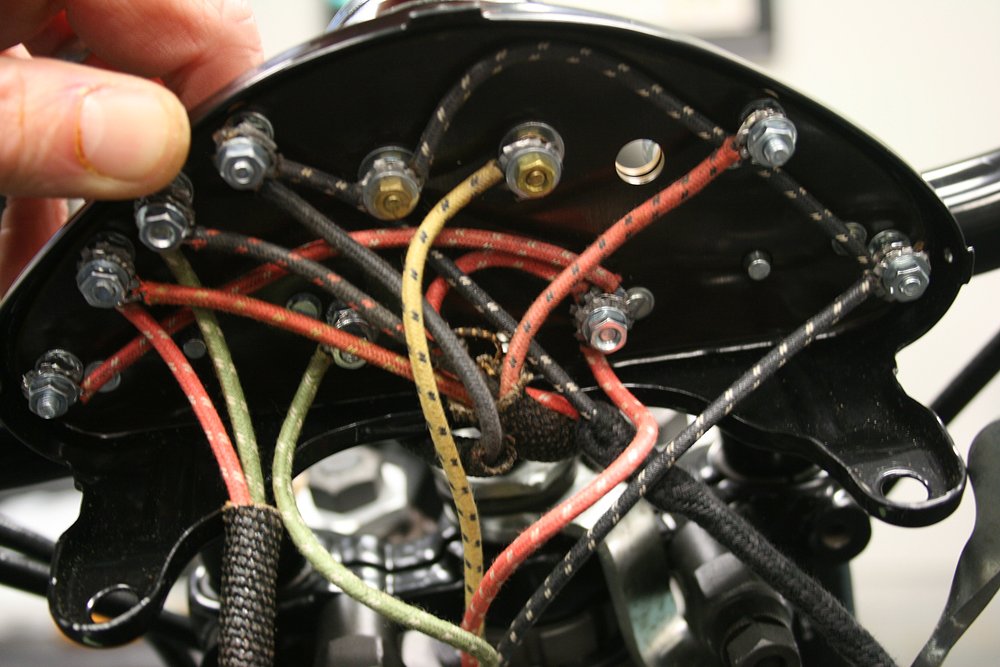

Unlike a modern motorcycle, my VL relies on adjustable shafts to operate the brakes, clutch and gears. Even the throttle uses a solid wire and a small shaft to open the butterfly on the carb. Getting these set correctly took a lot of trial and error, as each system had multiple points of adjustment and documentation on making these adjustments was not always as complete as I would have liked. Once everything was opening or closing as expected, it was on to standard engine adjustments like ignition timing and spark plug gap before it was time to finally start the engine.
I had expected a little trouble getting the engine started, but the reality was far worse than I could have imagined. First, I started kicking the bike over, again and again, playing with the throttle and timing adjustments. After about a 20-minute marathon of kicking, I looked down to see fluid running down the tank.
“Great!” I thought, “my gas caps must be leaking.” I soon realized it was sweat dripping off my face onto the tank!
I kept kicking, with the bike occasionally sputtering, giving me just enough encouragement not to give up. Then the bike kicked back so hard that I thought I had broken my foot. An hour later I could hardly walk and was on my way to Urgent Care for an X-ray.
While on the mend, I had a couple days to check over the bike. I discovered the front intake valve wasn’t closing completely. Although the manual showed how to lap the valves without tearing down the motor, that just seemed like a great way to trash my new motor when valve grinding compound worked its way into the valve train or, even worse, the cylinders. There was nothing to do but tear down the engine and remove the cylinders (remember this is a sidevalve so the valves are in the cylinders).
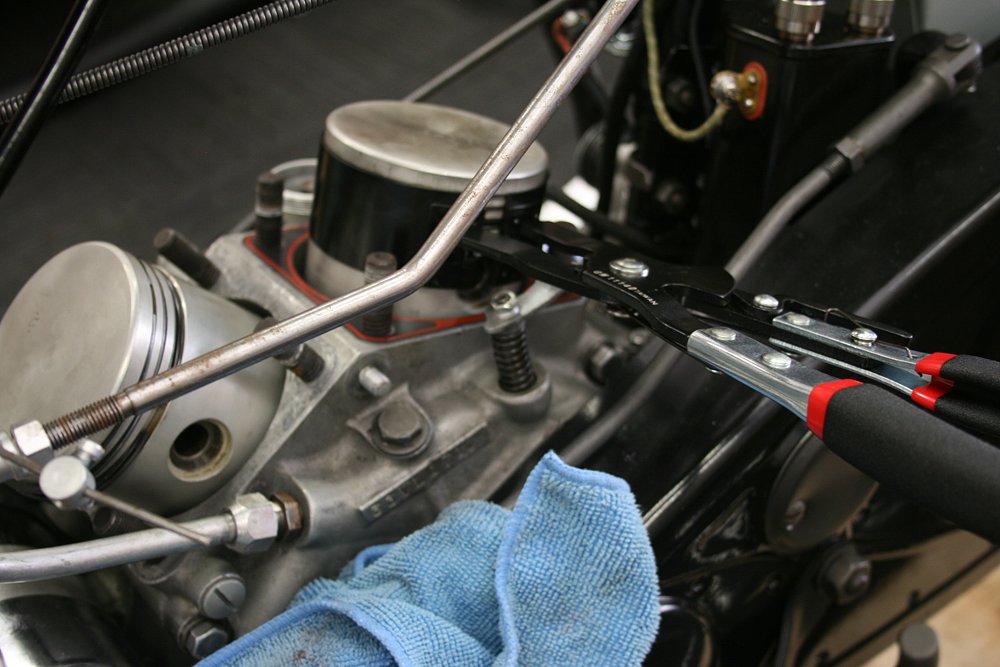
I sent the cylinders out to have the valves reseated and decided I probably should check the cam timing while I had the bike apart. Turns out the cam timing was wrong as well, with two of the cams being off, one by 90 degrees! Luckily, that was an easy fix, since the cam can be pulled out slightly, rotated to the correct orientation and slid back in.

When the cylinders came back from the machine shop, I took my time reassembling the engine (I did not want to have to tear it down again). I made sure to carefully seal the intake manifold, carburetor and head gaskets to ensure there were no vacuum leaks. Then I rolled up the garage door and prepared to start the bike.
This time, it started right away and after heat cycling the engine it was time to learn to ride a tank shifter and break in the motor. The factory manual suggested a break-in procedure which called for running the new motor up to 35 mph for the first 250 miles, 40 mph for the next 250 miles and 50 mph for the final 500 miles. That gave me ample time to master the hand shift and foot clutch as I rode circles around my neighborhood for the next couple weeks. The total loss oil system did a great job of making a trail of oil to mark my daily circuit.
Break-in went smoothly, so when I hit 500 miles on the engine, I parked the bike and pulled the sheet metal off for painting. Time was short, as well as funds, so I opted to paint it myself using Rustoleum spray paint, assuming that I could do a passable job quickly and easily. Three weeks and multiple repaints later, I had learned a lot more about using enamel spray paint than I ever wanted to know, but the results were better than expected. I went with Safety Blue for my main color with gloss black half-inch stripes and a pair of Harley-Davidson water slide decals on the tank, to make sure everyone at least could tell what kind of bike it was.

From start to finish, it took me about 22 months to find all the parts, rebuild, refinish and assemble a complete running motorcycle. Not too bad for a first attempt at a ground up build, but the real test will be seeing whether this 1933 VL can make it all the way across the country.

I’ve got three weeks to make the 3,600-plus-mile journey. Stay tuned.


