Making your own spark plug wires is very simple.
It is also, however, a fairly specific job, relegated at this point mostly to antique motorcycles and Harley-Davidsons. But let’s be realistic: There’s a hell of a lot of Harleys and old machinery still running around, so this is still a pretty relevant topic for many riders.
Why?
This was the first thing Lance asked me when I set off to write this article. I think he assumed you can go get premade spark plug wires right off the shelf. He is not incorrect; you can for some bikes. It’s very economical in many cases. But it’s not true for every bike. Here’s a few scenarios that are not exactly uncommon that would leave a rider high and dry for a store-bought solution:
- You moved ignition componentry (Did you relocate the coil and now need longer wires?)
- You mated items that never came together from a factory (Do you have a different-from-stock ignition setup, like maybe a magneto replacing a set of points?)
- You desire a change in wire color, diameter, or material (Are red-and-blue wires not available for your red-and-blue machine?)
Step 1: Assess what you have and what you need
Like many things in life, foresight beats hindsight here. There are some things you may want to consider. I’m gonna list off a few important questions you’ll likely ask, but it’s not comprehensive. For ease, I have broken it down by spark plug component.
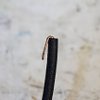
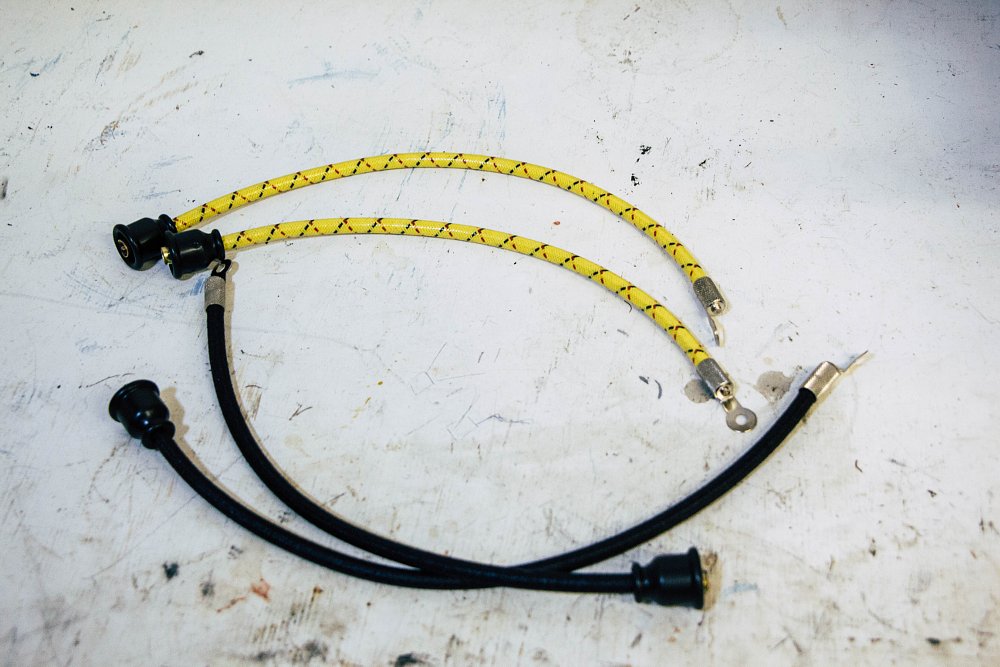
Wire. This seems obvious, but you have a few choices here. In the center of the wire is the core. Older motorcycles usually used copper-core wire, which offers little resistance, and you may see carbon-core wires, as well. However, these wires can generate all sorts of electrical “noise,” so suppression core wires were developed. You may see other materials used, too, like nylon or stainless steel. Different ignitions require different wire with different resistance values and different insulating abilities. These can be manipulated in the spark plug, the wire, the coil, and the plug boot, both intentionally and unintentionally. Incorrect mixing and matching can cause running issues, destroyed ignition components, and decreased voltage supplied to the plugs. You need to know what you need. The best way to make sure everything jives is to use what’s recommended by the component supplier(s), be they OEM, aftermarket, or a mish-mash, and understand that conflicts may arise.
The next item to consider is wire diameter. Usually this isn’t specified, but larger wires generally offer less resistance and thus better transmission of electricity to the sparkin’ plug. Early spark plug wires are usually seven mm or so, and later ones are often eight mm. Wires marketed for the “hi-po” look are often even larger yet, with 8.8 mm being a pretty common size. Harley-Davidson will even sell you a 10 mm spark plug wire, and I’ve seen 12 mm wires available. You should be aware that spark plug wires can help your engine get all the spark the coil can throw at it, but they won’t increase anything — at best, all wires can do is reduce losses. An ignition system is only as strong as the weakest part. If your current wires are doing the job, upgrading them won’t get you a lick more power.
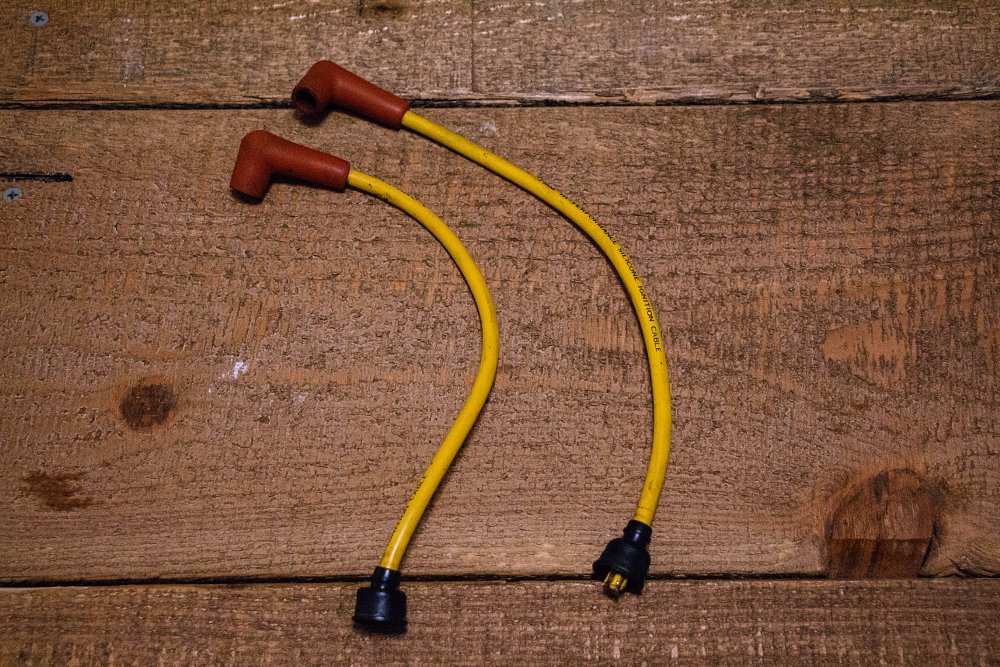
Moving outward, think about your jacket, the visible sheathing that protects the wire. (There’s a layer of braided fiber between the core and the jacket, but that’s not likely to come into play on your wire selection.) Most “modern” (or at least late-ish) motorcycles utilize silicone jackets for this purpose. Earlier motorcycles used cloth-covered wire. And, of course, there are all manners of colors available.
Length is important, as well. Match what you have on the bike if appropriate, or run a string in the routing you want, remove from motorcycle, and measure. Remember that wire can come in sets. (Buying a set for a V8 car is often the same price as buying a set for a twin motorcycle; it’s like a “Buy four for the price of one” sale. When I am looking for copper-core stuff for a magneto bike, I often hit up tractor parts places; they're often way cheaper than the exact same thing from a motorcycle shop.) Also remember that if buying wires of a uniform length (as opposed to one long length of bulk wire) that you can trim down, but not add on. So if you need an 18-inch wire and a seven-inch wire, you can buy one 30-inch section, but buying two 16-inch sections is no good. Sounds obvious, but don't forget to check.
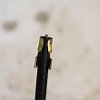
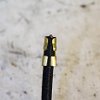
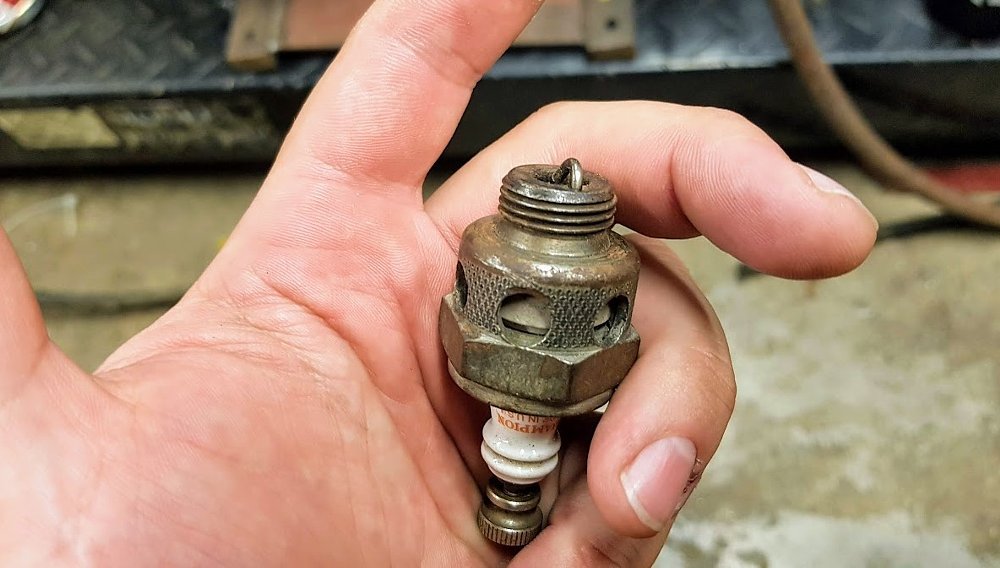
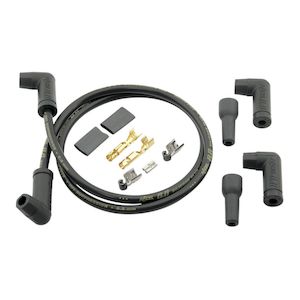
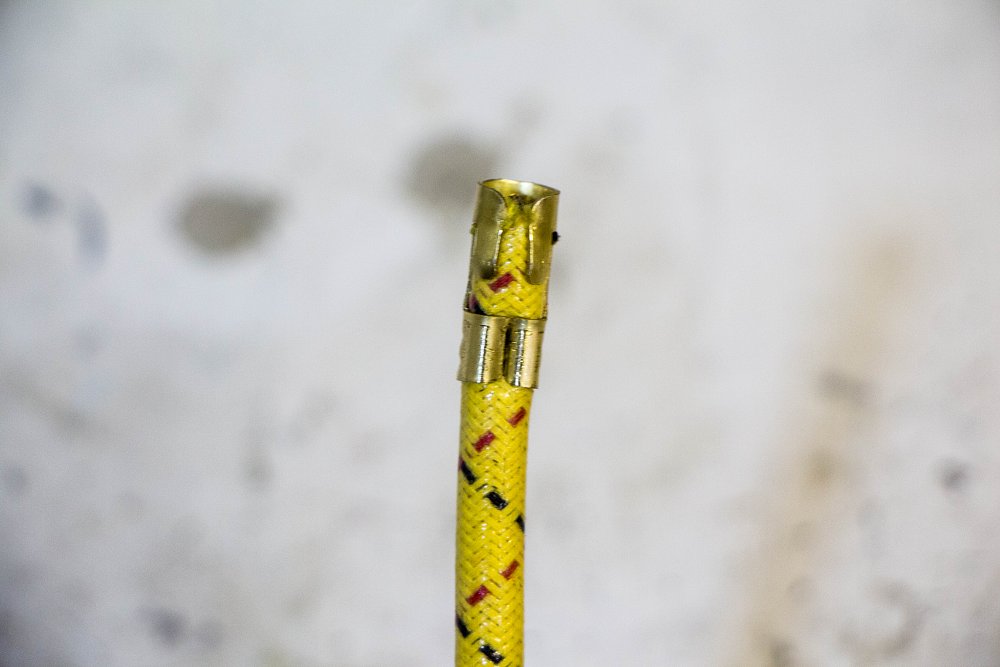
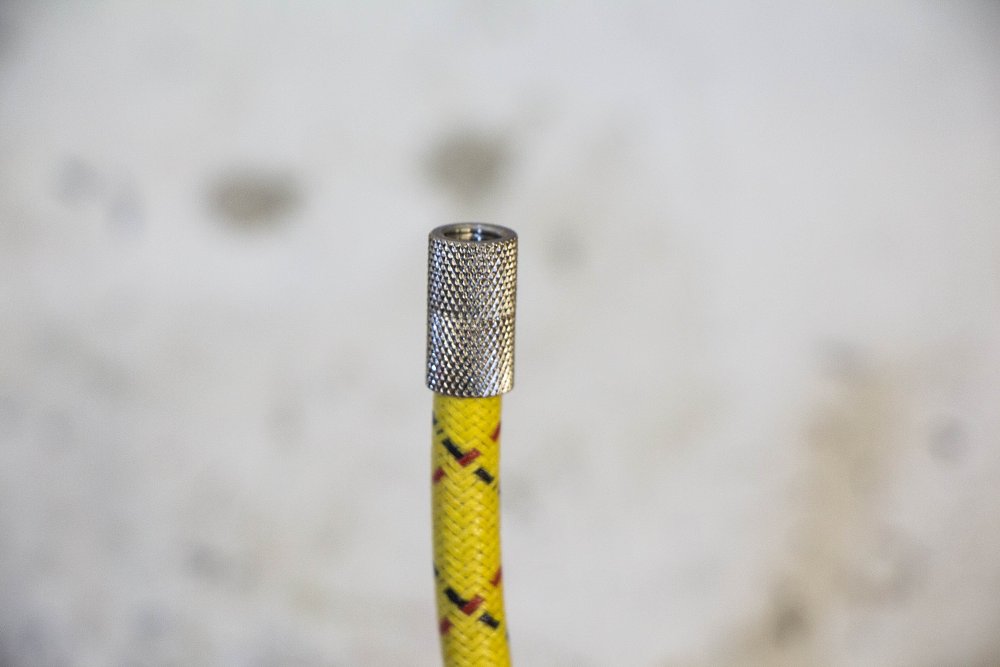
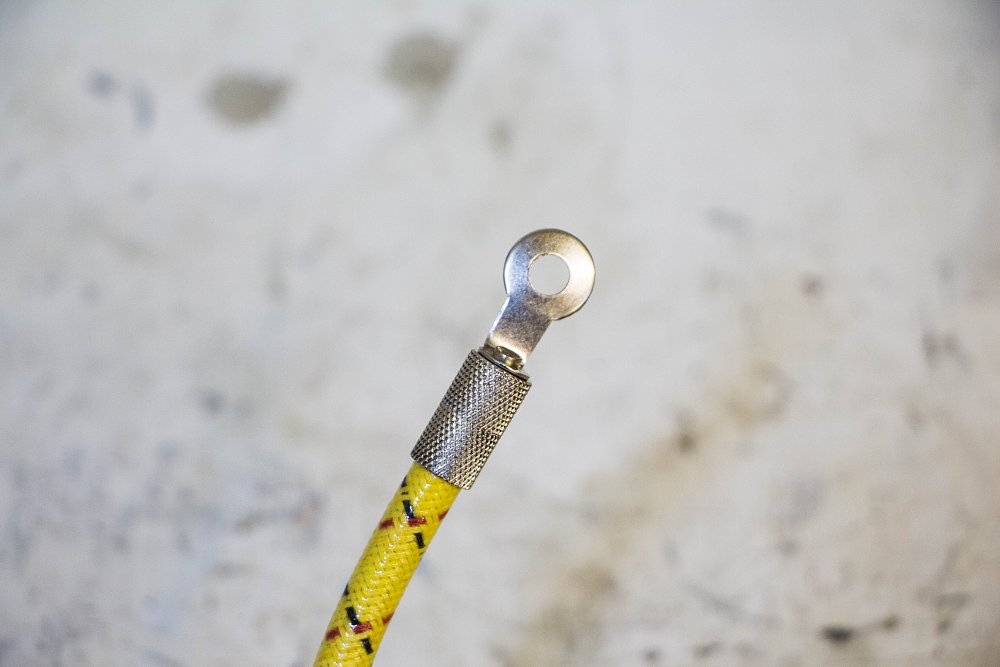
Terminals. These are the fiddly bits at the ends of the wires — you know, where the wire terminates? The type of terminal is important. Some motorcycles, like 1970s Japanese bikes, make use of integrated terminals and boots that also incorporate a resistor, and at the coil end, they are merely jammed into the coil, where the core contacts a small spike. Some terminals are made to snap down over a spark plug. Other terminals plug into something, like a magneto cap. The “angle of attack” matters, too. Commonly, you’ll see 90-degree, straight (sometimes called 180-degree) and 135-degree terminals.
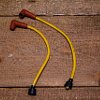
Boots. Boots protect your terminals from dirt and the elements, and they also protect you from getting a snappy buzz should you come into contact with a terminal! Most riders will want modern silicone or plastic boots, unless you’re striving for an antique look. These need to match your wire diameter and terminal angle. They also come in different colors and styles.
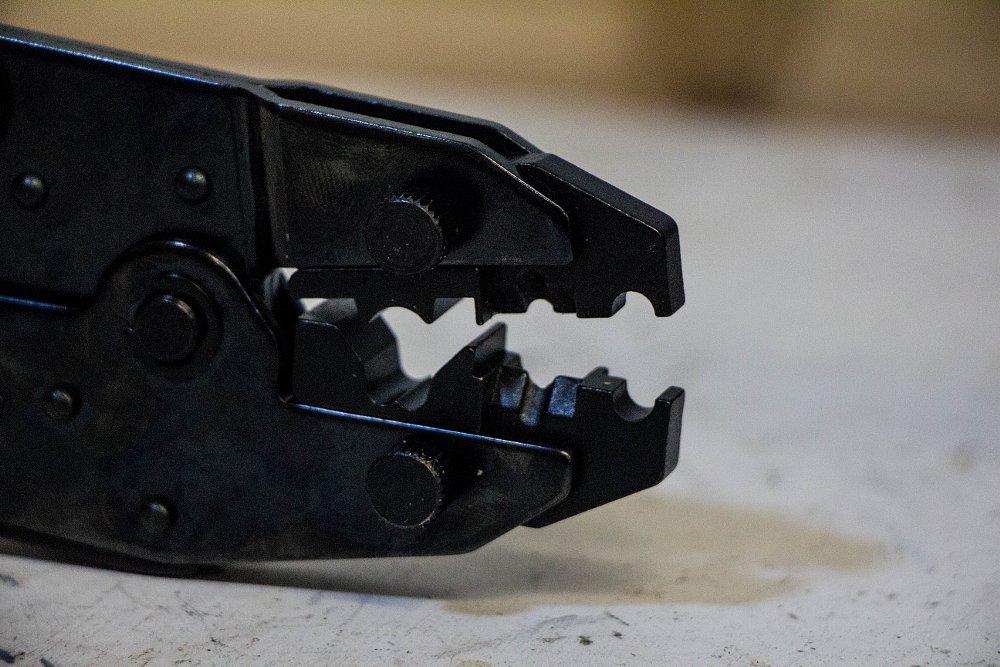
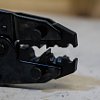
Tools. One difference between a pro job and a hack job are quality tools and the knowledge to use them correctly. When it comes to making wires, almost without fail, I have found tool performance is directly correlated to price. Remember, better tools will likely last you your whole motorcycle career. Amortize appropriately. There are fairly inexpensive plastic tools that work in a vise that are serviceable (sorta). There are cheap-o “just get by” tools you can scrounge up, like electrical crimpers and strippers. And then there are the big-buck, “do-it-right” tools that cost a lot because they’re worth it.
Step 2: Cut your wires to length
Cut to fit. Run a little long if you have the spike-and-thread arrangement found on Japanese bikes or a fold-back style; this will be most motorcycles.
Step 3: Prep the wires
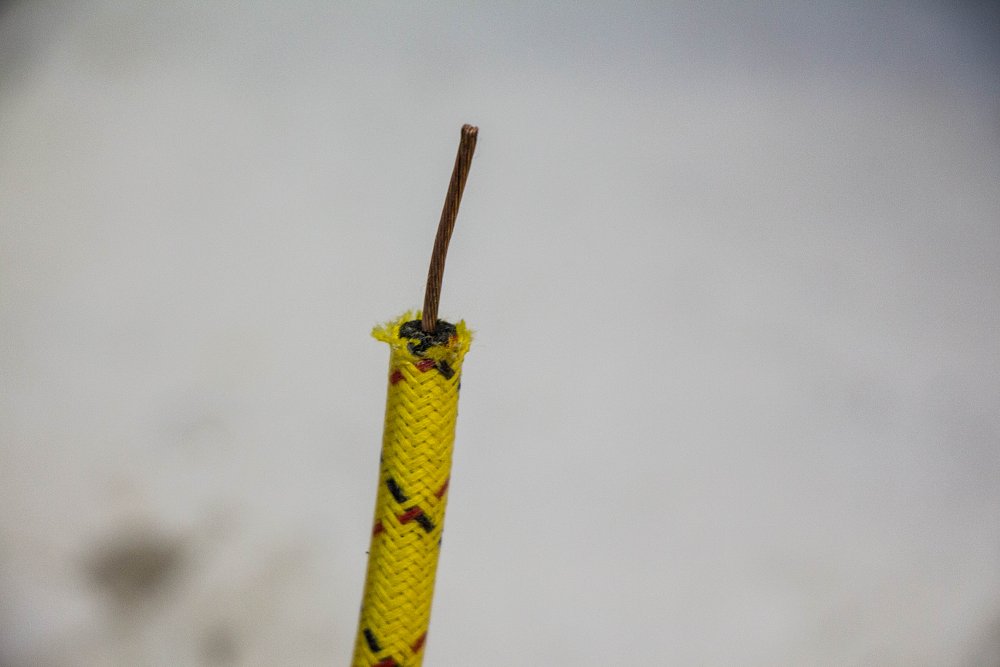
You can use a small jig that allows you to cut through jacket and insulation without damaging the core, or you can use a good set of strippers to do the same thing. You may be able to carefully perform this task with a razor and some patience. (In fact, my crimping tool is nowhere near as good at this task as an Xacto knife or razor blade.) Different wire styles will dictate how long to leave your stripped areas; double-crimped wires need far less exposed core than a fold-back style.
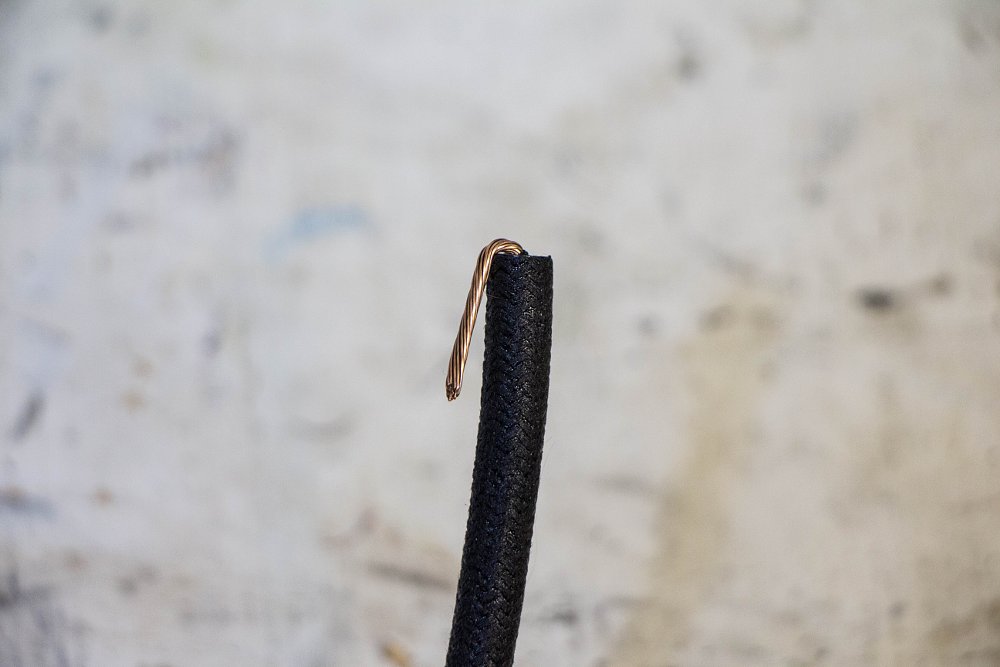
Install your terminal end at this time.You’ll want to put it in place and possibly even “pre-crimp” it, so the dies in your crimper can really do the best job they’re capable of. (Point the terminals into the wire’s insulation, so they bury themselves in there and potentially pick up more current if they get all the way through. What you don’t want is a loose terminal that’s crimped out-of-round.) If you’re using a spike-style terminal, you’d install the female threaded sleeve on the wire at this time.
Step 4: Fasten the terminal
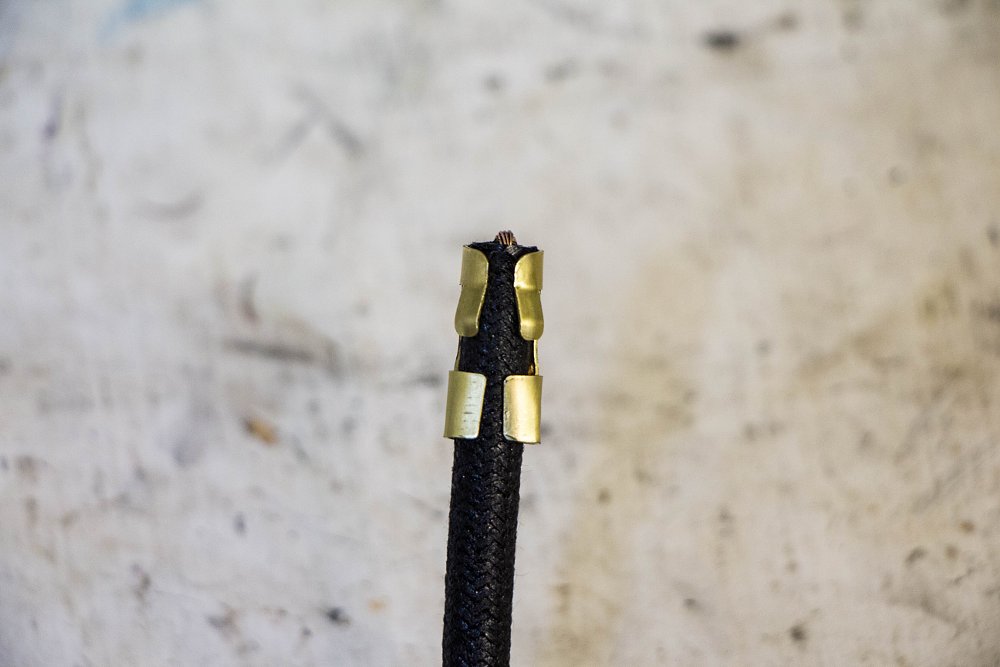
Here’s the moment of truth. After you’ve got your wire terminal in place, you need to crimp. This provides a good mechanical and electrical connection. If there’s one time where the right tools matter during this job, this is it. An improperly crimped wire can cause intermittent ignition problems that will have you pulling your hair out.
Note different terminals will have different attachment styles. If you’ve got an older metric machine utilizing resistor caps and spike-style coils I mentioned earlier, this may be the time where you screw down the spiked point into the female receptacle. In any event, your terminals should be fastened to the wires in such a manner that they are solidly affixed. Give them a yank to check; they should easily withstand that, as you’ll likely be doing it when you remove them for maintenance and repair. (But you should normally try and do that pretty gently.)
Step 5: Fine-tune
Make sure the terminal ends fit where they are supposed to. You’re looking for the sweet spot between “Man, that doesn’t even fit!” and “Ack, it fell off!” You can adjust the tension of the terminal a bit (carefully!) with needle-nose pliers.
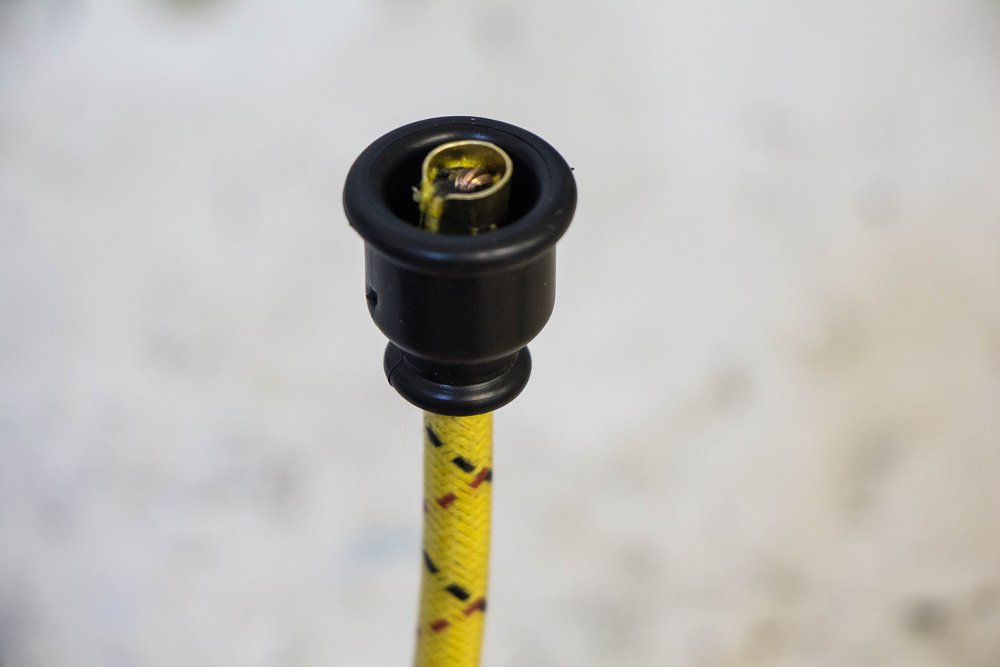

Step 6: Install your boots
Put boots on the terminals. Some soapy water can make this part a bit easier. The boots serve to seal out moisture and dirt. They also prevent you from getting a zap should you come into contact with a wire or boot. (If you touched the wire directly when the bike is running, you’d be very, very cognizant of that fact very shortly thereafter!)
Note that sometimes this is easier before the terminals are installed, and sometimes easier after. On my straight-style connectors, it kind of didn’t matter, so I installed them before I crimped. If, however, you were installing a 90 degree boot, those are definitely easier done after the fact.
Step 7: Spark ‘em up
Ground your plugs and check for spark or better yet, fire up your bike and go for a ride.