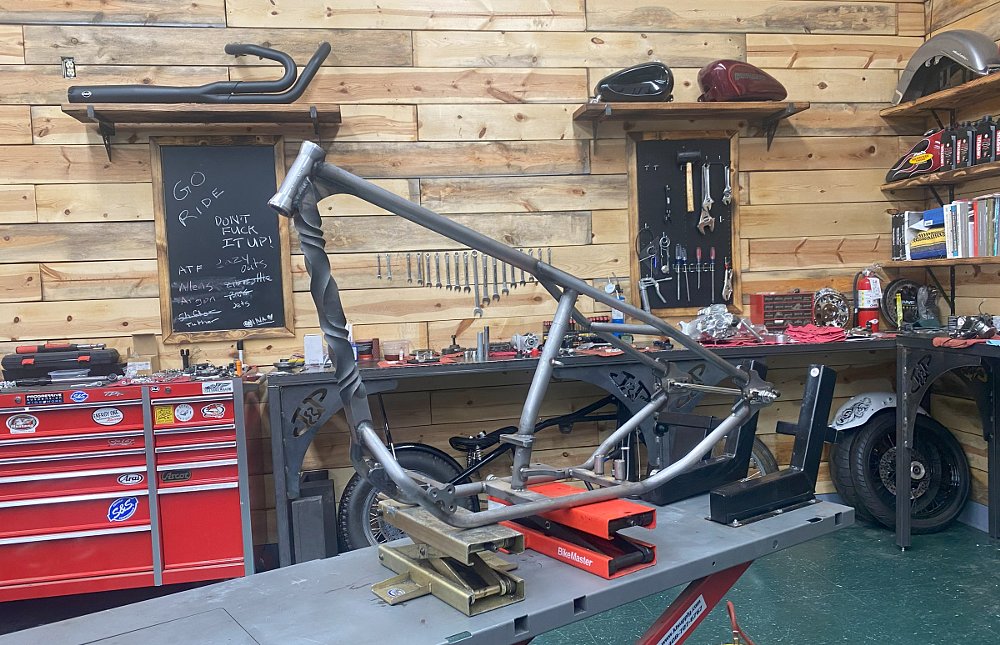
A few years back I was able to get my hands on an Indian Larry Twisted Downtube frame through a good friend of mine. And at the time I wasn’t in a place to build the bike but it was always sitting in the back of my mind. And I was always picking up parts for the project, knowing eventually I was going to build a rad chopper. And then a few months back that time came.
I knew the stars had to align a bit for this build. After all, it's an iconic frame from an iconic brand that builds incredible bikes around these very frames. I had to be on point with this build and I for sure didn’t want to try to build some sort of Indian Larry clone.
But what I did want to do was stay true to the style of choppers that are synonymous with the Indian Larry name. Typically those are quick handling, aggressive bikes meant to be ridden hard through the streets of Brooklyn, N.Y., dodging potholes and cars. Luckily I’m not really a long, stretched-out type of chopper guy. I like to keep my build as functional as possible, so the Indian Larry Brooklyn style was going to jibe with my personal style just right.
Due to its hardtail nature, a “chopper” is a classic look that doesn’t scream “performance,” but the more I thought about the bike, the more I kept leaning in the performance direction. So I set out to build the first performance chopper (at least in my eyes). I get it, it's an oxymoron. Choppers are low on function and high on style. But a few years ago if you would have run a “performance bagger” idea by someone, you probably would have been laughed out of the room, and now they are racing at Daytona. I’m not saying I expect to see a performance chopper series in MotoAmerica, but the idea isn’t that crazy. And the parts I had been squirreling away over the years were all kind of heading in that same direction, so the time had come. It was time to start turning wrenches.
Chassis, suspension, and brakes
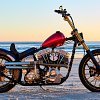
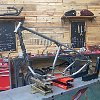
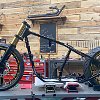
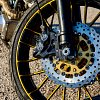
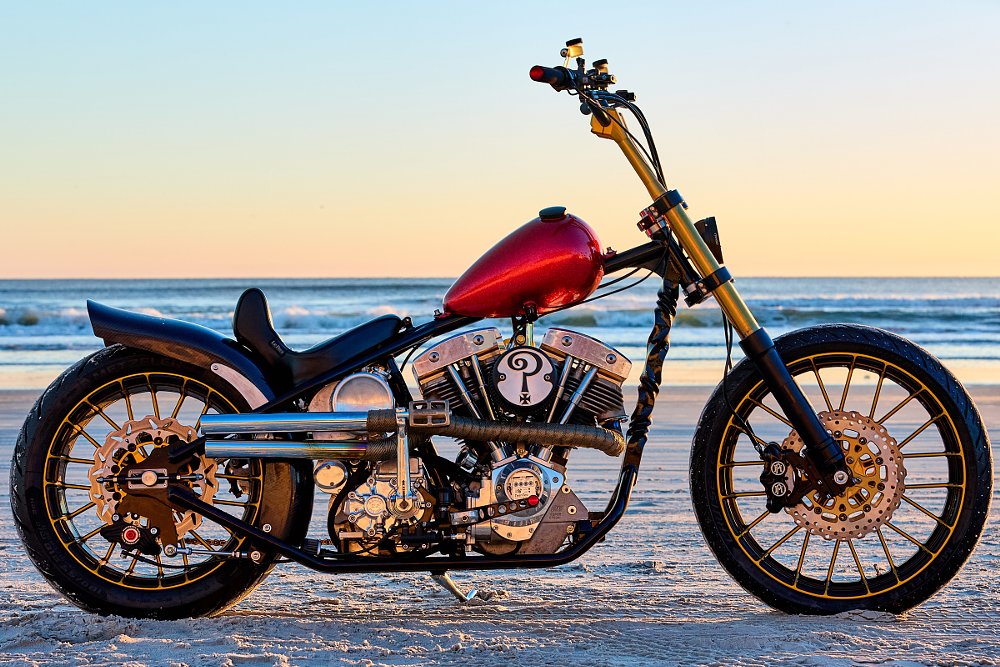
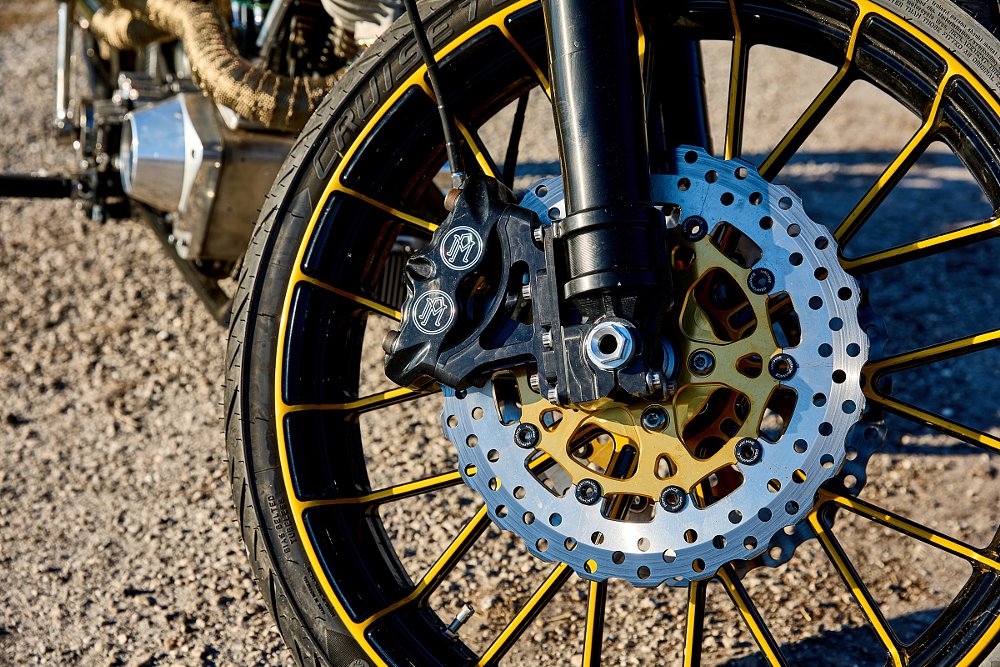
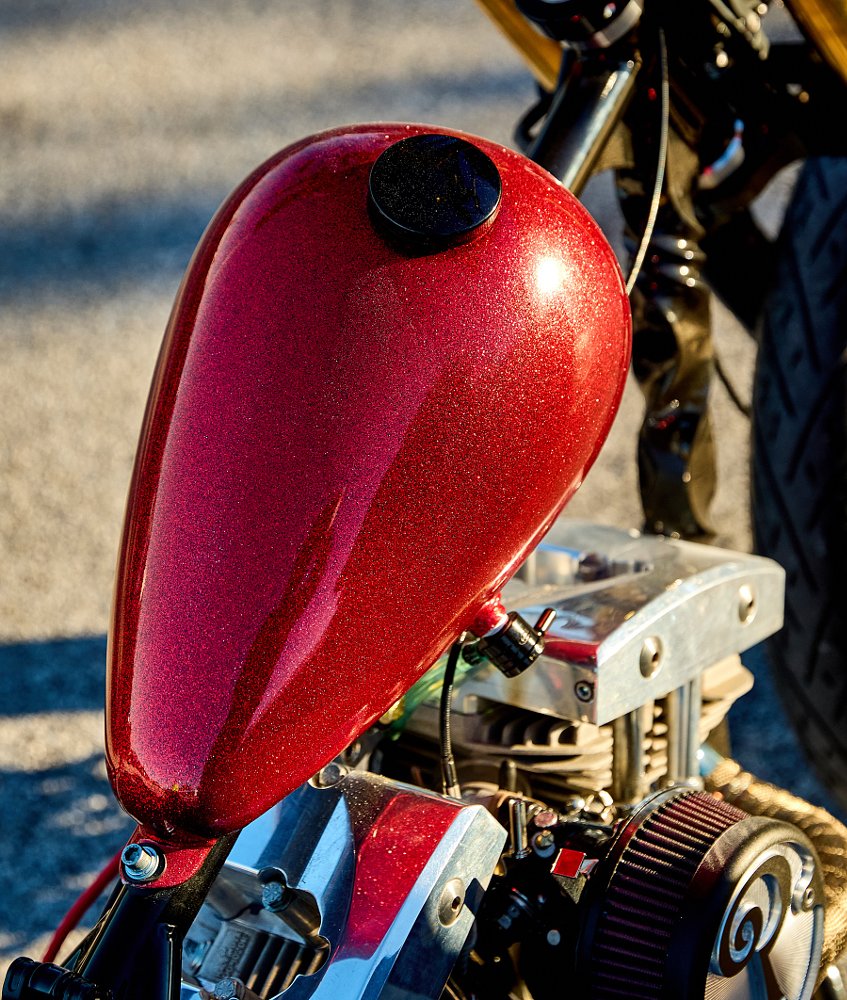
The frame geometry is a 30-degree rake, zero out, two-up frame that is set apart by its twisted downtube. They accomplish the wild look by welding the downtube to a table, heating it up to a glowing red and then two burly gents twist the steel back and forth until they reach the end of the piece. This ensures no two frames are alike; each one has its own unique look. The back end of the frame is set up for a wider wheel and tire, which worked perfectly for my performance angle. For a wheelset, I used a set of Arlen Ness Y-Spoke wheels that I had painted black and gold. The rear is a 5.5 x 18 and the front a 3.0 x 21, giving me a beefy look and plenty of space for some meaty rear rubber, so I chose some Metzeler Cruistecs.
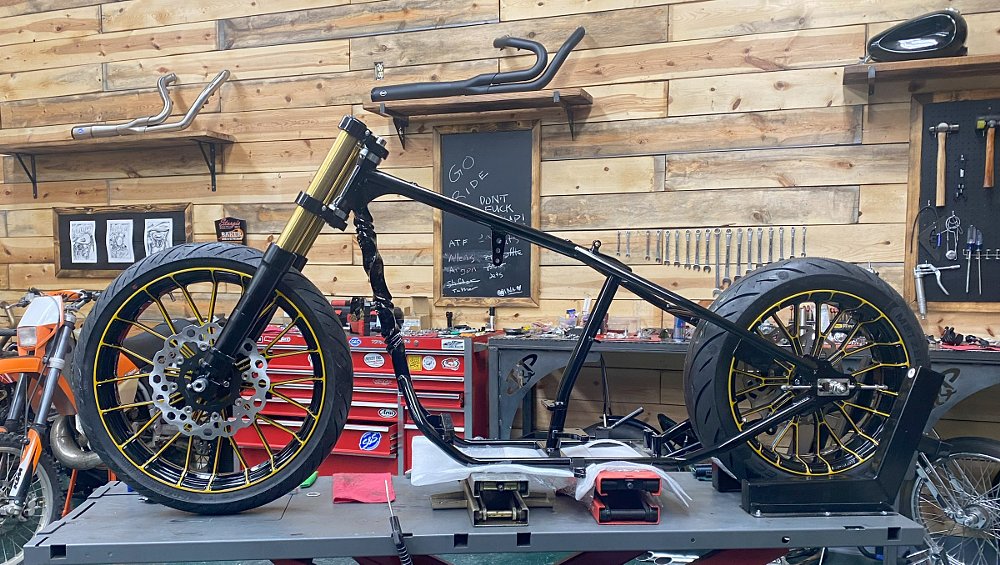
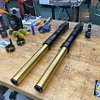
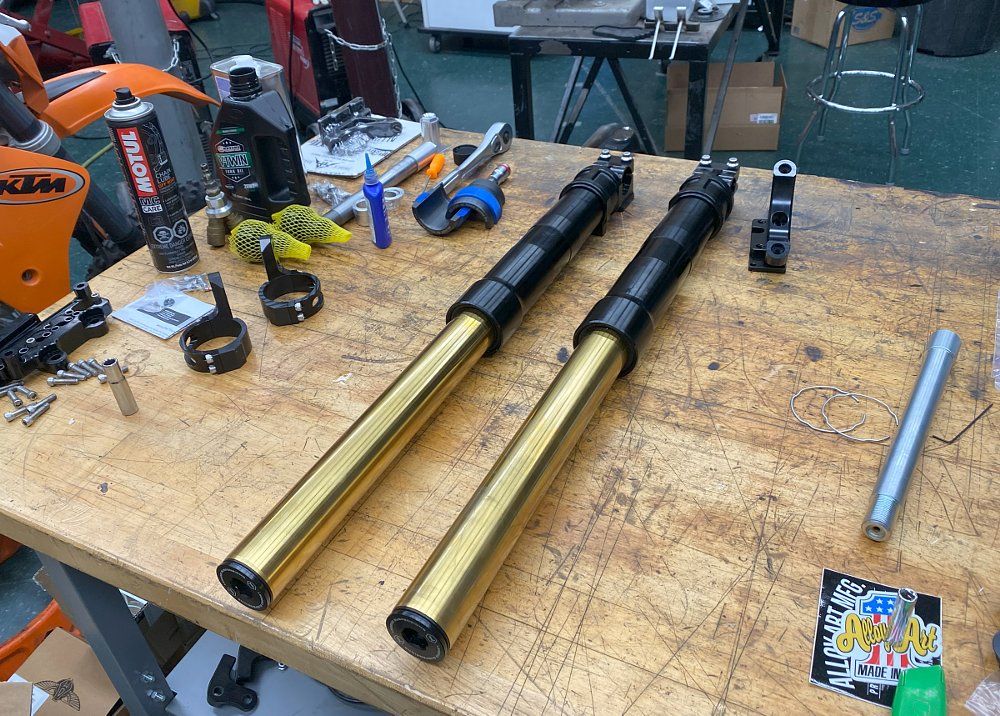
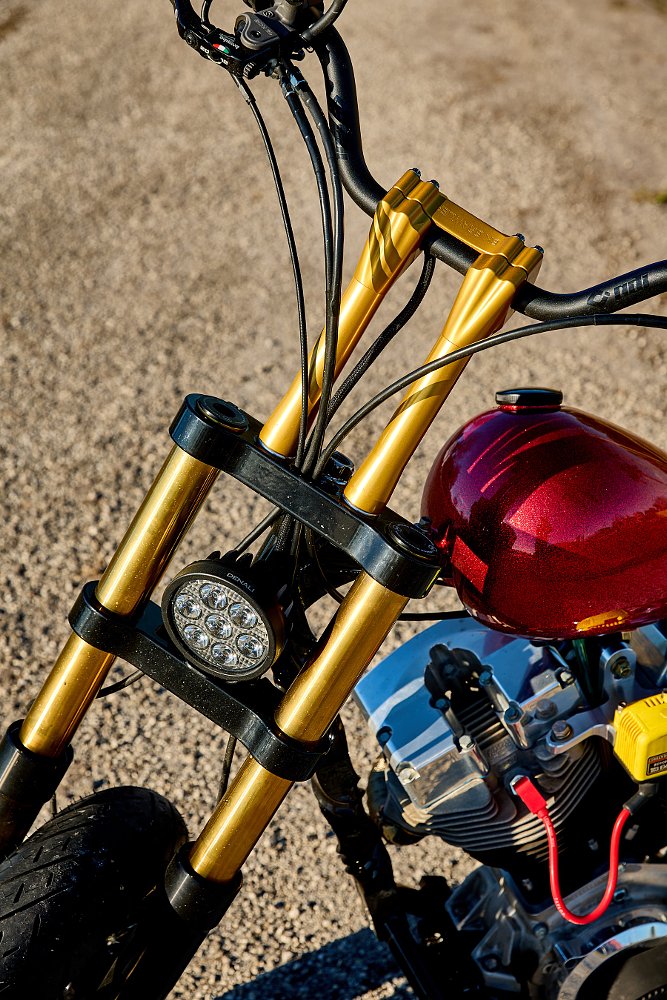
Obviously, the limited suspension on a chopper means you need to make what you have as functional as possible. With the wider wheels and tires, I didn’t want to run something as spindly as a 39 mm fork, and all the hot rod suspension these days is aimed at late-model Softails and baggers sporting 49 mm forks, so that's the direction I headed. I used a set of two over Ness gold tubes and slipped them into some really racey Alloy Art lowers and and dropped in a Legends AXEO cartridge kit to handle the bumps in the road. I was able to make that suspension setup work by using Bare Knuckle Performance’s narrow tree that is built for 49 mm tubes.
Brakes are another thing that gets neglected by chopper builders in the name of looking cool, but I had other plans for my performance chopper build and decided to mimic a set of sport bike brakes. Up front, I used a set of Performance Machine radial-mount calipers and matched them up to a set of Performance Machine floating rotors and had all of that being driven by a Brembo master cylinder up top. For the rear brake, I added a Performance Machine Vintage four-piston caliper that grabs onto a Galfer floating wave rotor to give this little chopper mega stopping power.
Powerplant and drivetrain
I struggled a little with my decision on an engine. I was really leaning into the idea of an Evo-style engine, but I really dig the classic style of a Shovelhead and how well it worked with the frame. In the end, I was able to have my cake and eat it too, so to speak.
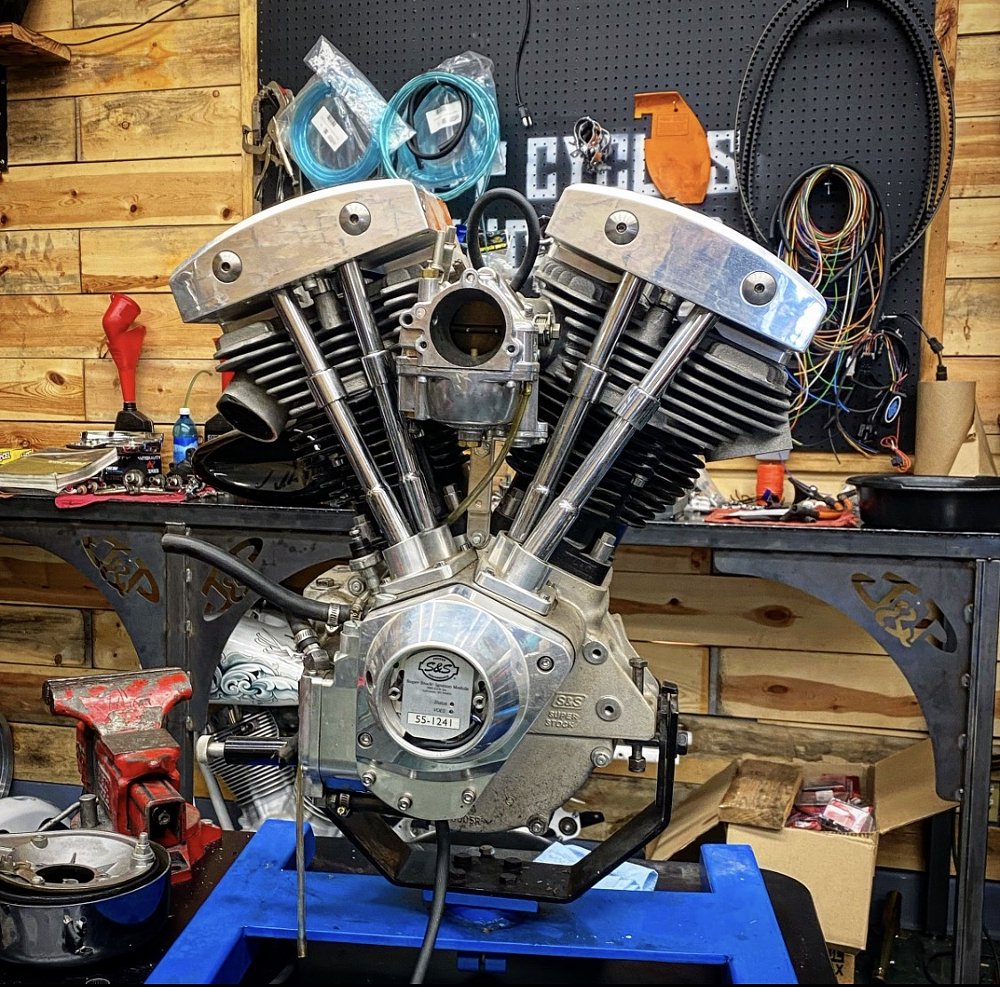
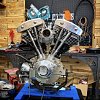
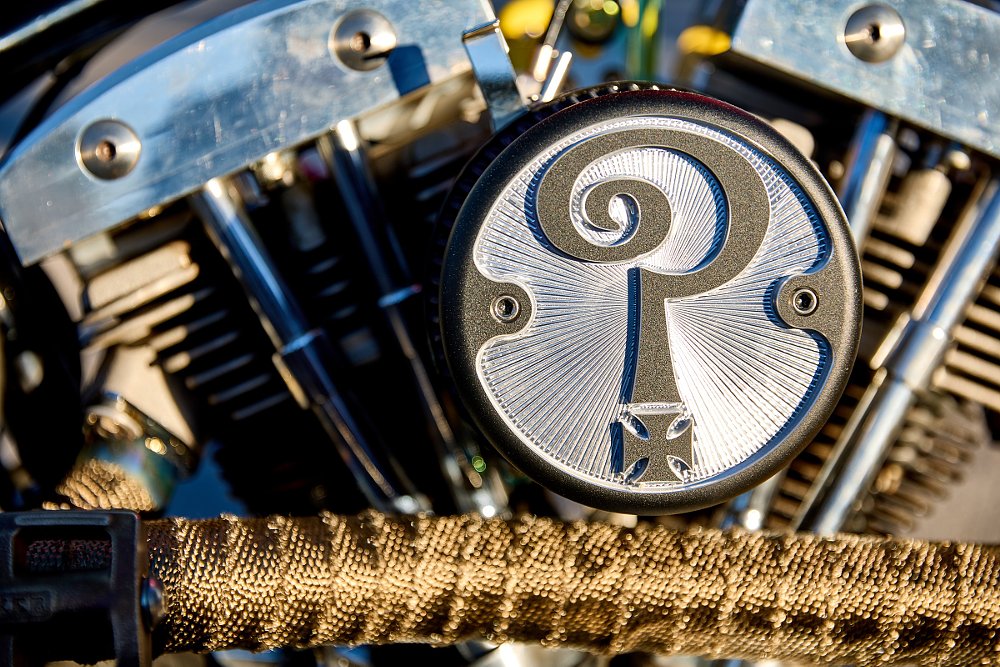
I used an S&S Cycle SH93 Shovelhead-style engine. I was able to keep that classic styling of the Shovelhead but get the performance I wanted through the extra cubic inches of the S&S Cycle powerhouse. To feed the beast, I used an S&S black series Super E carb and their stealth air cleaner, topped off with an Indian Larry question mark air cleaner cover.
For a transmission, there was only really ever one choice for me and that was Baker Drivetrain. Their 6-into-4 transmission was a must-do for me. It’s well known for its strength and durability and the six speeds give you the ability to have more gearing options, so you can have smooth highway rpms as well as quick acceleration around town. Topped off with a function-formed end cover and kicker pedal, it also looks incredible, like it was made to be mated up with that SH93. Rounding out the driveline is a BDL two-inch open belt drive with their ball bearing clutch. After all, you can’t really get all the chopper street cred without a belt drive.
Decorating the cake (accessories)
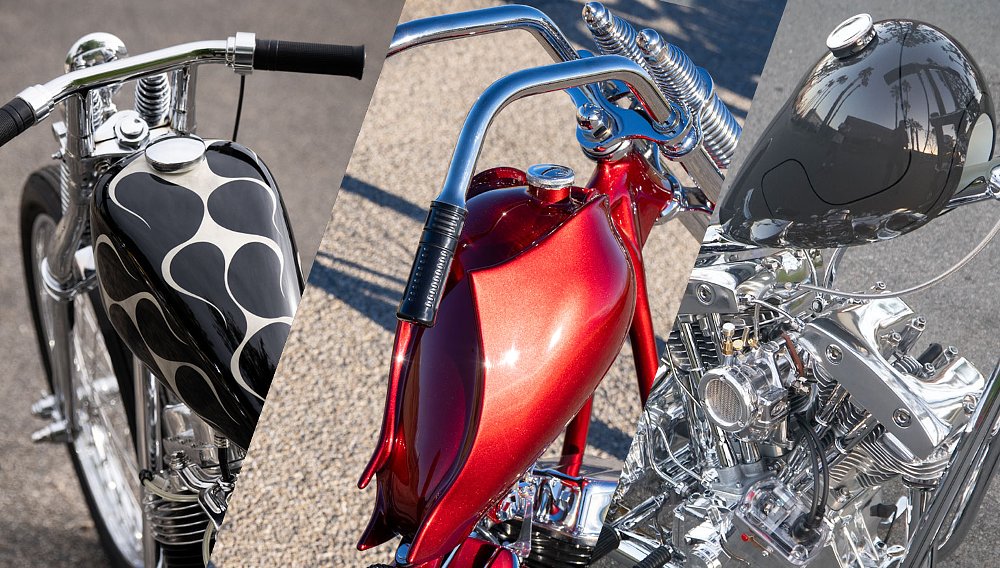
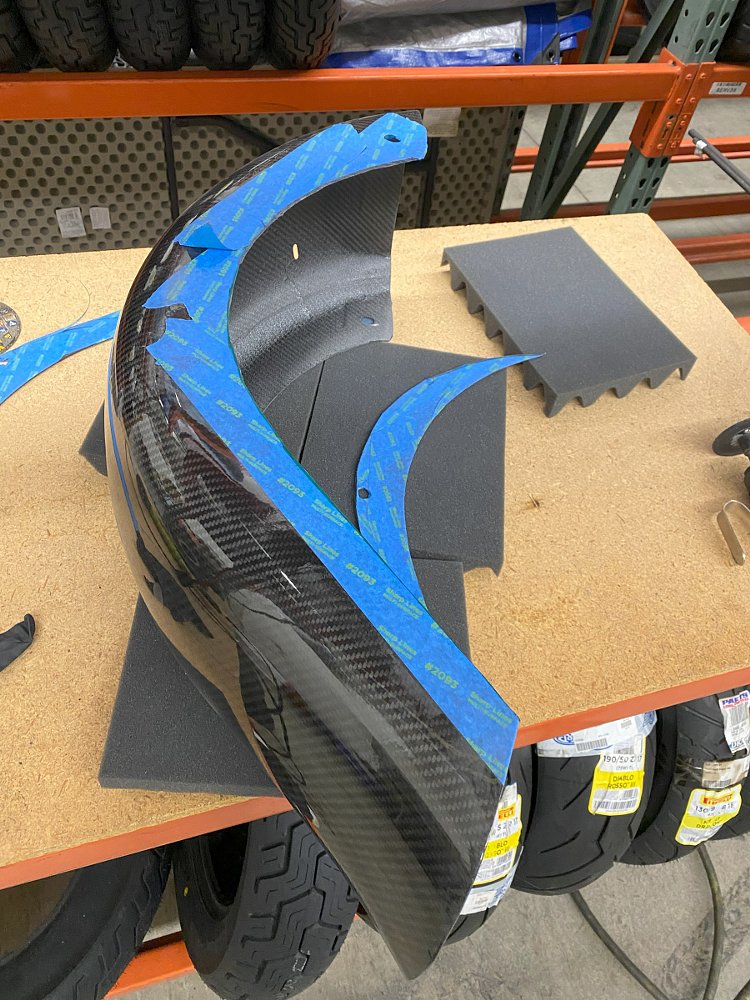
There isn’t much sheet metal to this machine, but what it does have stands out. The oil tank is an aluminum unit made for the frame that I left in all its polished aluminum glory. The front fender situation is straightforward: There isn’t one. The rear fender is a bit more complicated. I used a Slyfox carbon fiber fender that is meant for baggers. As cool as it turned out, it was kind of a pain in the ass. I fabbed up some aluminum fender struts to hold it and then I had to cut it into the shape I wanted. Cutting the carbon fender was nerve wracking because you really only get one shot. If you mess up your cut, there's no going back and carbon fiber dust is really bad for you, so that adds a little to the complexity, as well.
The few parts left to decorate this cake I actually pondered pretty hard. After all, one wacky part can really throw off the aesthetic of a build.
The pipes are not complicated but they fit the bike perfectly. A set of standard high-mount shotgun-style pipes fit the look and I wrapped them in some DEI pipe wrap to keep from barbecuing my inner thigh and also give them an old-school race look. The Le Pera Signature II is kind of my go-to for chopper seating. It's a comfortable ride and fits tight to the frame. Lighting and electrical on a chopper build should be pretty simple, but that doesn’t mean it has to suck. I used a Denali D7 headlight that is super bright and doesn’t take up much real estate. For a tail light, I used a Todd Cycle Martini taillight that I fabbed a mount for and hung off the left side of the frame. To wire the whole shooting match, I used a MotoGadget M-Unit. It’s absolutely the best way to wire a bike from scratch.
I finished the build with ice and snow on the ground here in South Dakota, so I was only able to fire the bike in the shop. So once I finally got the bike on dry ground in Florida, my stoke level was high to finally get to turn the wheels on a project that I had been sitting on for a few years. The shakedown went amazingly well and all systems were go. It’s alway a bit scary riding a bike for the first time after you spend months building it, but outside of a little fine tuning of the jetting, Cherry Bomb rode like a dream. The power is on tap, the short frame allows it to dart in and out without much effort and the brakes are amazing. After struggling to find a direction for the build, I think my performance chopper was absolutely the right choice.

Who knows, maybe there is a MotoAmerica race chopper class down the road? Kyle Wyman dragging knee on a Panhead? You never know.