

Social media makes reaching out to anyone easy, which means my Instagram inbox is often full of technical questions. While I reply to (almost) everything directly on my phone, we decided to publish a few of the more general-knowledge answers here so that more folks can benefit from the info.
This installment focuses on chains, cylinder service, and brake lights, but future recaps might cover anything from tires to valvetrain design, so check back regularly to ensure you don’t miss a concentrated dose of moto know-how. And if you’ve got a question you’d like answered, feel free to leave it in the comments section or shoot me a message on Instagram at @arihenning211.
Let’s get to the questions… and answers.
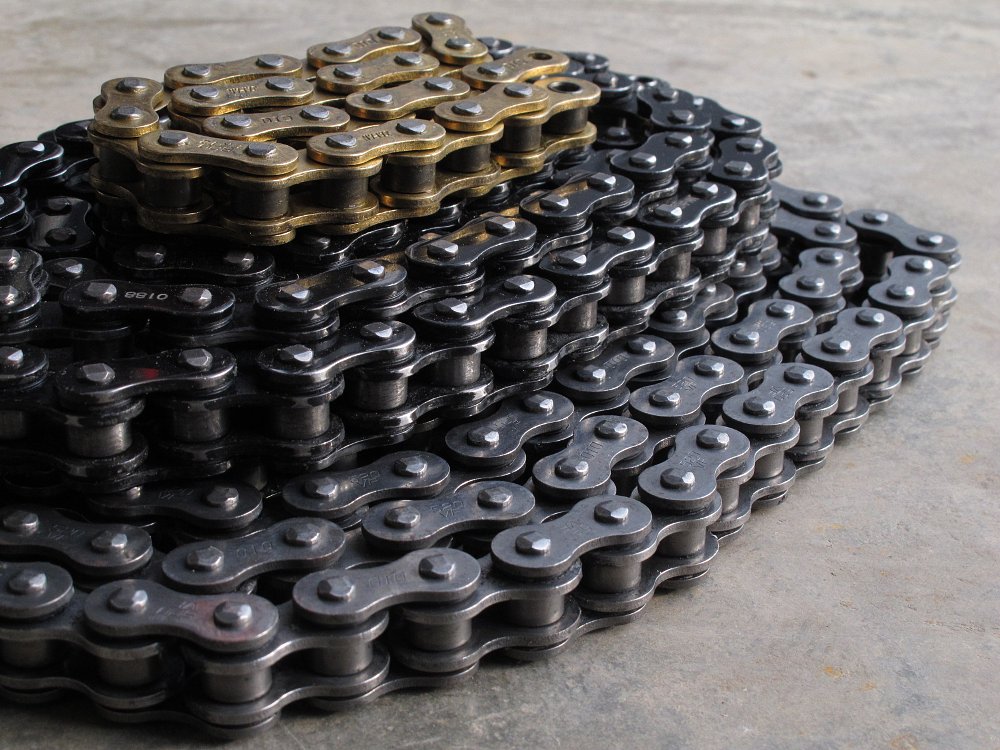
I have an MT-07 and I was wondering what your thoughts are on changing the chain from a 525 to a 520. Do you think it’s a worthwhile upgrade? — @bakut28
Switching from a 525 (5/16-inch bushing width) to a narrower 520 (1/4-inch bushing width) chain is a popular performance upgrade that’s an easy way to reduce a pound or two of rotating, unsprung weight, but it’s liable to be a downgrade in terms of durability since the skinnier chain will wear faster. You’ll also need to replace your sprockets to match the narrower 520 chain, and those will wear more quickly, as well.
So unless you’re tracking your FZ-07 or otherwise feel the need to squeeze every last bit of performance out of it, I’d stick to the stock chain size, and, just as importantly, steel sprockets (not aluminum) for the sake of durability.
I recently saw a YT video where the guy says he added horsepower by switching from a 525 down to 520 a chain. How does that actually add power? — @nateblanker
Like I mentioned in the previous answer, lightening your drivetrain, such as by switching to a 520 chain and an aluminum rear sprocket, can slash as much as three pounds and improve performance, at least slightly. The chain and sprockets are rotating weight, and the rear sprocket (and part of the chain) are also unsprung weight. Those are two categories of mass that are especially desirable to reduce since they have the biggest impact on handling.
A lighter drivetrain also impacts how quickly your bike accelerates, which is why people often say that it increases or “frees up” horsepower. The engine isn’t actually making any more power at the crank, but that power is acting on less weight, so you get going quicker. And since time is a factor in how dynamometers measure torque and horsepower, lighter drivetrain components will manifest as a minor (tenths or maybe a horsepower or two) bump in output.
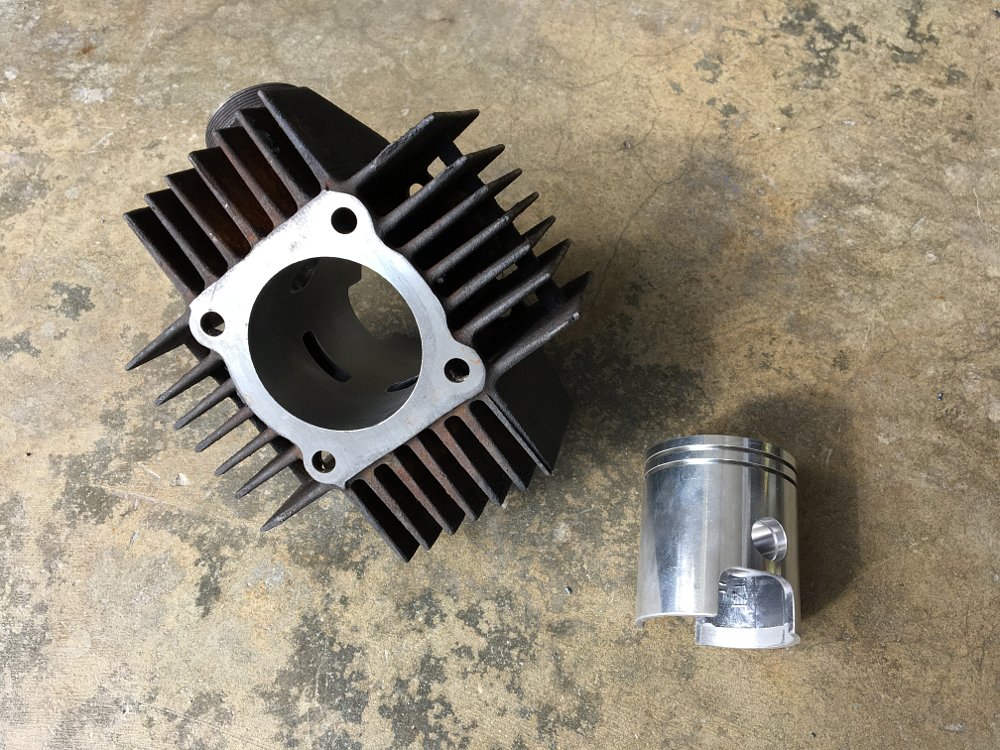
When boring a cylinder, how do you know how much to bore it? Also when replacing piston rings do you always have to bore and hone the cylinder? — @blackflag.nation
A cylinder’s finished bore size is determined by the diameter of the piston and the required piston-to-cylinder clearance, which will be listed in the service manual or the paperwork that accompanies an aftermarket piston. OEM oversize pistons come in standard sizes, known as “first over” through “fourth over” or “fifth over.” Each size refers to a 0.25 mm increase in bore, which is often enough to compensate for normal wear or light damage.
When installing an oversize piston, the cylinder will be bored to remove the bulk of the material and then honed to bring it to the exact diameter and to put that sweet crosshatch pattern on the cylinder walls. The crosshatching retains oil, which is critical for piston-ring lubrication and sealing.
When the piston and cylinder are still within spec and only the rings need replacing, it’s important to hone the cylinder to restore the crosshatching. Over time, the surface of the cylinder bore gets polished smooth, which reduces oil retention. This process is called glazing, and the light hone that accompanies a ring replacement is often referred to as deglazing.
We’ve talked about cylinder service before here on Common Tread. Check out this article for more info.
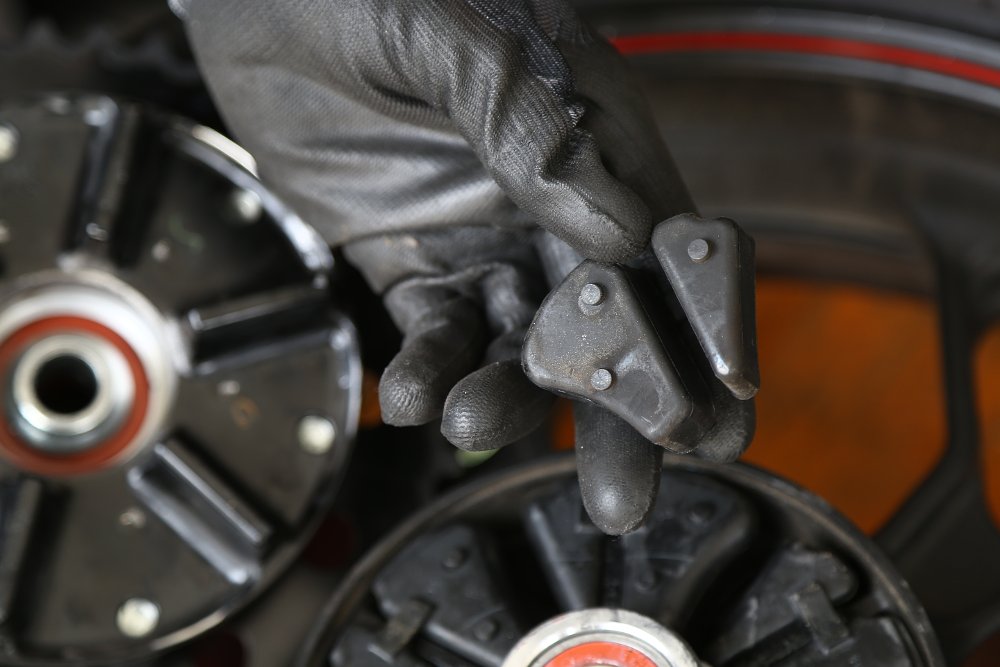
I have two bikes with cush drives that I’ve always ignored. How do I know when to replace the rubber and should I be doing anything when I have the wheel off? Grease, lube, etc. — @spencerspencerd
For those who aren’t familiar, cush drive refers to the rubber bumpers that sit between the hub and sprocket (or belt) carrier in your bike’s rear wheel. They serve to take the edge off of shock loads from power pulses, driveline lash, sloppy shifting, braking, etc.
Cush drive is pretty durable, but the rubber wedges can compress, harden, or deteriorate over time. And by time I mean tens of years and tens of thousands of miles. They don’t usually wear out until a bike is pretty long in the tooth.
Compression is the biggest issue with cush drive, as it introduces play that creates exactly the type of shock that cush drive is designed to eliminate. To check for play and compression, plunk your bike in gear and rock it back and forth while watching the rear sprocket and carrier. If it rotates relative to the hub, your cush drive is worn out and should be replaced. A few millimeters of movement are to be expected since the cushions are compressible, but if you see free rotation, that’s a bad sign.
For regular maintenance, it’s a good idea to visually inspect the rubbers for cracks or other damage any time you have the rear wheel off. As far as chemicals go, you can apply a little silicone to the rubber to keep them conditioned and to make installing the sprocket carrier easier, but that’s about it. Good on you for giving those hidden-but-critical bits some thought.
Recently my brake light stopped working, but both the brake light and taillight are constantly on. I replaced the fuse but that didn’t change anything. Any suggestions on what could be the problem? — @richfromlondon
A fuse check is always a good idea when you suspect an electrical issue, but the fact that the taillight is getting power shows that the fuse is good. The fact that both the taillight and brake light are always on points toward a problem with a brake-light switch.
Both your front and rear brake levers have switches attached to them to activate the brake light, and I’m guessing that one of these is stuck, out of adjustment, or otherwise malfunctioning.
Most front-brake switches are of the plunger type and may stick closed. Most rear-brake switches are an adjustable pull-type that uses a spring, and if you’ve recently adjusted the height of your rear brake pedal (or dropped the bike and bent the rear brake pedal) that may be out of adjustment. Inspect your switches and I bet you’ll find the problem.
Image Gallery


