Whether you call it clutch slack, clutch free play, or clutch tension, it refers to the clutch lever’s free movement before the cable gets taut, and how much of it there is will impact clutch function, feel, and longevity.
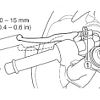
Many owner’s manuals list a free play spec as measured from the end of the clutch lever to the grip, and it’s typically between 10 and 20 millimeters. I’m not a fan of that method, however, because if you’ve installed aftermarket levers that are a different length, or you’ve busted the ball off the end or otherwise “customized” your lever against the ground (as Zack and I like to refer to it), then the factory spec is hard to apply.
Instead, I prefer to measure the gap between the back of the lever and the perch, which will be consistent regardless of the lever length or style and should typically be between two and four millimeters. Of course you can use a tape measure or ruler, but it just so happens that a nickel is about two mm thick, so if you set the clearance using one or two of those, you’ll be good.
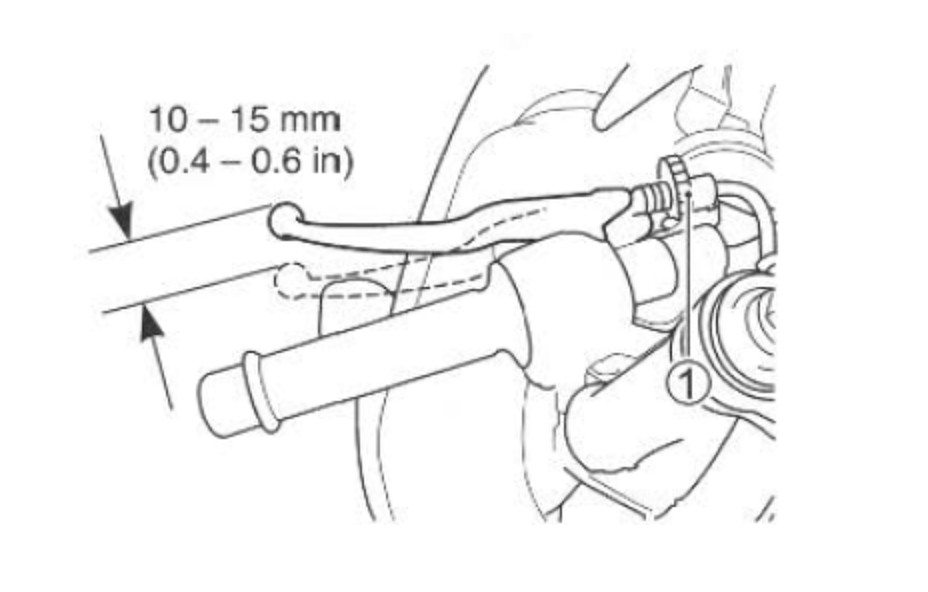
If the slack needs to be adjusted, loosen the locknut and turn the adjuster at the lever in to increase slack or out to reduce slack, and make sure that when you snug it back down the groove in the locknut and adjuster aren’t lined up. That’s so that the cable can’t jump out accidentally, and I like to aim the groove toward the back of the bike (when possible) so water and dirt are less likely to get in there.
If you’re unable to get the right amount of slack using the barrel adjuster at the lever, or if the adjuster is maxed out, you’ll need to move down to the secondary adjuster at the other end of the cable. This assembly is used to make large-scale changes, so before you crack the lock nuts free, spin the adjuster at the lever in most of the way to buy yourself more fine-tuning adjustment down the road.
While it’s a good idea to maintain the factory slack figure, it’s okay to tweak the clearance to make the clutch lever easier to reach or change the engagement point to where you want it. As long as the clutch fully disengages when you pull the lever in and fully engages when it’s out, then everything is working as it should.
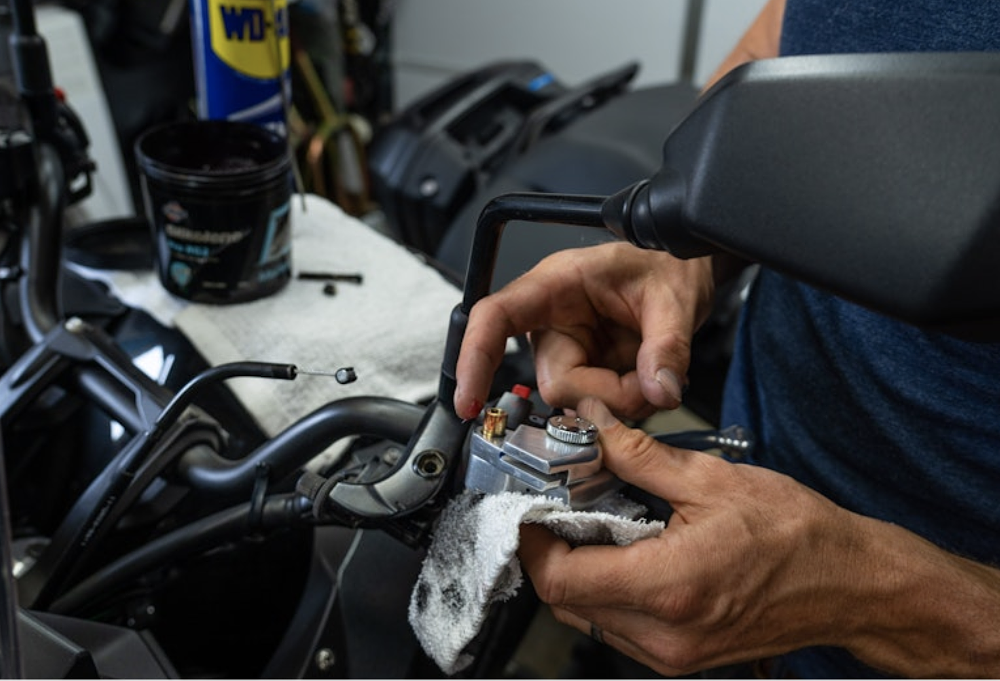
While we’re talking about clutch function, don’t forget to grease the lever pivot and lube the cable every so often to keep things moving smoothly. Take care of that, keep your cable adjusted properly, avoid burnouts and drag racing, and your clutch will likely last for 20,000 miles or more.
Image Gallery