
This time of year on Lemmy Mountain, the weather may force me to spend more time wrenching than riding, but that can be a good thing. Let me give you an example using the Honda XR650L I bought last year.
Every motorcycle has a weak spot. You don't have to have a degree from MIT to come up with some simple fixes to make yours more reliable.
Among the old, little-changed big dual-sports, the problems are well known: The Kawasaki KLR650 has its "doohickey," the Suzuki DR650 has issues with its neutral safety switch, and in the case of my XR650L, affectionately known as the BRP (Big Red Pig), the weak spot is the front sprocket. So I decided to spend a winter evening fixing that weakness.
If you have an XR650L, I suggest you follow along and make the same change on your bike. But you probably don't have an XR650L. In that case, consider this an example of how a little garage time, a bit of ingenuity and not much cash can make your ride more reliable.
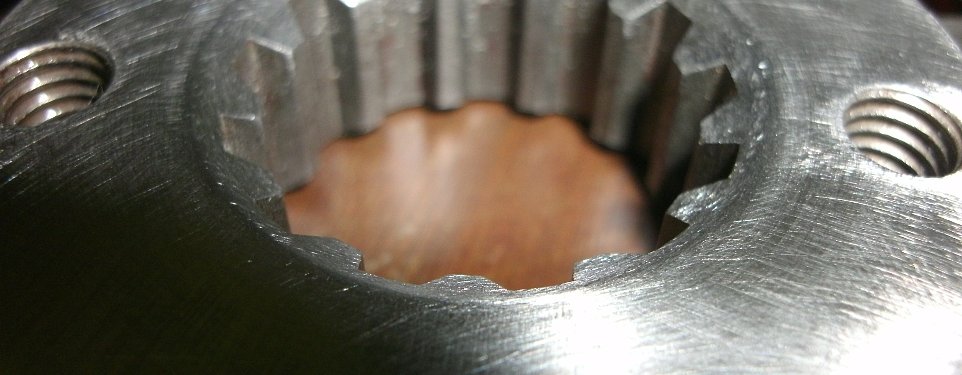
The well known problem with the front sprocket is that it is very thin and does not use much of the available splined area of the countershaft. In the real world, this lets the sprocket move around on the shaft, causing unnecessary wear. The countershaft splines are eventually destroyed, and you have to split the cases to make a repair.
I would like to pause here to explain my personal feelings about splitting cases: It sucks.
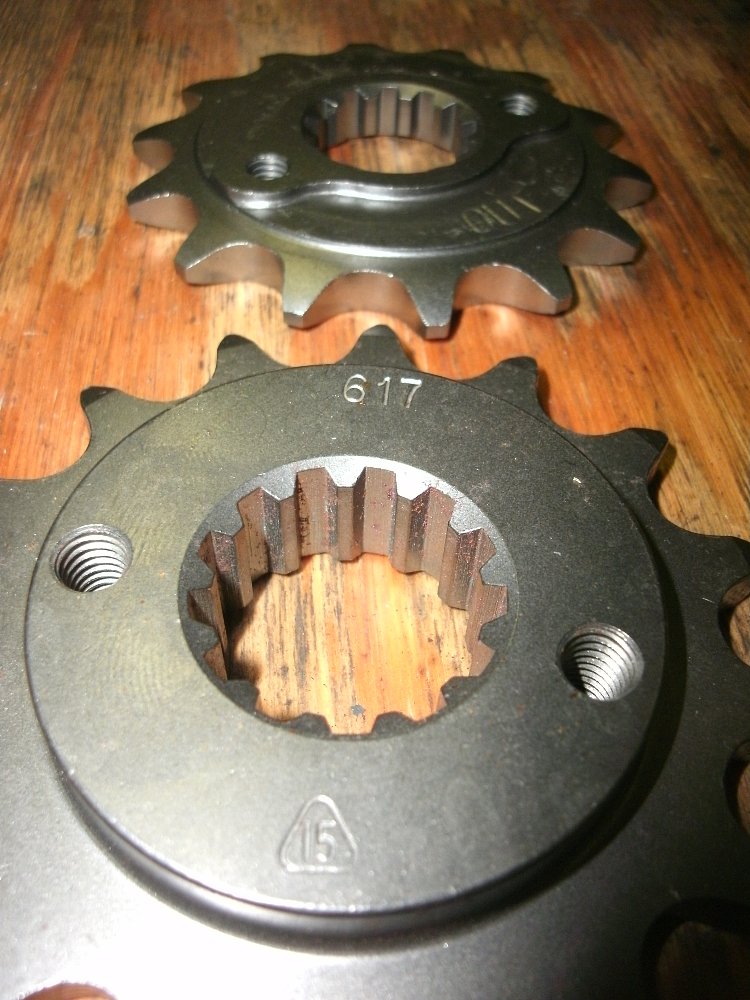
Plenty of folks have solved the problem by fitting up a “flipped” XR650R sprocket. The factory “L” sprocket is 8.5 mm in width, and the “R” sprocket is 13.6 mm. A few millimeters doesn’t sound like much, but that’s a 60 percent increase in width of spline contact area. All the power the engine makes is transmitted through that shaft.
In reading about this on a few online enthusiast forums, I learned that most folks simply buy a PBI or Moose sprocket for an “R,” flip it backwards, bolt it up, and go. If it fits. "If" is the operative word there. I read about several folks hammering their new sprockets onto their countershafts, and winced visibly. Say nothing of the bearings and seals, but goodness, cutting splines deeper with a sprocket? Egads. I can do better than that. I may homebrew everything, but I am not a hack. Most of the time.
So I set out to improve my XR my own way — the same way I do lots of stuff. I removed my front sprocket, and found, unsurprisingly, a rusted area as wide as my sprocket, no doubt due to the lateral (port-to-starboard) motion of the factory piece. Damage was minimal, but if my bike exhibited it in just 300 miles of total ride time, that should be an indicator that this is a serious problem. If you have an XRL, check your shaft for wear, or you run the risk of destroying a fairly critical part.

I ordered a 15-tooth sprocket for an XR650R, and test fit it. Mounted backwards, it fit the shaft beautifully in every way except for its depth. It would not slide inboard far enough for the sprocket keeper to slip into its groove. I considered facing the entire sprocket in a lathe. That method would probably work well. The solution I finally employed, though, was slightly different. I put a shank-mounted stone with a very convex face in the chuck of the drill press, and began removing material from the center of the sprocket.
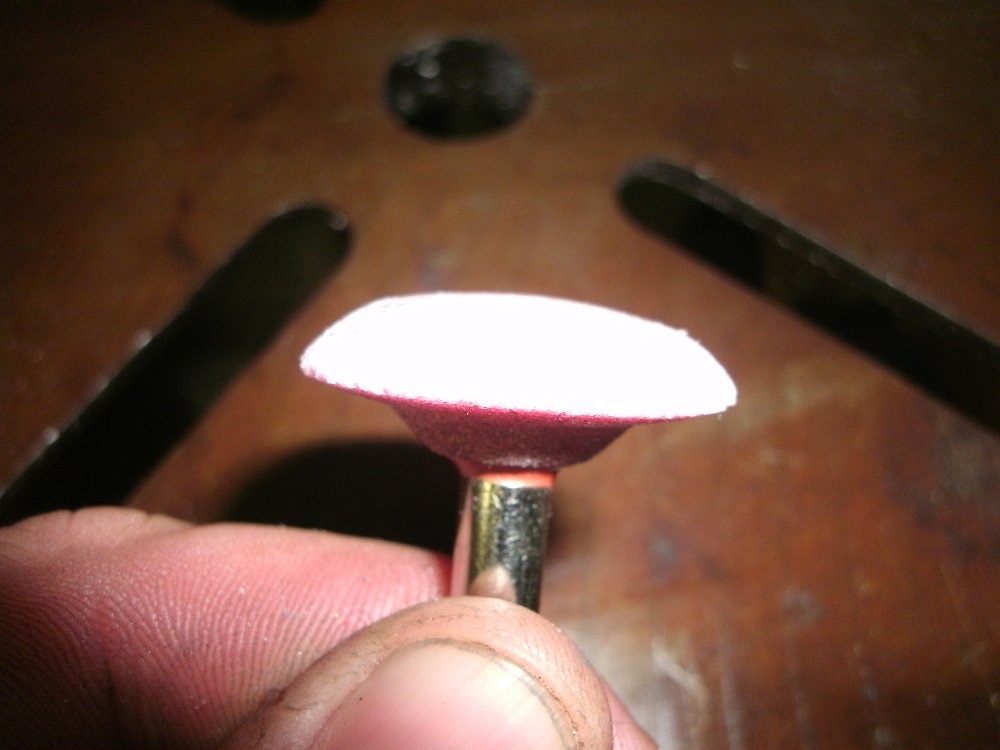
Given that a spinning, convex item will always self-center in a hole of smaller diameter, I was able to fillet the inside edge, allowing the sprocket to move further inboard. (I would have called it a bevel or a chamfer, but evidently, this is technically a filleted section, due to its concave profile. Who knew?) This movement exposed more and more of the retainer groove. As I got close to the sprocket face lining up with the rear of the groove, I began test-fitting frequently. I wanted the fit to be spot-on. It has been my experience that hand-fit items usually exhibit superior fit and wear characteristics.

After 20 minutes of alternating between my milk crate at the side of the bike and standing in front of the drill press, I had a sprocket that would slide on and just barely allow the sprocket retainer to slip on and rotate into position. The freshly machined section got some clean-up work with a bit of emery cloth to knock down any errant burrs. I then gave it a good dunk in the "poor-boy parts washer." (That's one of Mrs. Lemmy's old pots filled with kerosene and one of Lemmy Junior's old toothbrushes.) After cleaning the metal and abrasive particles off carefully, I gave the shaft splines a coat of grease, and then I installed it. After bolting the retainer into place, the sprocket was locked in firmly enough to feel like it was welded.

Much better, but I wasn't out of the woods just yet.
The final concern was the chain line. Since the “R” sprocket has a little different offset, I was concerned the chainline might be wonky. I reasoned that due to the chain’s length and looseness (due to the extreme suspension travel), I might get away with the sprocket swap. I was pleasantly surprised to find that my chainline actually seemed to improve! It was as straight as an arrow.

This modification is not "by the book." It's homegrown, but it's a sound modification, and the cost was not steep at all. I spent a quiet evening making something I needed that was custom-fit to my bike - that sort of stuff makes me grin.
If you happen to own an XR650L: Swap your sprocket, or at very least examine your countershaft for wear. Whatever bike you own, some time spent researching its weak points, the fixes applied by other owners, and a little time and ingenuity in the garage can make your motorcycle more reliable, give you a greater understanding of your machine, and provide personal satisfaction.
Image Gallery

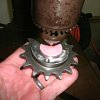
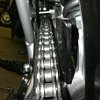
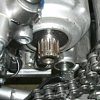
Image Gallery
