

If you’re struggling to bleed the air out of your motorcycle’s brakes, particularly after you’ve introduced a bunch of the stuff while replacing a hose or rebuilding a caliper, then try reverse bleeding. It’s fast, and very effective.
In reverse bleeding, you push brake fluid from the caliper up to the master cylinder, rather than pumping brake fluid down to the caliper. Reverse bleeding makes a lot of sense because air rises in liquid, so with this method you’re working with the laws of nature instead of against them.
To reverse bleed, you’ll need two rather intimidating 100 cc syringes; a few feet of flexible silicone hose that fits your caliper nipple (typically 3/16 inch ID works); two small zip ties; brake fluid, ideally from a sealed container so you know it’s fresh; a receptacle for the waste brake fluid; a screwdriver for your reservoir cover; a wrench for the bleeder bolt on the caliper; and some paper towels or rags to deal with any leaks or drips.
Start by removing the reservoir cap and sucking out the fluid with one of the syringes, then take your other syringe, push the hose on it, secure it with a zip tie, and fill it with fresh fluid, making sure to eject any air.
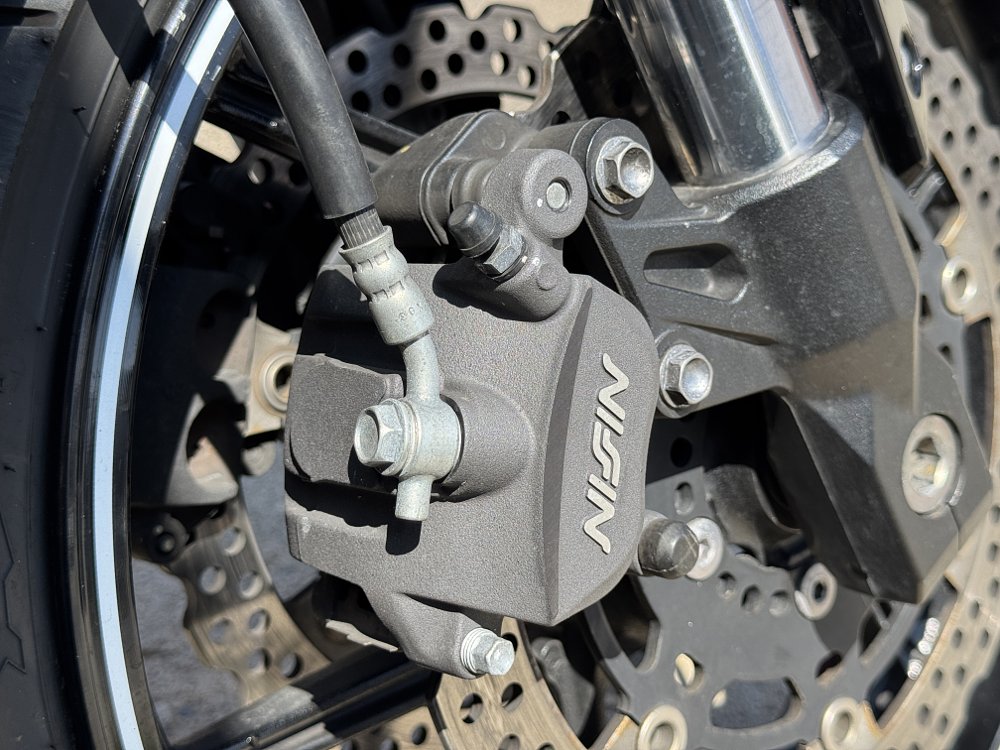
If your bike has a single disc then there’s only one place to start, but if your bike has dual discs, start at the caliper farthest from the master cylinder. In either case, put your wrench on the bleeder bolt and orient it so you’ll be able to swing it 45 to 90 degrees to open it. Now take your fresh-fluid syringe and put the hose over the bleeder bolt, secure it with a zip tie, and apply a little pressure to the plunger. Then, open the bleeder bolt just enough that the plunger starts to move.
Don’t open the bleeder bolt too far or it’s liable to leak, and resist the urge to press too hard on the syringe to avoid blowing the hose off the tip or the bleeder bolt, which will obviously make a huge mess. “Don’t press too hard” is subjective, so go ahead and wear safety glasses, just in case.

Apply slow, steady pressure to the plunger and look for fluid to start percolating into the reservoir. There really shouldn’t be any air bubbles to speak of, because all the air gets forced out ahead of the fluid — that’s the beauty of this method. Tackle the other caliper if you have a dual-disc setup, and since reverse-bleeding is so fast and wastes very little fluid, I like to fill and drain the reservoir two or three times before closing the bleeder bolt and checking the firmness of the lever.
If the lever is at all spongy after reverse bleeding, that means there’s still air in the system somewhere, so you may want to tap the caliper and hoses with a screwdriver handle to help dislodge bubbles that are lingering. You can also do a few rounds of conventional, top-down bleeding at the end just for good measure. This is especially important for calipers where the brake line connects well below the bleeder bolt. The good news here is that you don’t need to change your setup: When you pump the lever and open the bleeder, the syringe plunger will extend to accept the fluid.
So, why is top-down bleeding the norm instead of this faster, more effective, less wasteful approach? Off-road bikes’ hydraulic clutches are reverse bled, and every disc-brake mountain bike I’ve ever worked on includes caliper-up purging as part of the bleeding procedure, so it really is a good question.
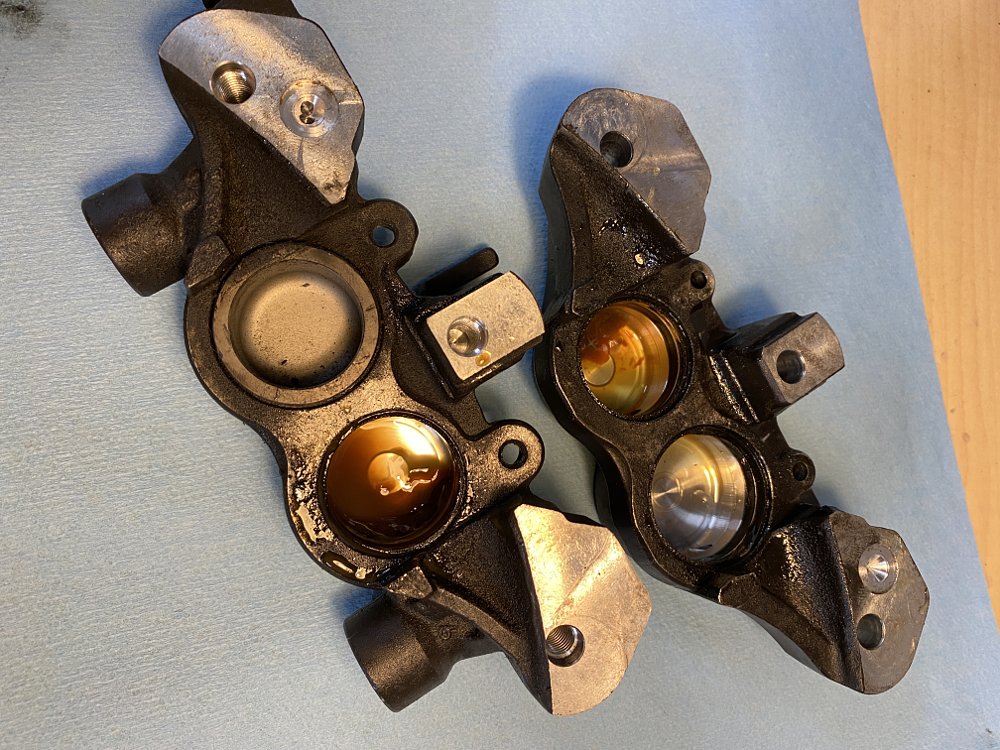
The only rational concern I’ve heard is that gunk that may have settled into the caliper could get forced up into delicate assemblies such as the ABS pump or master cylinder. The crud I’ve encountered is pretty gooey and unlikely to damage a seal or clog an orifice, but if you bleed from the top down then that “unlikely” becomes a very firm “can’t.”
Decide for yourself, but in my opinion reverse bleeding is effective, quick, doesn’t require much equipment, doesn’t waste a bunch of brake fluid, and is the fastest way to a firm lever after swapping a brake-system component.
Image Gallery

Image Gallery
