
Now, for the exciting conclusion of Save this Softail, with your host, Lemmy. In today's episode, Lemmy gets a special parcel, as cleverly foreshadowed in Part Three.

Everything was looking good in terms of repairing this Fat Boy until I discovered that the used primary shipped to me was a smorgasbord of stuff from a few different bikes. It was a mish-mash of parts never designed to work together. That’s OK, though, that happens all the time with used parts. I just remind myself to “buy ‘em right” and prepare to modify parts to fit whatever machine I am working on.
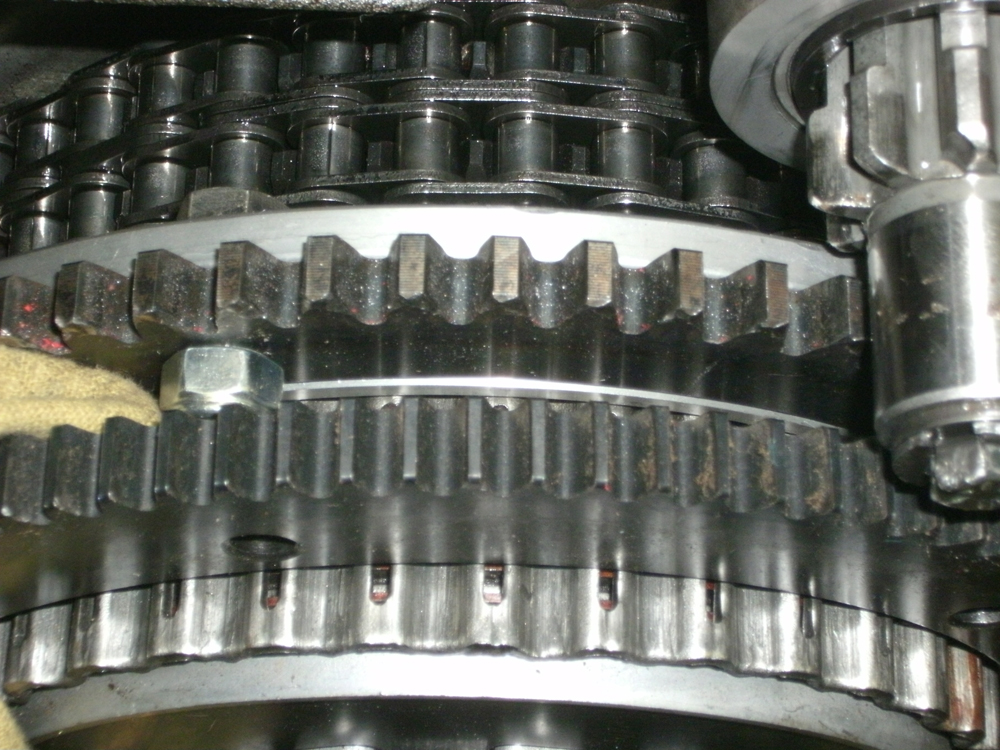
The main issue with this setup was the year of the clutch basket. The replacement clutch basket was a 36-tooth setup and its ring gear had the later, fine-mesh starter teeth on it, as seen here. The fine-mesh teeth are acknowledged to be somewhat weaker than the coarse teeth that earlier bikes were equipped with. Rather than change the starter drive gear to match the later-model ring gear, I opted instead to transplant the early ring gear onto the later clutch hub shell.
First came grinding off the rivet heads. I used a grinder because it was quick and I did not care about destroying the later model ring gear. I will throw it on my swap meet parts pile and sell it cheaply because I have broken through the case hardening. That’s an item I won’t feel too terrible about because the hardening in that area is non-critical and I will explain what I did to a potential buyer and lower the price accordingly. Given the fact that the fine-tooth ring gears are not sought-after, my bet is that in the future I will simply give it to a biker who needs to get his bike rolling on the cheap.
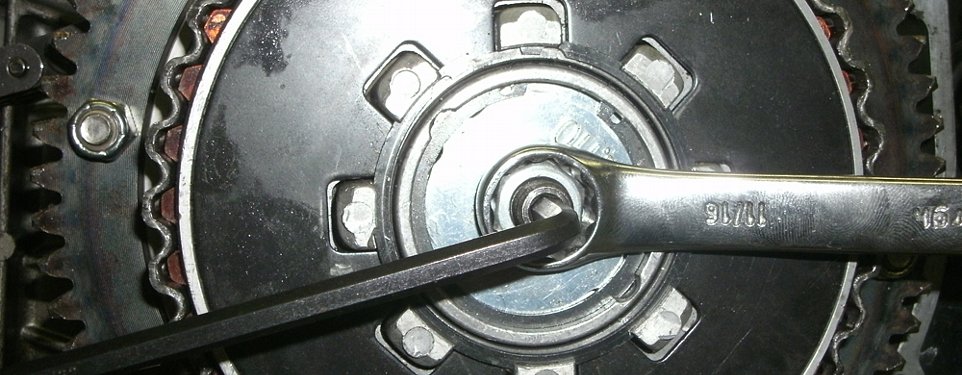
At this point, when I re-installed the original ring gear, I flipped it over to make use of the fresh ring gear teeth that had never had any wear put on them from the starter drive. That’s not a factory recommendation to my knowledge, but it’s something old bikers have been doing for years to keep their bikes on the road a little longer for short coin. You can see in the following pictures the nylon lock nuts I used to help keep those nuts where I put them.
Now, about that tooth count. The 1993 setup was a 24/37 tooth setup. The used compensator sprocket that came to me was a 25-tooth unit and the new hub shell was 36 teeth. Those two combos use the same primary chain and yield the same final drive ratio. However, the 25-tooth compensating sprocket that I got had worn through its hardening, likely from the bolt backing off at some point and the sprocket spinning on its shaft at high speed. Ergo, it was junk, so I elected to use the 24 that was originally in there with the new-to-the-bike 36-tooth sprocket in the rear. That setup offers a slightly more aggressive launch while giving up a bit of top-end power. It’s a popular ratio to run, so I forged on.
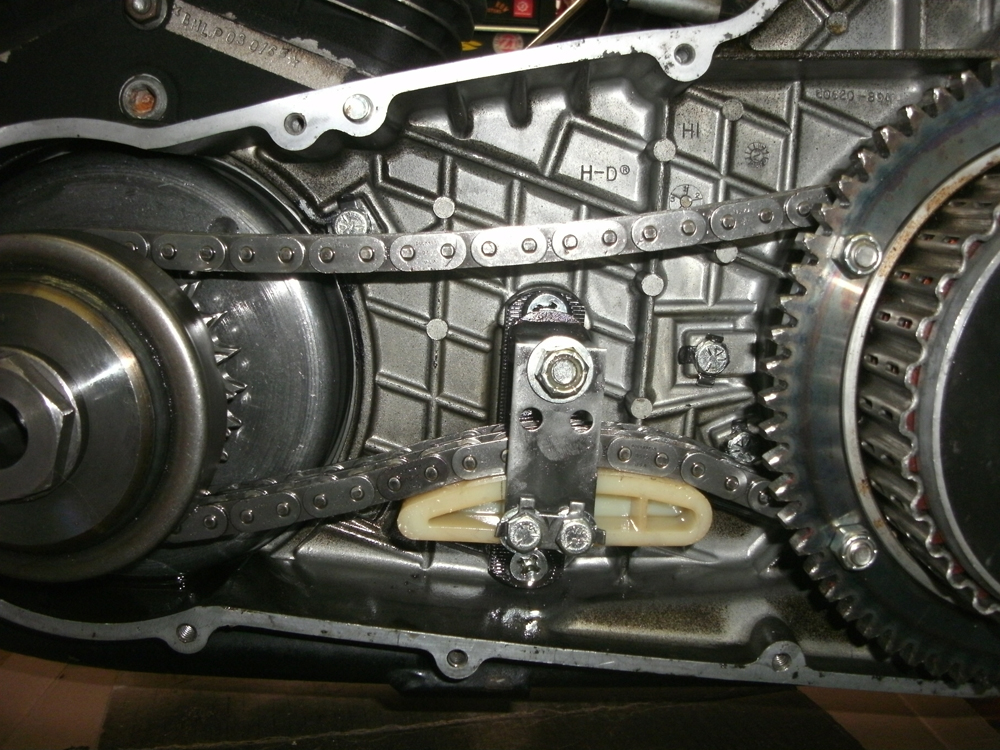
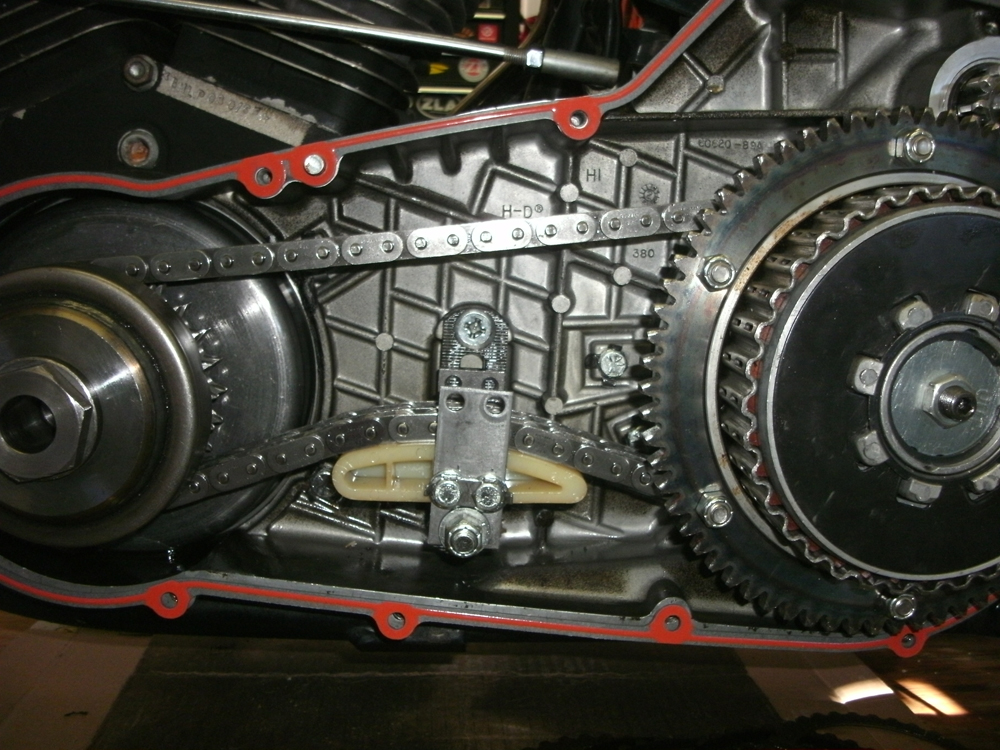
I put everything back into the bike and ran into another snag. The primary chain wouldn’t tension properly. The sprockets did not have enough teeth on them to take up the excess chain slack. Being a double-row chain, the primary chain is not easily shortened, and Harley has used precious few chain lengths through many, many years of motorcycles. Check out the excess slack in the top run of chain. This photo was taken with the tensioner adjusted to its maximum limit.
So now what? Mike Clarke, one of ZLA’s antique HD gurus, dug out some parts catalogs and we figured out that Harley ran the same tensioner since the last year of the Pan. That meant that this part had been in active service in new bikes for 35 years! Surely someone else has had this problem before me, right?
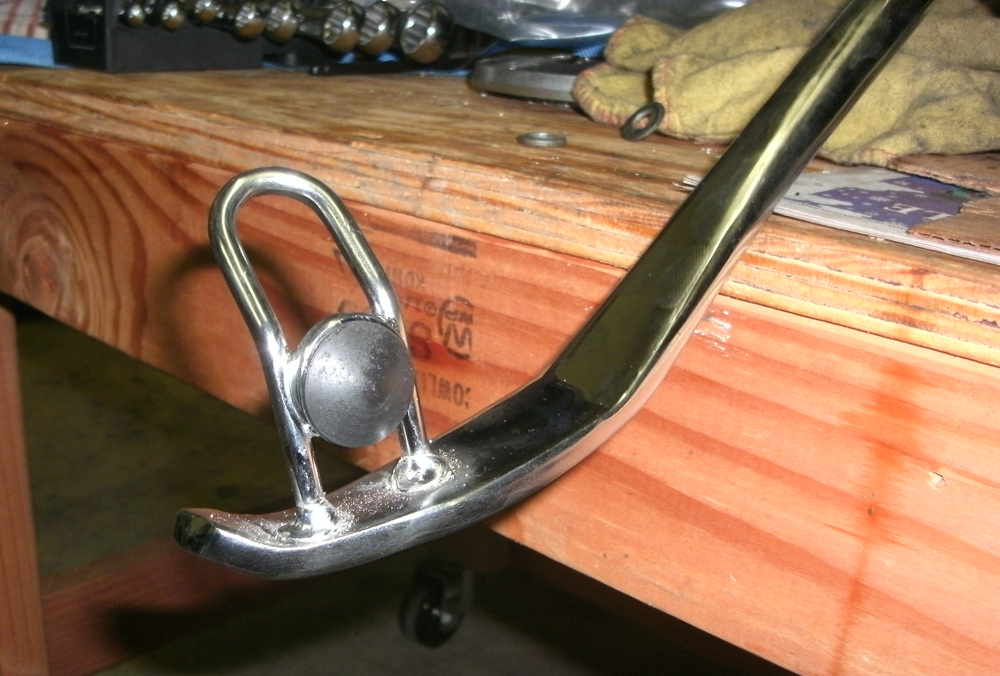
An idea came to me in the shower the next morning and I confirmed it with some old bikers whose beards are greyer and longer than my own before I got too excited. It’s so simple it’s silly: the tensioner can be flipped. Do you see those extra holes drilled into the other end the shoe does not ride in? I’m no Harley historian, but I would guess Harley ran many ratios over the years and wanted to keep their inventory numbers low, so they simply used the same part in a different way. Harley-Davidson was good for that over the years and it would stand to reason that an old Pan-powered bagger probably used a little different ratio than, say, an 80-inch Super Glide. I turned it around and inverted it, and lo and behold, the chain has lots of adjustment life left.
The caveat to this little trick, though, is that the adjustment nut is nearly impossible to access through the inspection cover. If you reach in there to inspect the chain and it’s loose, you face the same problem the owners of the early cast primary bikes faced. The whole outer primary cover needs to come off to re-tension the chain. No big deal. The savings was worth it to me!
At this point, I adjusted the clutch to factory specifications. The five-speed clutches really are a different animal than the old four-speed units. Deep down, in my heart of hearts, I like the four-speed clutches better, but I know the five-speed is a superior design. The conical spring design applies the clutch much more smoothly than individual springs, and the clutch really can be adjusted to factory specifications listed in the service manuals. (Anyone who has adjusted a four-speed clutch knows you read the manual, think about the specs, close the manual, ignore it entirely and adjust the clutch by feel alone.) Consequently, I have never been pulled kicking and screaming through a four-way intersection with my clutch lever pulled in on an Evo bike. That’s a unique experience offered only by Harley-Davidson four-speed clutches!
After that, I stripped the primary cover, degreased and cleaned the whole thing, and replaced all its gaskets — the derby cover o-ring, inspection cover and outer primary cover gaskets — and threw the whole works back onto the bike. The inspection cover bolts got replaced as a few of the hex heads were stripped.
The whole mess got filled with primary oil. I like to run Type F, factory specifications be damned. At this stage, being that the repairs were complete, I began to think about the bike’s final plan. I filed for a title, replaced the engine and transmission oils, oil filter, and spark plugs. The carburetor was torn down for a thorough cleaning. It was filthy! I pulled out all the goop, cleaned the main jet and slow jet, replaced a few gaskets, and buttoned it back up. The turn signals were also removed. They were scabbed on at some point in the bike’s life and were attached poorly and had wiring issues. It was really just easiest and cheapest simply to remove them. Andy came back over to help me roll the old girl down off the table.
We unstrapped it, chipped out the ice in front of the shop door, shoveled out the snow, and rolled her down onto dry pavement. I yanked the choke on the CV carb, thumbed the go-button and she purred right to life like it was warm out! Blockheads are notorious for wasting cylinder base gaskets when they are ridden hard before being fully warm, so I sat there a bit until the rocker boxes were toasty and then took off.
The bike pulled very hard with the new gearing. I went for a five-mile trip into town to get some gasoline and the bike was very well-behaved. Upon my return, Andy wanted to christen it with a run and I panicked a little as I heard him miss his 2-3 shift. Had my repair just gone sour? He was back in six minutes and he told me he just forgot how long and hard a Harley’s shift throw was. The transmission and clutch were just fine.
So, it looks like this bike is set and ready to be flipped over to a new owner! Another old bike is ready to prowl the roads once again, a rider this spring will hopefully fall in love with a new bike, and I should make a tidy little profit.
I wonder what kind of bike will stop in next time...
Image Gallery


Image Gallery
