You know your favorite motorcycle journalists and YouTubers? Guys like Spurgeon, Zack, and Ari? Well, none of them know how to ride a motorcycle. Not really, anyway. Nope, they’re basically just a bunch of pretty (primarily bearded) faces that were plucked from obscurity and made to look fast, talented and knowledgeable thanks to the immeasurable talents of the RevZilla video team — the true stars of this whole operation. At least, that’s what I like to tell myself.
The truth is, those guys might know a few things about getting around on two wheels, but I think we can all agree that a well placed camera is a vital part of making your motorcycle ride look good. And considering that most people have riding footage that looks decidedly un-good, today we’re going to take a look at the simple techniques I use to get the best looking images out of an action camera, regardless of riding skill.
Believe it or not, it comes down to just three things: settings, positioning, and accessories.
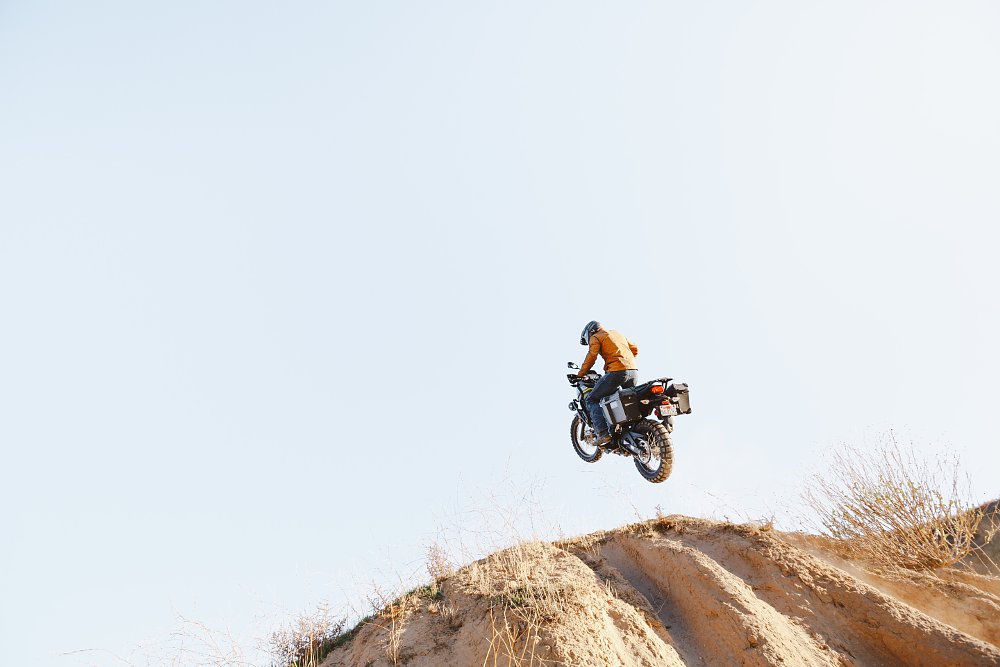
OK, maybe four things. Having a photo model willing to launch a Versys 300 into space never hurts. Photo by Spenser Robert.
Fine-tuning the settings on your motorcycle camera
Everything starts with the correct camera settings for your situation. Adjusting things like resolution, frame rate, shutter speed, white balance and field of view will not only affect the sharpness of the image but also the brightness, color, perspective and motion blur. While you can leave your camera in automatic mode (which often works quite well), these are the manual settings I use on an action camera to get the absolute best image quality:
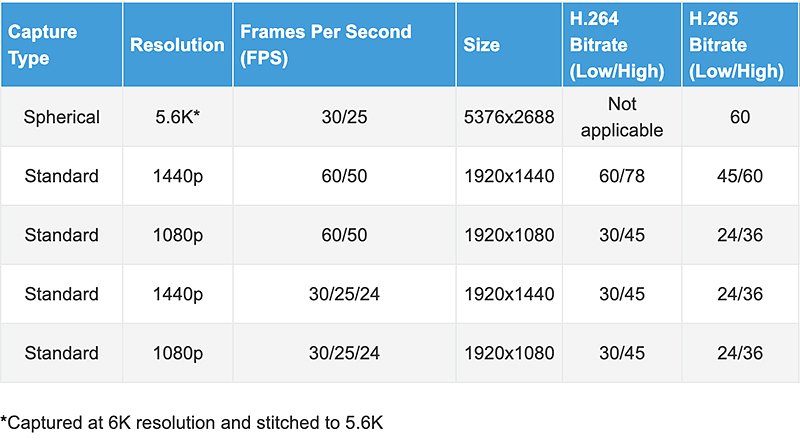
Resolution: This depends on the camera, but an easy rule is to select the highest resolution at which your camera can record video. On an action camera that usually means 4K (3840 x 2160). Just keep in mind that something like 4K recording will drain a battery faster, use up more memory, and will sometimes be more difficult to edit or play back on a computer.More resolution doesn't automatically make an image better, but it can definitely be a good place to start. GoPro illustration.
Frame rate: The general standard is to record at 24 FPS (frames per second) for normal speed and at least 60 FPS for slow motion. However, extra-juicy slow motion doesn’t really kick in until at least 120 FPS and sometimes recording in higher FPS will require you to lower the resolution. Some folks argue that recording at 60 FPS and playing it back in real time is better for image quality, but I dislike the artificially smooth effect this creates and I’m not convinced it’s good for much outside of broadcast sports and video games.The relationship between frame rate and resolution can vary wildly from camera to camera. Check your manual to know what your options are. GoPro illustration.
Shutter speed: This is what controls motion blur in your image and choosing the correct setting is the single biggest way to improve riding footage, in my opinion. The traditional rule for shutter speed is to have it double the frame rate. So, for standard 24 FPS filmmaking that would be a 1/48 shutter speed. However, I find that a shutter speed around 1/60-1/96 is often more usable as it avoids the nauseating amount of motion blur that can result from excessive movement on a bike. The only way to achieve this setting on an action camera — during broad daylight, without over-exposing your image — is to use an ND filter. We’ll talk more about these filters below but the gist is that it compensates for the brightness that occurs when you film at a shutter speed that allows for natural motion blur. If you’ve ever felt like your riding footage looks way slower than you remember, it’s probably because the camera was using a very high, automatic shutter speed that removed motion blur entirely.Motion blur, courtesy of a slow shutter speed. Making TW200s look fast since 1987. Photo by Ari Henning.
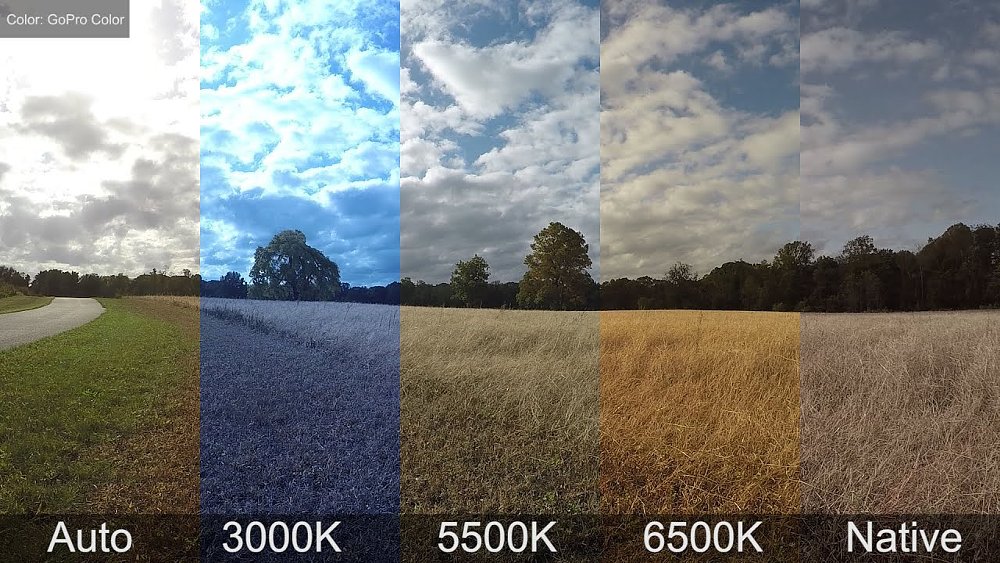
White balance: My big secret here? Set white balance to auto. You can technically set it to specified values that correlate to different lighting conditions (~5500K = daylight, for example) but I find that lighting changes so frequently on a motorcycle that letting the camera make those adjustments for you is almost always the best method for capturing accurate colors. Some cameras do this better than others, but my experience with GoPro has been very positive in this regard.Messing up white balance can ruin an image. So, unless you're a camera expert or you want a very specific look, your best bet is probably to use the auto setting. Photo by Jeremy Sciarappa, YouTube
Field of view: The most common mistake people make here is choosing a view that is too narrow. The wider the FOV the faster things look and the closer it mimics the perspective of human vision. There are occasions when I want to zoom in on a specific detail, which requires a more narrow FOV, but I find that going as wide as possible leads to the best results most of the time. We utilize the widest view possible when we film Daily Rider.
How to mount your motorcycle camera
Where you need to position a camera on a motorcycle will depend on what you’re trying to achieve. Do you want to capture the scenery of a mountain pass? Do you want to film a track day so you can study your lines or show off for your friends? The position that works for one won’t necessarily work for the other, so it’s important to give the position some genuine thought before taking off.
In my experience, the most effective camera positions around a bike include:
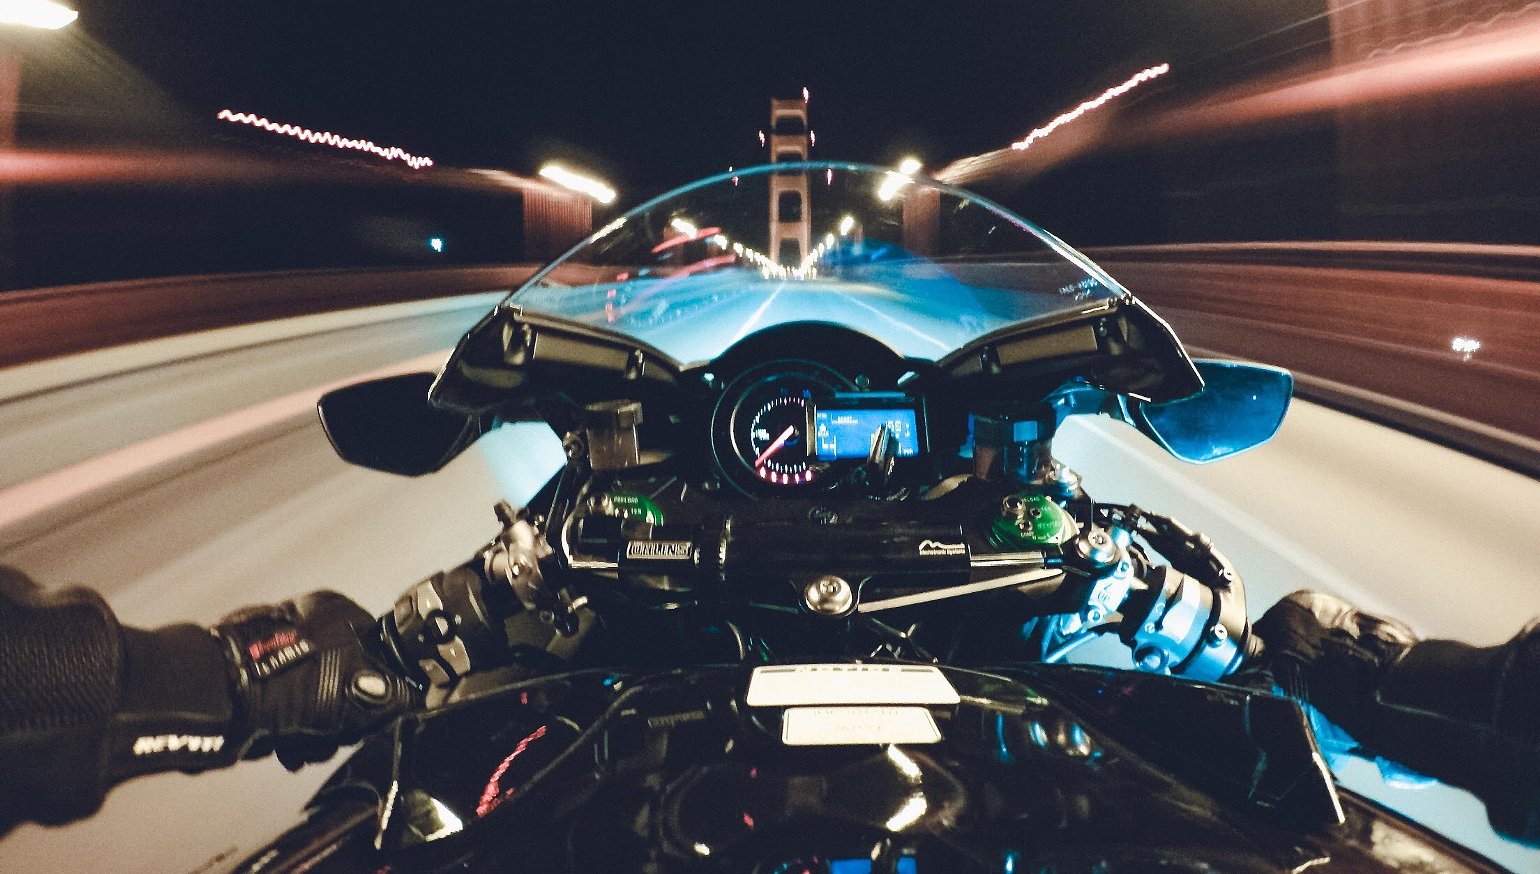
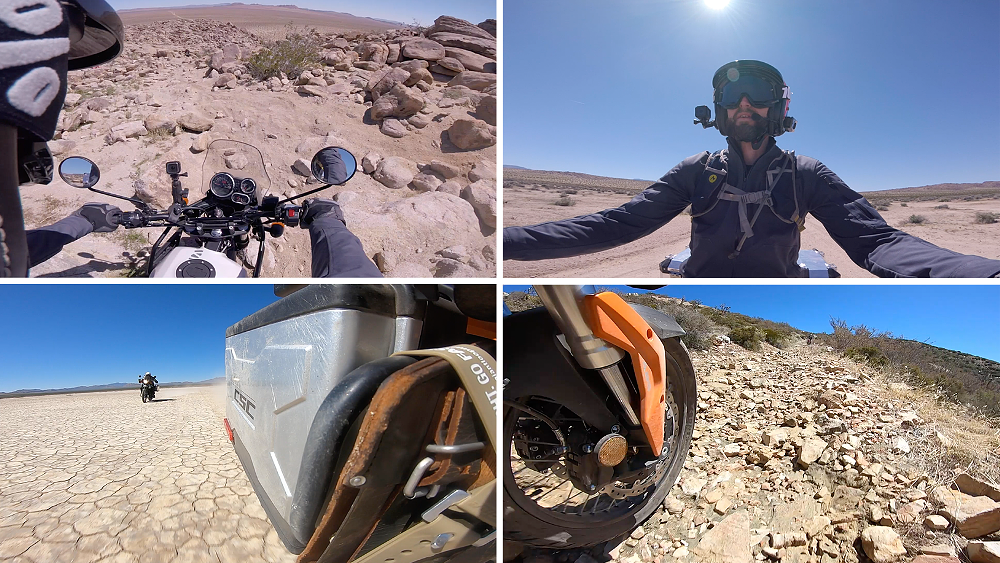
Helmet: I prefer to have cameras on the front and the side of a helmet with the field of view set as wide as possible. I think these positions are the best for taking the audience along for the ride, as we get to see exactly what the rider sees. Whatever you do, just don’t put the camera on top of your helmet. It’s a weird perspective, makes everything look slower, and prevents you from wearing that radical helmet mohawk you deserve.
Gas tank: A large metal surface tucked out of the wind is usually a great place for mounting a camera. I like to put an adhesive mount right on the tank for hot laps around a race track since it captures the speed and line choice of a rider with a ton of clarity. You can also flip the camera around and face it towards the rider, though depending on the bike this may just give you a view up the rider’s nostrils. No judgement, if that’s your thing.
Handlebar: This is the best location for a camera facing the rider, in my experience. Sport bikes with clip-ons can be a little tricky, but with the right mounting hardware (see below) you can usually clamp the camera to any handlebar for a sturdy and wind-protected location. If this isn’t an option, you can also try putting an adhesive mount right on the surface of an instrument cluster, though it’ll likely obstruct your view of whatever is on said cluster.
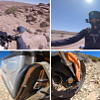
Miscellaneous: Sometimes bikes have a treasure trove of mounting options and sometimes they’re intentionally smooth, mount-less machines made to slice through the air without resistance. If your bike is all fairing but you still want some alternative perspectives, you can try clamping to a passenger peg or a fork tube, or just stick an adhesive mount anywhere that captures something interesting. On cruisers and ADV bikes, the mounting options are usually plentiful. Crash bars, panniers, and luggage racks are just a few places you can try.A charcuterie board of action camera angles from the first episode of CTXP. Your camera position is determined by whatever story you're trying to tell. Photo by Spenser Robert.
The best accessories for your motorcycle camera
The sheer number of accessories available for action cameras can be overwhelming. From clips, to mounts, to clamps, to straps, to stickies, lights, mics, and gimbals; what do you really need? Your situation may vary, but after years of experimenting with all the action cam accessories under the sun, these are the ones I use the most:
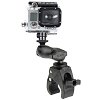
RAM mounts: Lots of people use RAM products for their phones and GPS but they also make far and away the best solution for versatile camera mounting that I have ever experienced — the Tough Claw. The Every man, woman, child, and golden retriever interested in filming their motorcycle should invest in a RAM claw. RAM Mounting Systems, Inc. photo.claws are covered in rubber (which helps prevent damage and dampen vibration) but are strong enough to hold a camera steady at more than 100 mph, in my experience.
Adhesive mounts: As great as RAM mounts are, sometimes they’re too big for the job. When you need a low profile mounting solution, the best option is a sticky mount, which gets your camera as close to the mounting surface as possible — thus keeping it out of your way. Just make sure you use tape or safety wire if you want to ensure the camera is still there when you’re done.
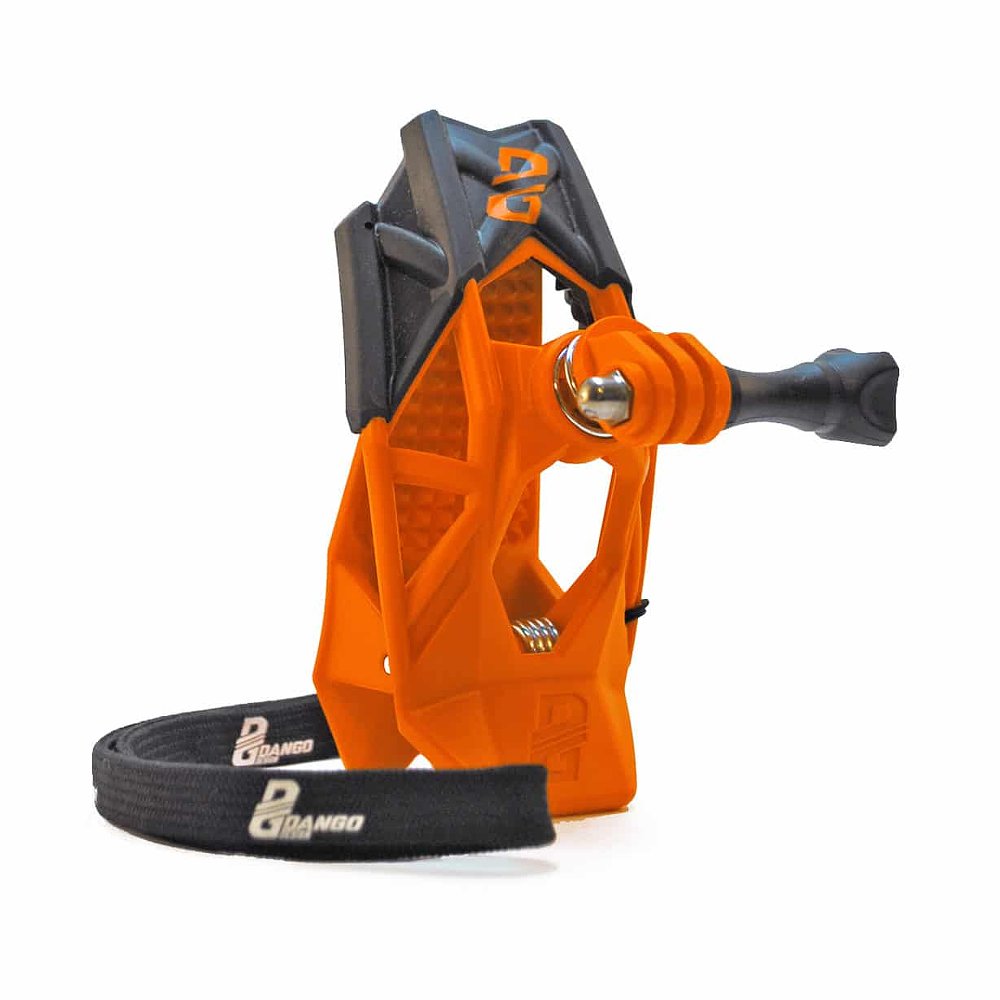
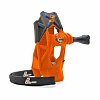
Chin mount: Putting a camera on the chin bar of the helmet and setting it to the widest FOV possible is the closest thing you can get to seeing While it's a little bulkier than an adhesive or some of the strap-based mounts, the Dango Gripper is a great option to get perfect POV on a motorcycle. Photo by Dango Designthrough the eyes of a rider. Some companies like Klim actually make model-specific chin bar clips that slot directly into the vent of a helmet, but I’ve primarily used the Dango Gripper for dirt helmets and the SoPro for street helmets.
Helmet swivel mount: On occasions where I need to mount to the side of a helmet, a GoPro swivel mount is a must-have. You can make something work with a K’Nex set of elbows, adapters, and rigid mounts, but a swivel mount reduces the number of elbows needed and makes small adjustments incredibly easy.
ND filters: As mentioned above, these are filters that reduce the amount of light allowed into the camera. Having one of these compensates for the extra light allowed into the camera by a slower shutter speed and leaves you with an even exposure and natural motion blur. The filters are usually available as clips or spin-ons.
Microphone and microphone adapter: The best way to get crisp dialogue or a clear exhaust noise from an action camera is to add a microphone. The built-in mics are fine but do not handle wind very well.
Audio recorder: If you really want to improve your audio, then an even better solution is an entirely separate recorder and microphone like the Tascam DR-10L. You’ll have to sync the audio and video in an editing program, but the hassle is well worth it for those who want the best sound possible.
USB outlet/portable battery pack: Since modern action cameras usually kill their battery in an hour or two, it’s vital to have a way to keep them charged while you’re on the road. I don’t think anything beats the flexibility of a portable battery pack that can charge your phone, your camera, and jump start your motorcycle, but even a simple USB outlet wired to the bike can be a camera lifesaver.
Conclusion
Action cameras have literally changed the way the world sees motorcycling. With a few taps on a keyboard, anyone can be transported to the cockpit of a MotoGP racer, a world traveller, or even a casual Daily Rider. But, with great action-camera power comes great responsibility to get footage that captures something. There’s nothing worse than filming the ride of a lifetime only to discover that the camera was pointed at the sky or fell off the bike before you left the parking lot.
These tips for how to get better footage are just a starting point — if you have something different that works for what you need or like, then keep on keepin’ on. The most important thing to remember, beyond any camera setting, position, or accessory, is that the real star of any motorcycle video is the person who hits the record button.
By purchasing and enrolling in Riders Preferred Membership, you agree to the
Program Terms and Conditions.
*Some exclusions apply: 10% RPM discount applies on full price and sale price Exclusive Brands.
10% RPM discount applies on additional select brands at full price.
Exclusions apply.
RPM free 2-day shipping applies on qualifying items, contiguous U.S. only.
Not available for AK, HI, or U.S. Territories.
View shipping policies.
RPM free returns apply on qualifying items and are processed on standard return timeline, contiguous U.S. only.
View return policy.