

I was just out of turn 12 and building speed down the main straight at New Jersey Motorsport Park’s Thunderbolt course when I was cut off by a rider who immediately began to swerve back and forth before slowing down early entering turn one. Welcome to the advanced levels of education at California Superbike School.
The rider who cut me off was my coach, Connor, and it was all part of the plan. He wasn’t so much cutting me off as he was acting as a distraction in order to make me focus. He was utilizing a drill known as Wide View Follow Me to reinforce other skills learned during lower levels of the school. Connor’s goal was to get me to set my body position earlier and to use trail braking to choose different lines and execute corners, even with other riders in my way.
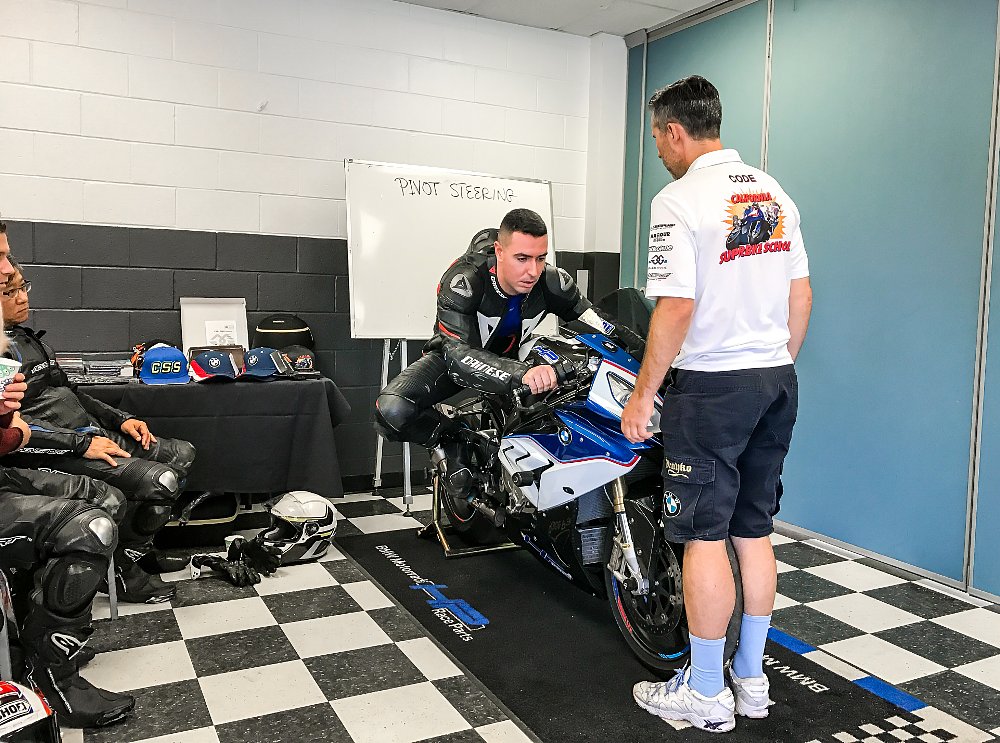
Having completed levels one and two last year, which cover Control Actions and Visualization, I was back for more. This year, I attended the two-day school covering level three, focusing on Body Position, before diving into level four curriculum, which takes a more personalized approach. Once riders reach level four of CSS, they work directly with coaches and consultants to improve on skills learned in the first three levels. With the first three levels completed, students can return any time as level-four students to work on specific skills that are continuing to give them trouble.
Like last year’s article, this is no substitute for going to school yourself. Rather, these are just some tips I picked up that helped me further improve my riding and could help you, too.
Trail braking
“Braking is nothing more than the transfer of kinetic energy into heat, but that alone probably won’t help you much out there on the track,” Dylan Code, Keith’s son, joked to the class.

Last year we received comments from readers wanting to know if trail braking was covered in the CSS curriculum. At the time, trail braking was briefly touched on as part of the level three course work, but that has changed for this year. Braking is now incorporated into the level two curriculum and has been modified to include both classroom and track time covering the subject. As a few of us level-three students had missed out on this lesson, Dylan spent lunch on the second day giving us an abridged version.
We use brakes on the racetrack to adjust entry speed. Correct braking technique allows riders to stay on the gas longer, drive harder into corners, and select alternative lines when executing a turn. The key to braking is less about engagement and more about release. The main idea is to come on the brakes strong and release them slowly (think two seconds), trailing them off as you enter the corner. Hence the name “trail braking.”

The problem is that tires have a finite amount of traction and that must be shared between braking and control. In traditional braking exercises, you would have all of your braking completed by the time you hit your turn point. With trail braking, you engage the brakes a bit later and carry some braking force to the apex, thus splitting the tire’s workload. If you are using 20 percent of the tires' grip for braking, then you only have 80 percent left for controlling the bike and turning it. But it's hard to tell if you're running out of grip until it's too late.
"As riders rarely know where 100 percent grip actually lies, I encourage riders to think of it in terms of keeping the suspension down versus the rocking horse action of brake, release, then turn," Dylan explained. "The brake compresses the forks, and then as we lean in, we trail the brakes as the corner takes over the job of compressing the suspension."
Learning trail braking not only allows for smoother cornering skills, but offers the rider the ability to alter one’s strategy for attacking a corner by changing the corner’s turn point and thus choosing a different line. This can help to pass a fellow rider on the track, correct a line mid-turn, or figure out a faster way to execute a particular corner.
There is no golden rule as to when and where riders should apply this technique. It’s not going to be something that works for every corner and it’s important to figure out when it’s appropriate for your riding. I found it to be beneficial when used in conjunction with the next skill, Attack Angles.
Attack Angles
This was the last skill that was introduced at the end of the first day. Our instructor, Jon, drew a random corner on the white board with three different lines labeled “A,” “B” and “C.”
“A,” Jon told us, “gets you through the turn the fastest. B is a defensive line used in racing, and C is just wrong.”
If you find yourself on the wrong line, you’ll need to change the angle at which you’re attacking the corner if you wish to correct your course mid-turn. This is hugely helpful if you’re entering a series of corners and you find yourself off-line going into the first turn. If uncorrected, one wrong line will carry through the entire series of turns.

In order to alter the bike's course, riders need to use a combination of skills including throttle control, body positioning, and braking. By carrying the brakes further into the corner, and using what is taught as “the hook turn,” riders can shift their turn point further into the corner and correct their line. Not only can this be used to correct a bad line, it can also be used to get around slower riders mid-turn.

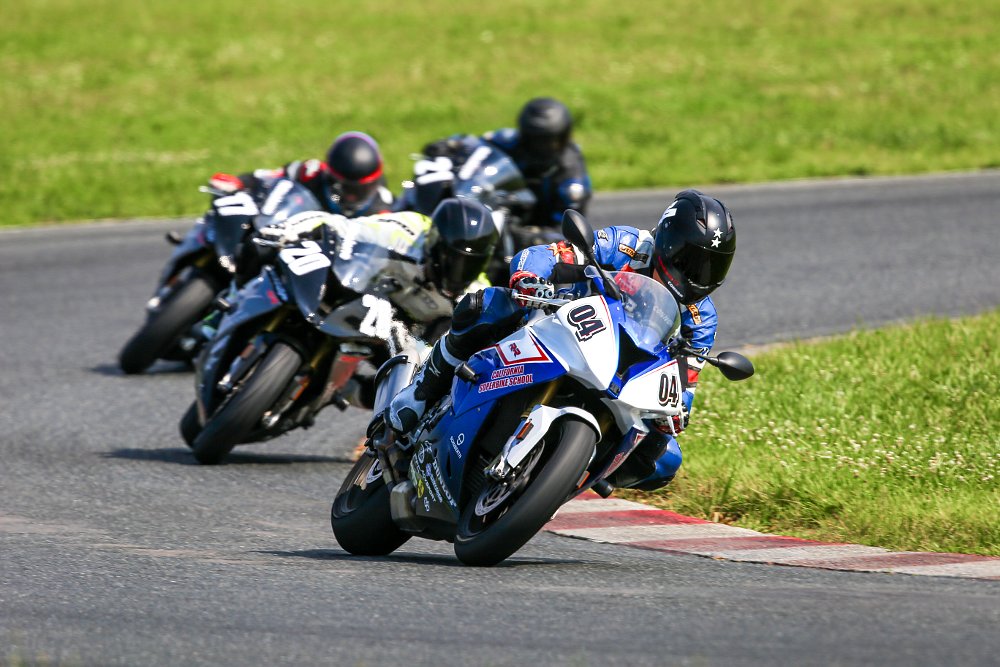
Playing “follow the leader” with Lyle, my coach for day one, he showed me how to drive hard on an inside line, passing slower folks safely in the corner. I found myself utilizing this combination of Trail Braking and Attack Angles it in turns one, six, eight, and nine. Instead of trying to get around individuals on the straightaways, I was able to brake later, choose a different turn point, attack the corner at a different angle, and execute a pass without ever disrupting the other rider’s course.
The Hook Turn
The first drill of the day for level three was to practice what the instructors referred to as The Hook Turn.
Our instructor, Johnny, offered up a hypothetical situation: “You’re running wide in a corner and traction is maxed out. You can’t roll off the throttle or apply the brakes because you’ll put too much pressure on the front tire, which will result in a low-side crash. Your lean angle is maxed out. How can you get the bike back on track?”

My fellow peers and I stumbled through a few responses that garnered little more than a shake of the head from our teacher. After our failed attempts at answering, Johnny enlightened us. The answer was to change the direction of our body from leaning to the side, to leaning forward. There is no additional pressure applied to the bars or changes in speed, you simply shift your weight forward. Picture yourself stretching your neck as far forward as it’ll go; your body simply follows.

During my level-four consultation sessions with Dylan, he had me practice this technique to improve my overall body position on the bike.

“You’re a tall rider,” he reasoned with me. “Use your height to your advantage and get more of your body off the bike. Everyone wants that cool picture of themselves hanging off the bike with their knee down, but what’s more important is properly utilizing your weight to get you through a corner faster.”
Practicing this technique helped with body position but it also improved my visualization skills from level two. In the end I was executing corners faster and with improved confidence.
“Ass, then Gas”
My “aha moment” came at the start of the second day. Level three students had graduated to level four and we all started the day by revisiting Wide View, a drill from level two which had been one of my favorites. As level four curriculum is completely tailored around individual riders, this drill allowed our coaches to follow us around the track while learning what skills needed work.
Upon exiting the track after the first session, Connor, my coach for the second day, began asking me a series of questions concerning body position and timing. One of the things the coaches are trained to do is to get you to identify problems in your own riding via a series of questions as opposed to just telling you what is wrong, thus making you a more self-sufficient rider. After a short back and forth, I realized I wasn’t setting my body position early enough, in my case, I was waiting until just before the turn point.

“Ass, then gas, man,” he hollered at me with a goofy smile. “Set your ass while you’re still on the gas. Get it out of the way early and you’ll be free to focus on braking and steering.”
The official term for this is Body Position Early and it took me working with Connor for an additional two sessions before it began to sink in. The struggle became a bit easier when we revisited Wide View in a different form.
Wide View Follow Me
By the end of my third session of level four training I had gotten better at setting my body position early and holding it through the corner. I learned that once I was set for a right hand turn, I didn’t have to change my position until a left hand turn presented itself. On a track like Thunderbolt, that meant I could set my body position for turn 12 and wouldn’t have to reset until turn four. In order to perfect this, Connor wouldn’t allow me to place my butt in the center of the seat, only left or right.
Everything was going good until other riders were thrown into the mix. It was at that point when my form fell apart. In order to address this, Connor had me practice an exercise entitled Wide View Follow Me. The irony being I wasn’t actually following him.
Connor would ride in front of me trying to distract me with improper lines and sudden changes in speed and direction. My job was to use the Wide View technique to tune him out, visualize my lines, set my body position, and execute the corner without falling victim to his distractions. After a few laps, it was working. My technique was more consistent, regardless of who was in front of me.

Everything at California Superbike School works like a puzzle piece to complete a larger picture of improved riding. Riding a motorcycle is just like any other sport. To get better, you have to have a solid base of fundamental skills and you have to practice proper techniques. Practice does you no good if you're practicing poor techniques, and that's where the value of professional instruction comes in.
California Superbike School is aimed at any and all riders looking to better their riding abilities, regardless of the environment. While the skills learned at CSS will undeniably benefit your riding at the track, you’ll especially notice it on the street. If they can train riders to navigate hazards on the track at speeds multiple times faster than public roads will allow, imagine the effect that will have on your ability to handle the challenges of day-to-day riding.


