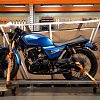
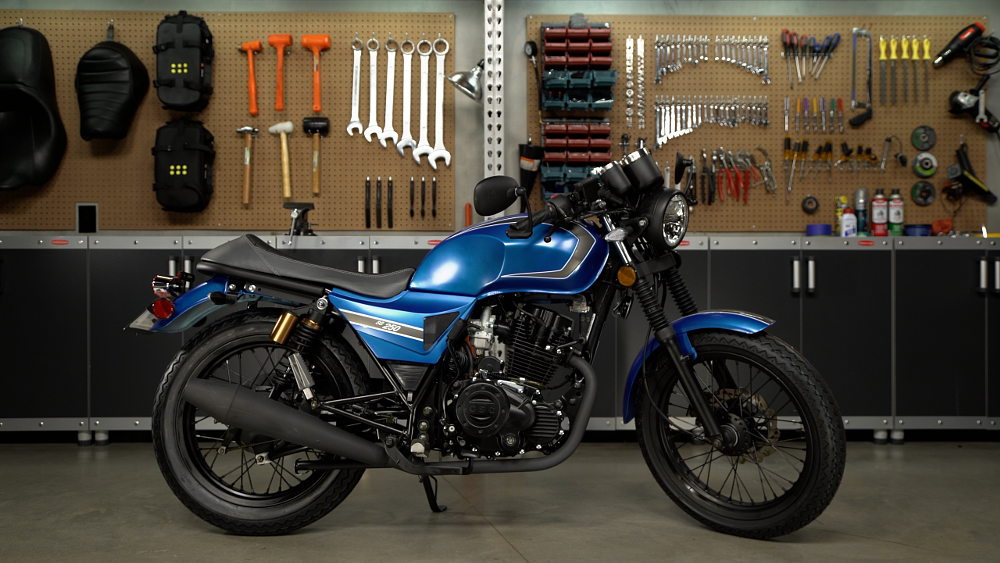
When we reviewed the CSC SG250 San Gabriel, a big part of its appeal was obvious: It’s a basic, simple motorcycle that’s really cheap. Under $2,000 new cheap.
But there’s another aspect that makes the CSC different. You buy it and it shows up at your door in a crate. There’s no dealer. That means you either have to do the maintenance and repairs yourself or find an independent mechanic to do the work. For the confident and competent home mechanic, that’s not a big deal. But lots of other potential owners maybe aren’t that confident. For them, considering a purchase of a CSC means not just checking the spec box and deciding if they like its cafe racer looks, but also deciding if they can go it alone, without dealer support.
To answer the key question of just how hard it is to work on the CSC, the Common Tread team told me to gather my wrenches and do a routine service on the bike. How long would it take? Were there any pitfalls that would make maintenance harder than expected? Here’s what I found.
Getting started
First, I need to mention how awesome the online manual is for this bike. The folks at CSC definitely put the work into creating a clear and concise resource for the owners of these bikes. It has clear color photos and well written instructions on how to perform a wide variety of services on the motorcycle. Considering you could save the .pdf file of the manual to your phone and the bike comes with a small tool kit, even the most novice mechanics should not worry about taking the CSC SG250 on a multi-day trip.
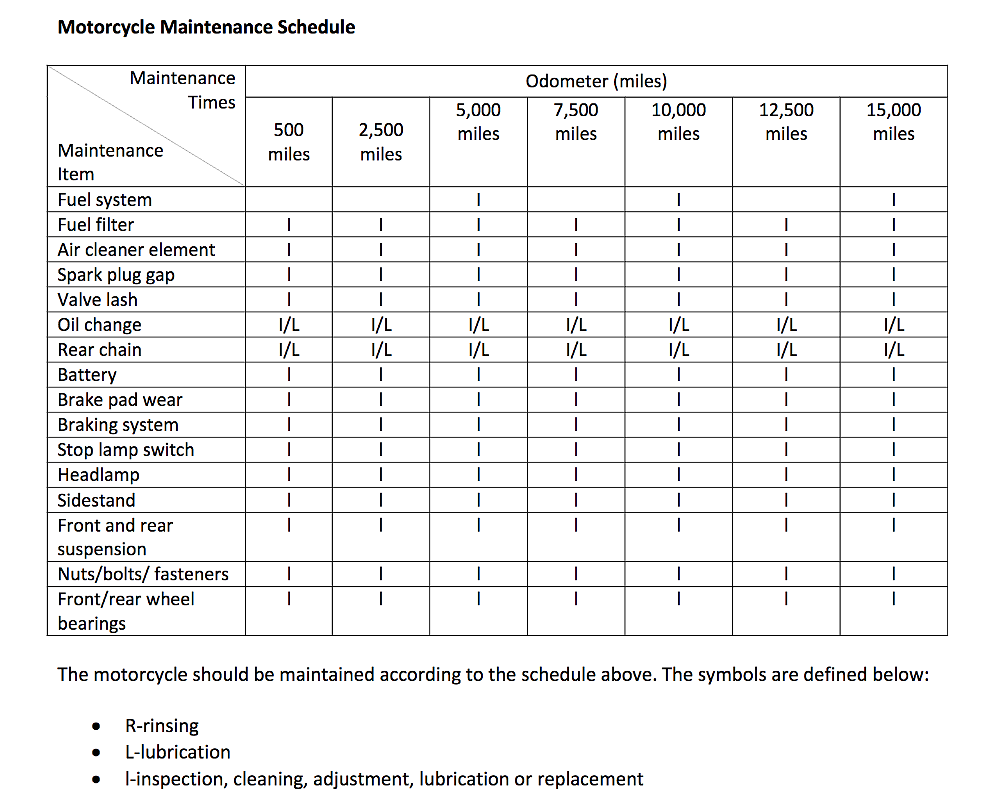
Alright, time to get our hands dirty. Our bike has about 500 miles on it so it's time to do the first service. Spoiler alert! This entire job only took me about an hour to complete, including the oil change and valve adjustment. That said, I have been wrenching on bikes professionally (and amateurly) for quite some time. I would expect inexperienced mechanics might spend about two hours total, if they really take their time.
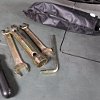
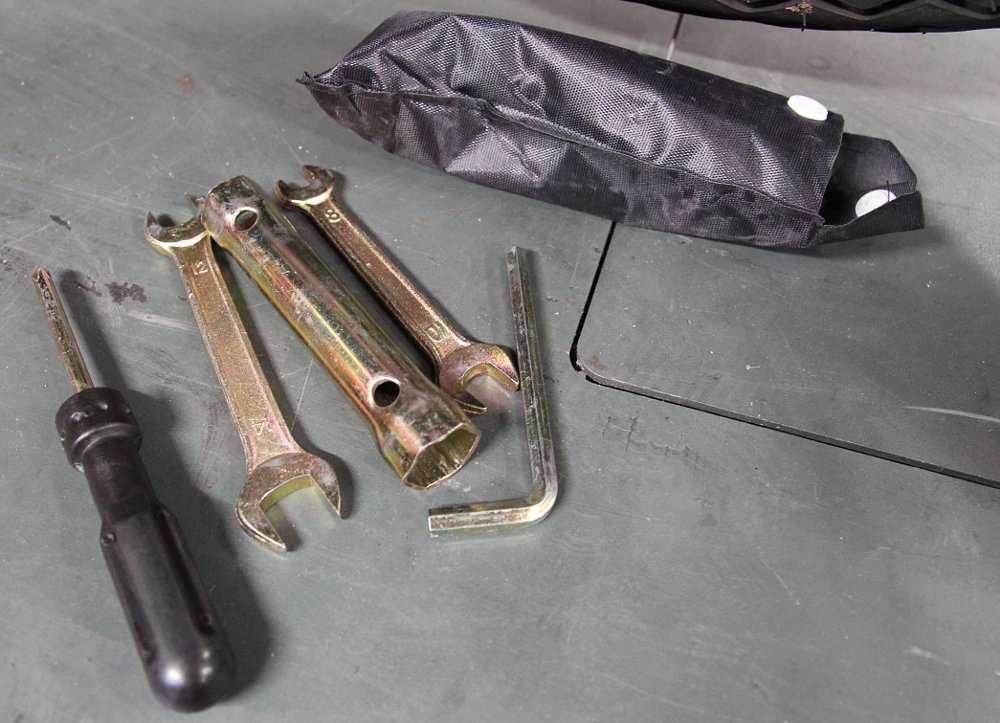
This bike was built with serviceability in mind. No fancy tools required at all. A simple set of metric combination wrenches, a pair of pliers, one large adjustable wrench (needs to open to 24 mm), a set of feeler gauges and a spark plug gap tool is all you need. A deep-well 14 mm socket is optional. Add a couple quarts of oil, a can of chain lube, a few shop rags, a drain pan and a funnel for the oil.
A friend recently reminded me of an intelligent approach to attacking a pile of work. Do the hard stuff first, then you know the rest of the job will be a breeze. Since some folks are intimidated by valve adjustments, I tackled that first.
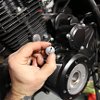
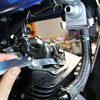
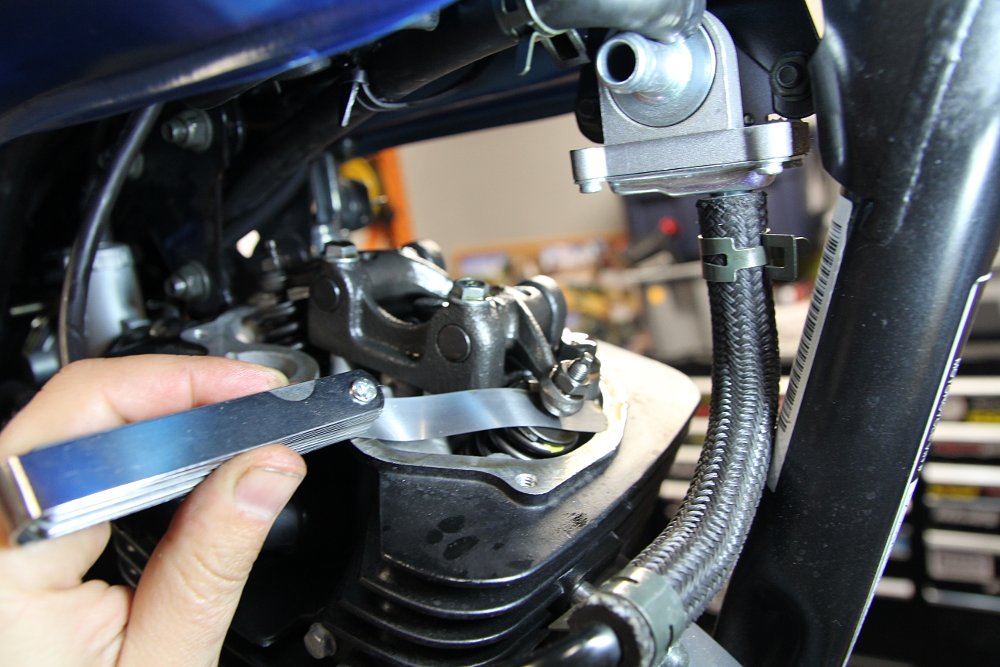
The SG 250 has a single cylinder, two-valve engine with threaded rocker arm adjusters, which is the simplest possible scenario when it comes to valve adjustments. I used the tools that were included with the bike to remove the spark plug. The plug gap was under spec but the color showed me the bike has been running well. I gapped the plug and set it aside.
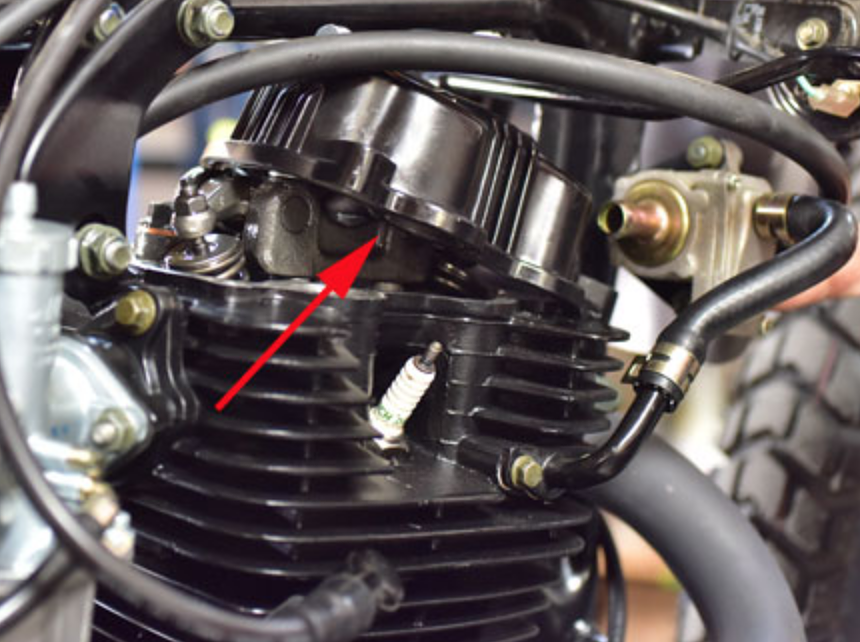
Removing the rocker cover was a piece of cake. Thankfully this bike does not require removal of the seat or gas tank to access any service items, so I only had to remove three bolts and disconnect the EGR hose. The cover uses a thick O ring instead of a paper gasket, so no need to worry about ordering a new one at every service. Nice touch! Now we can access the rocker adjusters.
Finding TDC a PITA
The next part was honestly the only troublesome one, and it can easily be avoided. I’ll explain how in a minute.
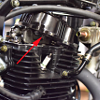
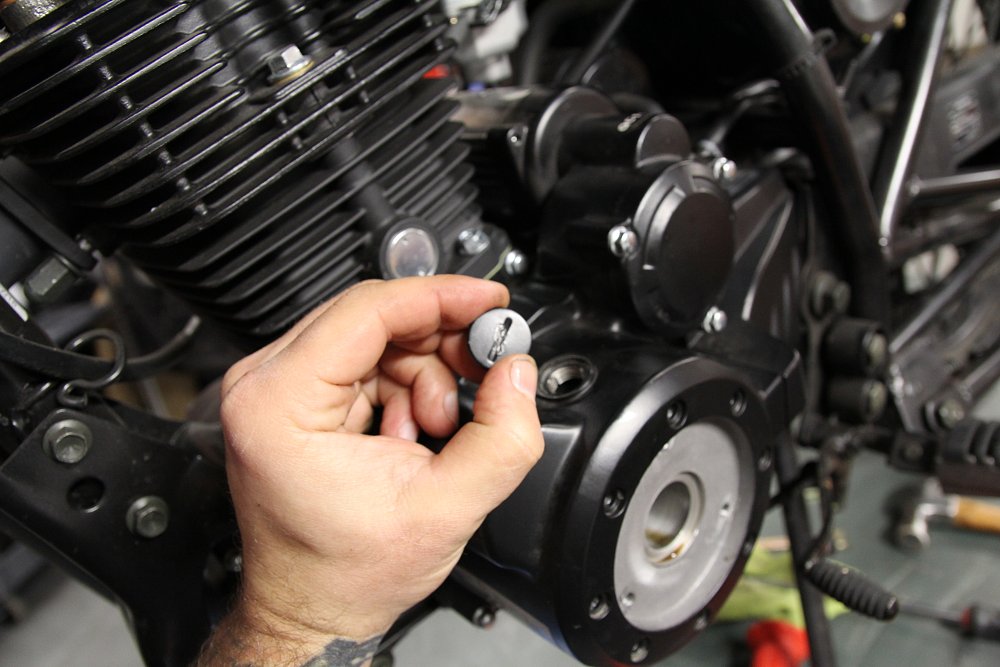
To adjust valves, the rocker arms have to be on the heel of the cam. This means that the valves are as closed as they can be. To do this, the piston needs to be top dead center (TDC) on the compression stroke. CSC was kind enough to include an access plug to view the TDC mark on the flywheel. They also included a removable cover to access the 14 mm bolt that allows you to turn the engine while looking for the TDC mark in the timing hole.
In theory, this is a foolproof technique. You do have to be sure the piston is coming up on the compression stroke by putting your finger over the spark plug hole to feel for air pressure. If you are at TDC on the exhaust stroke, the valves are not fully closed so your measurement will show zero clearance. If you adjust your valves at this point, they will be very far out of spec.
The trouble I had was that the Phillips screws holding the crank bolt cover on were extremely hard to break loose. A novice mechanic would have likely stripped the screws. Thankfully, I had an impact driver that did the job. Next issue was removal of the timing plug, which the manual ironically states can be “removed with a large blade screwdriver or a coin.” False! This plug was frozen in place, too, and is made of soft aluminum, so it got buggered up quite a bit when I used the impact driver to get it out.
All this struggling could have been avoided with an alternate approach. Forget about removing the timing plug and crank bolt access cover. Just leave them in place. Go to the right side of the bike. Put your finger over the spark plug hole and push the kickstarter down with your left hand until you feel pressure building. Grab a pen and put it straight down into the spark plug hole. Push the kicker down until the piston pushes it up as high as it will go, just before it begins to fall down again as the piston goes back down. You might have to go around a couple times to get a feel for this, but this is a much easier way to find TDC so you can adjust the valves. You will likely feel a little slack at the rocker arms once you have it set properly. If you do not feel any at all, double check that you feel that compression building with your finger over the spark plug hole before locating TDC.
Always measure valve clearances when the engine is cold. Once the valves were adjusted per the manual, putting the cover back and the spark plug back in were easy-peasy. Just remember to hook the EGR hose back up. Even with the struggles, the entire valve adjustment process only took about 20 minutes.
Easy oil change
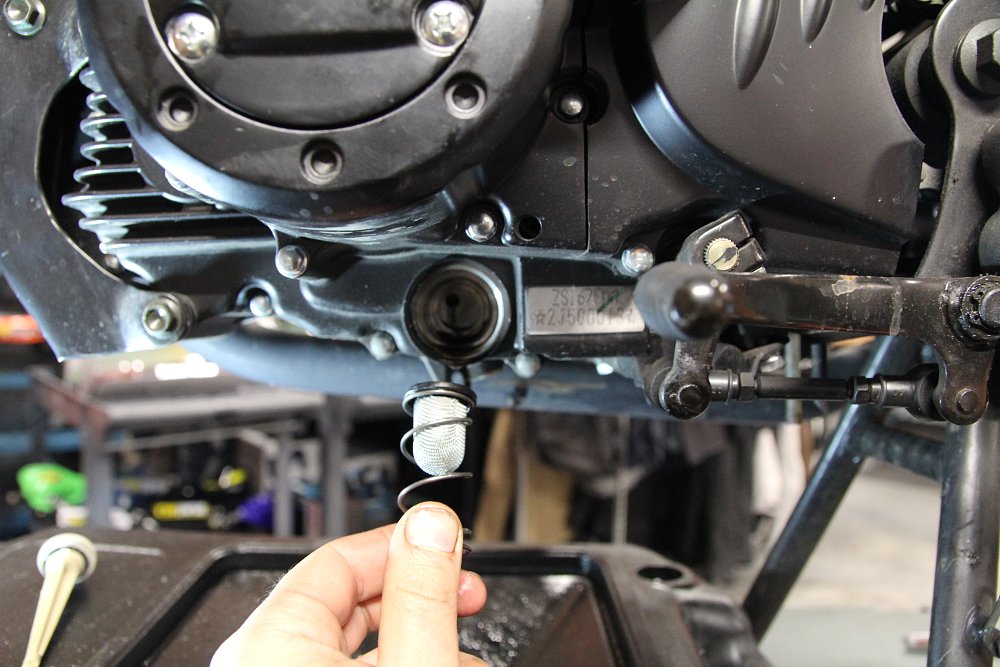
On to the second biggest part of the CSC’s first service, the oil change. No surprises here. Pull the drain plug, oil comes out, hopefully into your drain pan. The only unusual thing about this bike compared to most others is that it uses a small washable oil strainer to filter the oil instead of a replaceable, thread-on style. The oil strainer cap requires a 24 mm wrench or a large adjustable one, like I mentioned earlier. Once the screen is out, it's easily cleaned with some soapy water or solvent. One cleaned, replace the strainer, cap and the drain plug, then refill the motor with fresh oil.
I found that our bike took just one quart to reach the required level in the sight glass, despite the manual calling for 1.3 quarts. I will keep an eye on this once I get a chance to take it for a spin. The oil change took about 15 minutes total, including cleaning the strainer.
Home stretch: Checks and lubing
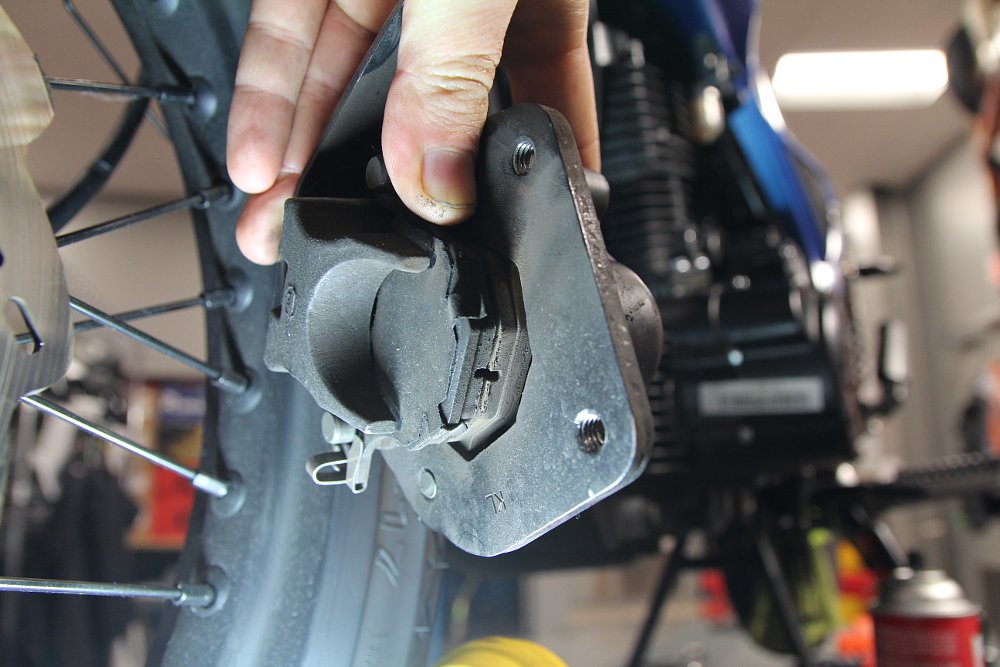
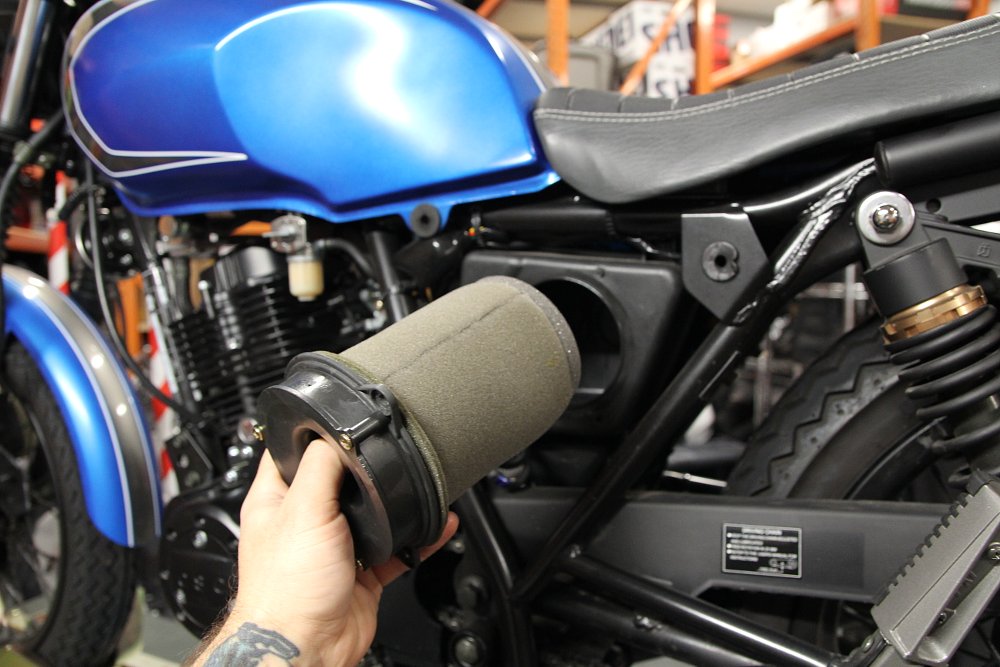
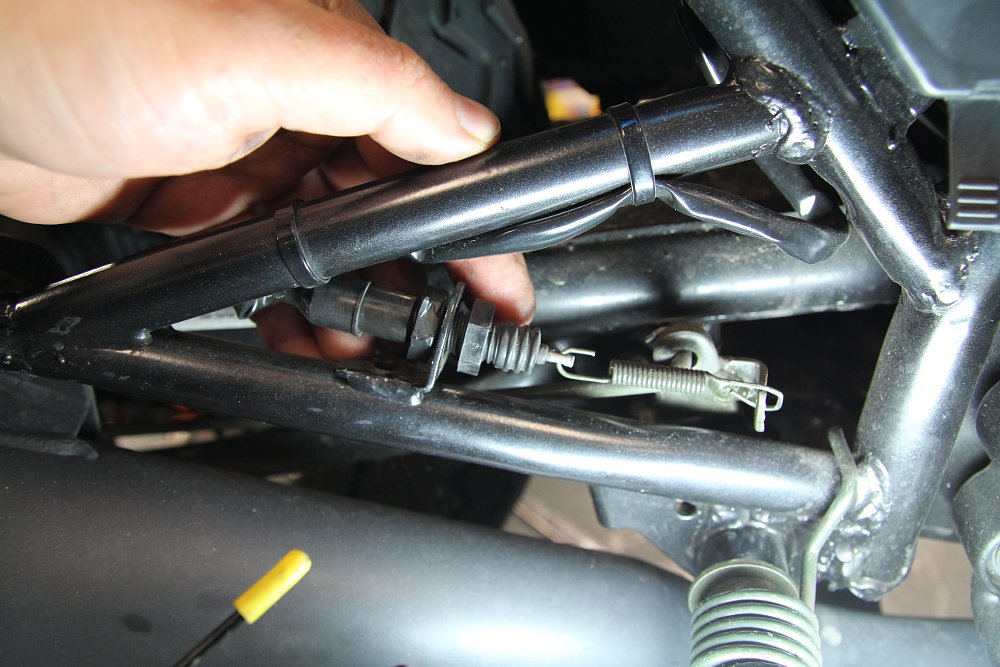
Honestly, from here on out, everything else on the list was a walk in the park. Removing the two caliper bolts to check the front pads took about a minute. Removing the left side panel and three bolts to inspect the air filter took about a minute. Checking and lubing the chain, another minute. Same goes for checking the wheel bearings, fuel filter, fasteners, lights and suspension; just about a minute or two for each task. One thing worth noting was that the rear brake light switch was loose, so I made sure that was adjusted and tightened up properly. Again, that took just another minute.
I did remove the right side panel to check the battery voltage and to ensure the terminals were tight, but this was pretty pointless. If the bike had a lot more miles and lived outside, I may have felt this was more critical, but ours lives indoors in a climate-controlled environment and has only 500 miles on it. The bike started up perfectly using the electric starter, a sure sign of a healthy battery. If it was cranking slowly or not starting, the first thing I would check is the battery. I recommend replacing your motorcycle battery every few years either way.
Again, the entire 500-mile service took me about an hour. Most of that time was spent with the valve adjustment and oil change. Overall, this bike was a pleasure to work on. It is super simple and everything is easily accessible.
Spurgie had mentioned in his original article that the CSC is a great alternative to a vintage bike, since it is incredibly simple like a bike from “back in the day,” but it's new! No rusted parts, stripped bolt holes, fried electronics or wobbly wheels like an old bike, but you get the simplicity and style of one. He and I are on the same page here, and I’m a vintage bike guy!
Final thoughts
If you were considering a CSC but were afraid of working on it yourself, don’t worry about it! This is really a neat bike to ride and wrench on. Working on this bike yourself will help build your skills and confidence enough to take on bigger tasks down the road. There isn’t much about this motorcycle that’s any different from a bike from the 1970s, except that it’s not worn out. You may find that you like working on this one enough to pick up a vintage bike as a side project.
If you have more questions about our CSC SG250 experience, let me know in the comments section below