Installing a new set of grips really is a great way to rejuvenate your bike. Grips have the dual function of isolating your hands from vibration and shock while providing important feedback information to your meathooks — seemingly divergent jobs that are both pretty damn important. Plus, tattered, worn grips also look like crap, despite whatever hipsters say about "patina."
Fortunately, installing a new set is really pretty simple. If you’re reasonably ambitious and handy, you should be able to pop a new set of grips onto your sled in under an hour and give a new look and feel to your scoot. It’s easy, and if you plan things out and understand the the process, you should be on Easy Street.
As always, we recommend this task be undertaken with a copy of the factory service manual within easy reach, and several hours to spare. It’s not a hard job, but you definitely need to allot some time for the task and time for the grips to "set up." Protip: Don’t try to do this six minutes before a ride; you’ll just have poor results. Read all the way through so you can see what parts of the process you’ll need to perform for the bike you're working on. Depending on what type of grip you’re removing and what you’re installing, removal and replacement falls between easy and super-easy!
The theory
Grips come in two main varieties: plain rubber grips, and integral-tube style. Rubber grips are replaced just like bicycle or golf club grips. The old rubber gets sliced off, and the new rubber slides over your handlebars and throttle tube. You can identify this style of grips easily — they are soft and squishy. Your existing throttle sleeve is re-used.
The other, integral-style grip has a throttle sleeve built right into the righthand grip. Typically, these grips are a little pricier and the install is a little more difficult, but they offer a much wider array of looks and textures when compared to rubber grips. This type is identified by the hard plastic tube in the right grip — that’s the throttle sleeve. Some rubber grips require disassembly of controls, but most do not. All integral throttle-tube grips require getting into the control boxes.
The other thing that can affect your installation is how your throttle is actuated. Many bikes use a cable-operated throttle, but on many newer motorcycles, a sensor on the throttle sends an electrical signal to a motor on the throttle body itself. These bikes are typically referred to as “fly-by-wire.” You can quickly ascertain which you have by looking at the righthand control box. If there are two thick cables coming out of it, you do not have a fly-by-wire bike.

Selecting grips is not always a walk in the park, either. Air-cooled Harley-Davidson guys, you really just have to choose between fly-by-wire and throttle-cable grips, because grip length and diameter are consistently the same. Nearly every other brand, though, has some variations. You need to buy the right length and diameter of grips and not all bikes are the same! Make sure you’ve selected the correct parts, or you’re likely to split your removal and installation over multiple days while you wait for new parts to arrive. If you’re stuck, give one of the Geeks here a jingle — we can give you some recommendations to make sure you don’t have any installation snafus.
Removing the old grips
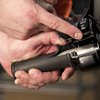
Removing grips falls somewhere between art and butchery. Metric bike guys, accessing your grips may involve removing a bar-end weight. Typically, this involves unscrewing a fastener that keeps your weights in the bar or clip-ons. Here's a tip to make that easy: loosen the bolt at the end of the bars just a few turns, and pull. If the bar-end comes out, great, you have a rubber-expansion style. If not, keep unscrewing. You likely have a threaded bung welded into your bar. If you simply loosen the bolt all the way, and your bike has the rubber-expansion style, you're going to have to chase all the hardware that will be loose in your clip-on or handlebar, which can be quite a chore.

Many rubber grips, regardless of bike make, can be simply cut off. This is my usual method. The grips are usually trashed, and unzipping them with a box cutter is super speedy. I have used compressed air blasted through an air blowgun for folks who wanted to save their old grips. Sometimes, this works well. Sometimes, it’s a struggle. A little shot of kerosene pumped under the grips and worked around can also loosen them, but it takes a little while and makes a mess.
If you are removing integral-throttle-tube-type grips, you have a bit more work to do. The first step is adjusting your throttle cables so they have as much slack as possible. See your manual if you are unsure of how to do this.

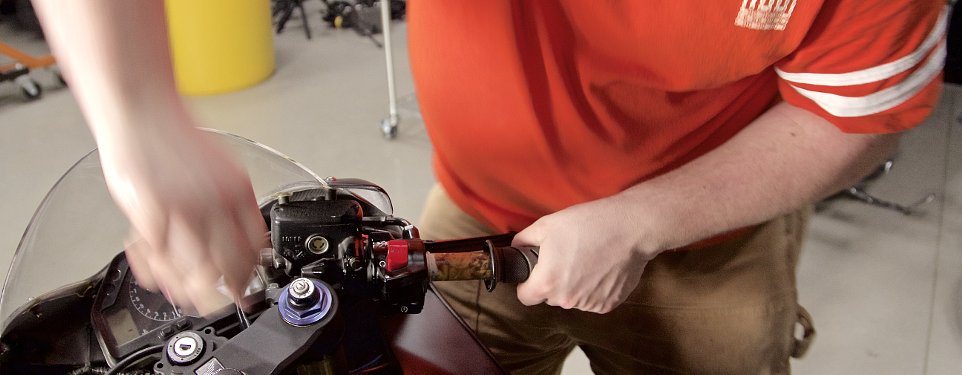
Next, you’re going to have to split open your “clamshells,” or switch housings. All bikes are different, but in a general sense, you’re going to have to loosen a few fasteners and carefully separate the halves of the housings. Apply common sense here. There is plenty of delicate electrical stuff in your way. Protip: Late-model Harley-Davidson OEM grips are rubber, but you need to remove them this way because there is a section of the grip that is captive under the clamshells. For you fly-by-wire folks, be careful. The throttle actuator is expensive and delicate. No hamfisting!

After the clamshells are split, you should be able to yank the clutch-side grip off the bars. (It might fight you a bit, but trust me, it will go. Keep in mind a previous owner may have gotten happy with the grip glue after a sniffing sesh.) On the throttle side, slide the cable ends out of the cutouts in the throttle tube. Protip: If you have a late-ish model H-D, don’t lose the brass ferrules that cradle the cable end. They’ll fly out and disappear like fairy farts. There is a reason I have dozens of these at the shop.
Installing rubber grips
If you’ve removed your rubber grips and had to take off the clamshells, you can put ‘em back together now. (I love rubber grips. They are fast to change, and cheap, cheap, cheap! I like being able to afford frequent replacement.) Install the right-side grip first if you need a design on the ends "clocked" a certain way. Protip: swish a little isopropyl alcohol in the grip, then slide it right onto the bar.
Make sure of two things as you install: First, don’t let the grip twist as you install it, especially on the left side. If it has a pattern on the rubber surface, it will look all wonky if it sets up in a twisted position. Second, as you near the grip being completely on the bars, make sure to finish sliding it carefully. Your bar can act like a cookie cutter on the end of your soft new grips. Definitely don't smack the end of the grips to help them on. If you’ve got bar-end weights, bolt ‘em back up now. Open the throttle and close it a few times, letting it "snap" back to position. Doing so makes sure the sticky rubber isn't hanging up or preventing the throttle from operating smoothly.
I'd like to take a moment to discuss lubricants, because their use is exclusive to rubber grips. Most petroleum-based products are out. They eat up the rubber and never evaporate, meaning your grips are free to spin. This is detrimental. I have used brake cleaner in the past, but it can be too aggressive and ruin some of the softer rubber, like Kraton, that today’s grips are made from. Grip glue is not a terrible idea, but you’ll need to work fast, and sometimes the residue can be pretty stubborn when you’re removing grips the next time around. Those of you with open-ended throttle sleeves (looking at you, metric guys!) might want to avoid this stuff, because it can get jammed up in your throttle tube and make your throttle very uncooperative. Hence, I have settled on rubbing alcohol, or plain water with just a touch of soap. They lubricate well enough, and dry in a reasonable timeframe.
After you’ve got this done, do not go ride! Don’t even touch the grips! Let 'em sit undisturbed, the longer the better. How long depends on the amount and type of lube or adhesive you used. If you’ve gone 24 hours and they have not “locked” into place, take them off, clean them out, and try again using much less lube. If you choose to use alcohol, it evaporates really fast. Sometimes you're set to go in a matter of minutes.
Installing integral throttle tube grips
Begin on the throttle side. This is important if you have a fly-by-wire Harley. How the grip is “clocked” on the bike matters if there is a design or specific area you want turned a certain way. The clutch side is infinitely adjustable, but the throttle side is not, due to the serrations of the throttle mechanism. Slide your new tube and grip assembly onto the bar. You may need to rotate the grip ever so slightly to get the teeth in the throttle tube to mesh with the teeth on the throttle-by-wire unit. Get the throttle sleeve back into the halves of the control boxes and button them up. Easy, right?

For you cable folks, install the grip and tube unit onto the bar. Reinstall the ferrules or cable ends. Protip: this task can be a little fiddly. You have to guide a barrel-shaped end very specifically into a hole oriented a certain way. It can help to use a mechanic’s pick for this task, and sometimes opening or closing the throttle can get you more cable slack in each direction. Trap the throttle sleeve between the clamshell halves and snug up the fasteners. Adjust the slack back out of your throttle cables, referring to your manual if you don’t know how to do this. Check and double-check your throttle action, making sure you have the necessary free play and everything moves smoothly.
To finish up on either type of bike, slide your left-side grip on. You’re going to follow the same procedure for your throttle side if the clutch-side grip is captive under the clamshell. If your grip does not get trapped in there, put the clamshell back together and install the grip just like we discussed in the “rubber grips” install portion. If you’re on a metric and you have bar-end weights, now is the time to reinstall them.
Just like I mentioned earlier, don’t go for a spin yet. Let the lube or adhesive dry. If a few hours later you still have slippery grips, remove, wash out, and reinstall with way less liquid. That's nothing out of the ordinary, just so you know. I walked back into the studio the day after we shot the video on the installation, and the left grip still rotated, so I wound up reinstalling it using grip glue. Nobody gets it right every time.
Conclusion
Soft, sticky grips that are clean and not stained and worn under your hands are the reward for a little bit of quality time spent in the garage. Handlebar grips are like new tires for your hands! They can breathe fresh life back into a tired old bike. If any of you follow along and get hung up on this, I will be surfing the comments section heavily for a few days after we publish this article. We can’t obviously do an individual writeup for every bike out there, but if you are hung up somewhere, let me know. I can get you through the process — I guarantee it.