Regardless of your motorcycle experience level, flat tires suck.
I mean, even in a car, they still are crap-tastic.
They just always happen at an inconvenient time. That makes sense, I guess. No one walks outside into the sunshine, stares at a shiny two-wheeled toy and says, “Well, I guess I wouldn’t really mind a flat today!” That inevitable event does suck a lot less, though, if you know how to do some basic tire repair.

Before you do anything… don’t even think of using Fix-a-Flat. It doesn’t work reliably at all, it makes a huge mess, ruins balance jobs, and generally pisses off any tech (or you) who has to deal with it to make a permanent repair or replacement. As a professional wrenchy guy, let me tell you a secret: We charge you extra. Why? Because we have to sit there in work duds redolent of tire goop while we eat lunch. Oh yes, you’ll pay. Instead, purchase a tire repair kit. Ideally, do this before you have that flat.
Allow me to pontificate further, if you will. More expensive flat kits are often a good value. I’m doing this writeup with your garden-variety cheap-o kit you can get at the auto parts store. It’s inexpensive, but nearly any other option is better. The cheap kits may get the job done, but they rarely include any way to put air back in the tire after the repair is performed. Having a way to reinflate the tire is a primo idea. Yes, it increases the cost of the kit, but it also means you can air up easily when you break down in East Jabip.
Make sure you get a kit with T-handle tools, not the straight screwdriver kind. Saving (literally) a buck or two on the straight-handled ones seems like a great idea until you stab yourself with a reamer in the middle of a cornfield in Indiana somewhere. The better kits, especially motorcycle-specific ones, may also have mushroom-shaped plugs that are more likely to seal the hole than the plain strings.

Step one: Figure out what you have!
You should figure this out before you’re standing beside the road with a flat. Repairing (plugging) tubeless tires is easy and fun. Well, it’s easy, anyway. How do you know if you have a tubeless tire? Well, most cast wheels use tubeless tires, and most spoked wheels use tubes. Of course, there are exceptions. Some Japanese, H-D, and Italian bikes from the late 1970s and early 1980s come to mind as bikes that used cast wheels and tubes. And there are some modern ADV bikes (KTMs and BMWs, among others) that have spoked wheels that utilize tubeless tires.
If you’ve got a tube-type tire, repair is going to involve either replacing or patching your tube. This is no different than doing the job in the shop, only you’ll have a more difficult time getting the wheel off. If you know how to replace a tube, do so at this time, and if you don’t, call for a transport vehicle. Protip: Lay the bike down for a little nap so you can pull the wheel off. The unfortunate truth is that catching a flat with tubes is inconvenient on the road and there are no shortcuts.
If you do have tubeless tires, congratulations! Now proceed to the next step.

Step two: Find the hole
That air is coming out somewhere, right? Most of the time, the valve stem and bead aren’t the offending items. Normally, there’s a hole somewhere. If you can hear or see the hole, great! If not, you gotta find it. Roll the bike around a little bit if you have large fenders and can’t see much of the tire. Soapy water can help here if the leak is a slow one — the leaking air will blow bubbles. This is best done from a spray bottle, but I have definitely mixed up gas station bathroom soap and water in a Gatorade bottle before.
Don’t plug a tire in the sidewall or even near the “corner” of the tread where it meets the sidewall. That rubber flexes quite a bit, which makes tire plugs sad. If you decide to ignore that advice, ride slowly. Motorcycle tire blowouts ain’t that hot.
Step three: Don’t remove the offending item
Step Three is the easiest step, because it requires you not to do something. Don't yank out that damn drywall screw or whatever it is just yet, especially if you don’t have a reinflation method handy. Resist the urge. #donttouchityet

Step four: Get a plug ready
Assemble your plug. It needs to go through the eyelet in the tool, just like threading a needle. You kinda gotta squish the end to get it in there. I may or may not use my teeth to pull it halfway through the eyelet. I don’t use the cement that comes in those little kits, because usually it sits in my tool roll until I need it, when it is hard as a rock and I throw it away. If yours hasn't turned to stone and you feel like you’d like to use it, slather that puppy up now.

Step five: More destruction
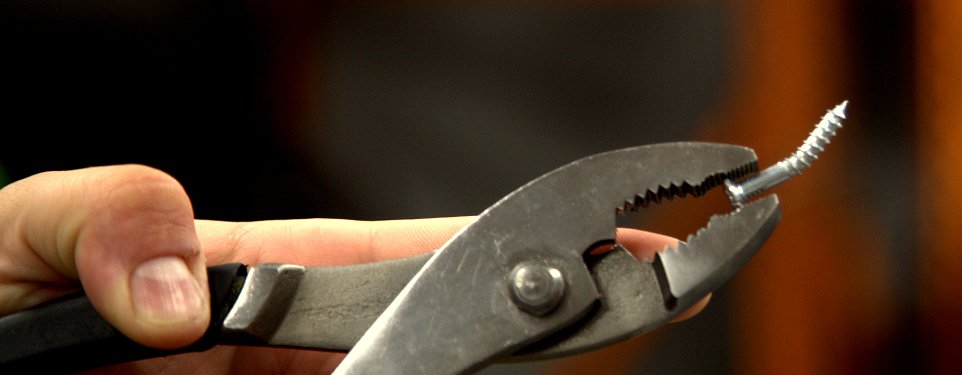
OK, this is the part where you wanna work fast if you have no air and you’re gonna try and nurse this bike up the road to the filling station with the nine-dollar air machine. Use pliers or a Leatherman to yank that nail/screw/staple/whatever. If you’re really lucky, it didn’t puncture the liner. You can have a hearty belly laugh, put away your tire plugs, and ride off into the sunset. Since you won't be that lucky, you’ll hear a big hiss of air. At this point, jam that reamer into the hole. (That’s the poke-y lookin’ thing with the knurling on the shaft.) A couple of quick strokes in and out will rough up the rubber to accept the plug, and size the hole correctly for the plug. It also helps to dull any burrs that may have cropped up on the steel belts.
It should be noted at this point that you need to eyeball the hole. If it’s bigger than a quarter of an inch or so, plugging is not recommended. Have I ever doubled up and jammed two plugs in a tire to get down the road? Of course. Should you do it? Probably not.

Step six: The moment of truth
OK… we’re still moving quickly here, unless you’re one of those responsible types who carries an inflation tool of some flavor in the toolbag. As you finish up your reaming, pop the reamer out and quickly jam that plugging tool in the now-smooth void. Push push push until you have about a half an inch of each of the “tails” hanging out. Then yank the tool out. The tension of the rubber will hold the plug in place while the tool releases because of that small slit in the end.

Step seven: Finish it off
Trim the ends of the plug flush with the tread so the road doesn’t rip out the fruits of your labor. Wiggle it around a little bit, see if you can feel or hear air leaking past. If you followed that advice about not plugging a hole bigger than a quarter of an inch, it should be airtight.
It's really hard to detect a leak and finish the plugging process while keeping enough air in the tire to ride it to someplace where you can inflate it. That's why it's wise to carry some source of air with you, whether it's a hand pump, an electric pump or compressed CO2 cartridges. If you have any of those, inflate the tire to proper pressure. If you have no air and and there's still a few pounds of pressure in there, ride slowly to the nearest area with some air and air up.
Now that we’re through the process, let me be a buzzkill: This is a temporary fix. Your tire is damaged, and even with a patch-plug (the best way to repair a damaged tire), most tire manufacturers say with a repaired tire, all bets are off. Your tire “loses” its speed rating. Additionally, the steel cords are now exposed to road debris, salt, and moisture. You really don’t want to have a belt separate on a motorcycle tire.
That's why your final step is to fit a new tire. I shouldn’t have to tell you my preferred source for low-cost, high-quality rubber.
A punctured tire is still a pain in the ass, but having the tools and know-how to make a temporary repair can save you from spending hours by the road waiting for your buddy to get there with his truck or your roadside assistance plan to scare up a flatbed.


 Riders Preferred Membership


